
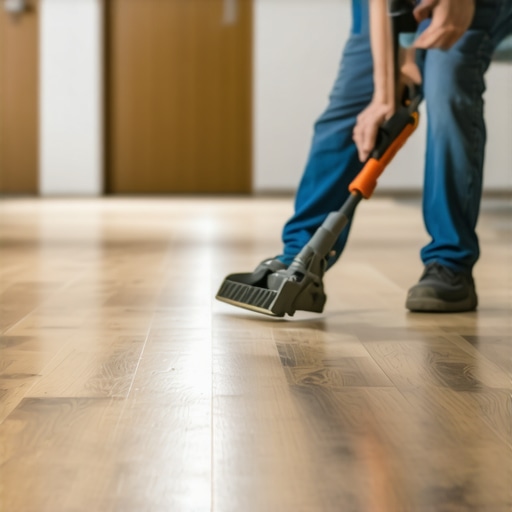
The simple pry bar that saves your baseboards
A wide-face trim puller is the $15 tool that makes pulling up old laminate a breeze by distributing pressure across a larger surface area to prevent wall damage. Most DIY enthusiasts reach for a standard crowbar or a flat-head screwdriver when it is time to rip out an old floor. That is a mistake that leads to crushed drywall and splintered baseboards. The trim puller features an integrated center wedge and a wide, flat striking face. When you drive it behind the molding, the angle of the tool does the work for you. It lifts the trim straight out rather than prying against the delicate wall board. It is the difference between a clean removal and a week of patching plaster. I smell like WD-40 and oak dust most days, and I can tell you that my tool belt never lacks this specific pry bar. It saves hours of frustration. It turns a destructive job into a surgical one.
Why most guys skip the leveling compound
Subfloor leveling requires a self-leveling underlayment to eliminate dips and peaks that cause floating floors to bounce or click. Most guys skip the leveling compound. They think the underlayment will hide the dip. It won’t. I spent three days grinding concrete on a job last month just so the floor wouldn’t click like a castanet. You cannot hide a half-inch valley with a piece of foam. That is pure fantasy. If the subfloor is not within 3/16 of an inch over a 10-foot radius, the locking mechanisms on your laminate will eventually snap. The physics of a floating floor rely on a flat plane. When you step on a section over a dip, the tongue and groove joint flexes. Over thousands of footsteps, that high-density fiberboard fatigues. It cracks. Then you have a permanent squeak that no amount of lubricant can fix. Grinding the high spots of a concrete slab involves 36-grit diamond segments and a heavy-duty vacuum system to manage the silica dust. It is dirty work, but it is the only way to ensure the longevity of the installation. If the slab is too low, you need a high-flow, polymer-modified self-leveler. These compounds use a specific ratio of water to powder to create a Newtonian fluid that finds its own level via gravity.
“A floor is only as good as the subfloor beneath it; deflection is the enemy of every joint.” – Master Flooring Axiom
The chemistry of the moisture barrier
A vapor barrier with a perm rating of less than 1.0 is required to protect laminate cores from hydrostatic pressure and concrete moisture emissions. Concrete looks solid, but it is actually a porous sponge that breathes moisture. If you lay laminate directly over a slab, the HDF core will drink that moisture through capillary action. The edges of the planks will begin to peak. This is known as cupping in the hardwood world, but in laminate, it is a death sentence. You need a 6-mil polyethylene film at a minimum. This plastic sheet acts as a barrier against water vapor. The science of vapor transmission is measured in perms. A lower perm rating means less water passes through the material. When I install over a crawlspace, I check the humidity levels with a pinless meter. If the wood subfloor is over 12 percent moisture content, the installation stops. We bring in dehumidifiers. We fix the drainage. We do not just cover up the problem. The bond between the melamine wear layer and the fiberboard core is strong, but it cannot withstand the internal pressure caused by wood cell expansion. The cells swell, the glue lines fail, and the floor delaminates. It is basic chemistry. You cannot fight the expansion of water.
The physics of the floating floor
Floating floors require a perimeter expansion gap of at least 1/4 inch to allow for the natural expansion and contraction of the wood-based core. The ghost in the expansion gap is the primary reason for floor failure. People want the floor to look tight against the wall, so they jam the planks right up to the drywall. Then summer hits. The humidity rises. The floor expands. Since it has nowhere to go, it buckles in the center of the room. I have seen floors lift six inches off the subfloor because they were pinned against the baseboards. You must leave a gap. The baseboard or a piece of quarter-round molding covers this gap, making it invisible. The locking profiles, often a Valinge or Uniclic system, are engineered to hold planks together under tension. However, they are not designed to be a structural anchor. The floor needs to move as a single monolithic unit. If you place a heavy kitchen island on top of a floating floor, you have effectively pinned it. This prevents the floor from breathing. It will eventually pull apart at the weakest joint. Always build your cabinets first and install the floor around them. This is the professional way. It is the only way to satisfy the warranty requirements of the manufacturer.
Hardwood floors versus the laminate reality
Choosing between hardwood and laminate requires an understanding of the Janka Hardness Scale and the specific gravity of the wear layer. While solid hardwood floors offer a lifetime of sanding and refinishing, laminate provides a superior scratch resistance due to the aluminum oxide top coat. This coating is essentially a liquid sandpaper applied in a thin film. It is incredibly hard. On the Janka scale, which measures the force required to embed a steel ball into wood, solid oak sits around 1360. A high-quality laminate does not have a Janka rating in the traditional sense, but its wear layer can withstand impacts that would dent a cherry floor. Below is a comparison of common materials and their characteristics.
| Material | Janka Rating | Acclimation Time | Moisture Tolerance |
|---|---|---|---|
| Brazilian Cherry | 2350 | 14 Days | Low |
| White Oak | 1360 | 10 Days | Medium |
| Laminate (HDF) | N/A | 48 Hours | Moderate |
| Engineered Oak | 1250 | 5 Days | High |
Acclimation is the most ignored step in the process. You cannot bring wood or laminate from a cold warehouse into a humid house and start clicking it together. The material needs to reach equilibrium moisture content. For laminate, this takes at least two days. For solid hardwood, you are looking at two weeks. I once walked into a house where a $15,000 wide-plank walnut floor was cupping so bad it looked like a potato chip because the installer did not check the crawlspace humidity or let the wood acclimate. It was a total loss.
“The maximum allowable moisture content for a concrete slab to receive wood flooring is three pounds per 1000 square feet over 24 hours.” – NWFA Industry Standard
The 1/8 inch that ruins everything
Precision in measuring the vertical deflection of the subfloor is the difference between a silent floor and one that squeaks with every step. When we talk about tolerances, we are talking about the difference between success and failure. A 1/8 inch dip over six feet might not look like much to the naked eye, but to a locking joint, it is a mountain. The tongue of the plank is often only 2 millimeters thick. If the floor is forced to span a gap, that 2mm of HDF is the only thing holding the weight of a person. It will snap. I always use a 10-foot straight edge. I mark the low spots with a pencil. I fill them with a high-compressive strength patch. If you are working on a wooden subfloor, you need to check for deflection between the joists. If the plywood is too thin, the floor will bounce. You might need to add a second layer of underlayment grade plywood. This adds mass and rigidity. It also changes the height of your transitions. You have to think three steps ahead. You have to consider the height of the dishwasher, the swing of the doors, and the transition to the tile in the bathroom.
Grout and showers meet the flooring transition
Transitions between laminate and wet areas like showers require a waterproof silicone seal and a proper T-molding to prevent moisture wicking. When your laminate meets the tile grout of a bathroom, you have a potential water entry point. Laminate is often marketed as waterproof, but that usually only applies to the top surface. The joints and the core are still vulnerable. In a shower area, the humidity is constant. You must use a 100 percent silicone sealant in the expansion gap at the transition. This keeps the water from getting under the floor. Most people hate the look of a T-molding, but it is a necessary evil. It allows the two different materials to expand at different rates. Tile is stable. Laminate is not. If you grout the gap between them, the grout will crack within a month. The movement of the laminate will pulverize the cementitious grout. Use a metal or color-matched transition strip. It is the mark of a pro. It shows you understand the physics of movement. It shows you care about the long-term health of the home.
A checklist for a dead flat floor
Following a systematic preparation protocol ensures that the final installation meets industry standards and avoids common failure points. Before you even open a box of flooring, you must complete the following steps. Failure to do so will void your warranty and likely lead to a floor that fails within three years. Use this list as your guide to a professional finish.
- Test the concrete for moisture using a Calcium Chloride test or an In-Situ probe.
- Check the subfloor for flatness using a 10-foot straight edge and a 3/16 inch shim.
- Secure any loose plywood sheets with gold screws to eliminate subfloor squeaks.
- Grind down any high spots or ridges in the concrete using a diamond cup wheel.
- Fill low spots with a polymer-modified feather finish patch.
- Vacuum the entire surface twice to remove all debris that could cause crunching sounds.
- Install a high-quality underlayment with a built-in vapor barrier.
- Leave a consistent 1/4 inch to 3/8 inch expansion gap around the entire perimeter.
The $15 trim puller is just the start. It gets the old stuff out of the way without creating new problems. The real work is in the prep. If you take the time to address the subfloor physics and the chemical reality of moisture, your floor will last for decades. Skip these steps, and you will be pulling it all up again in two years. Do it right the first time. The floor is the foundation of the home. It deserves the respect of a structural engineer. I have seen too many heartbreaks caused by shortcuts. Do not be the guy who thinks a piece of foam is a magic wand. Be the mechanic who knows the value of a level and a moisture meter. Your knees and your wallet will thank you later. That is the truth from someone who has spent twenty-five years on the floor. I do not care about the aesthetic if the structure is rotten. Start with the subfloor. Everything else is just a cover.