
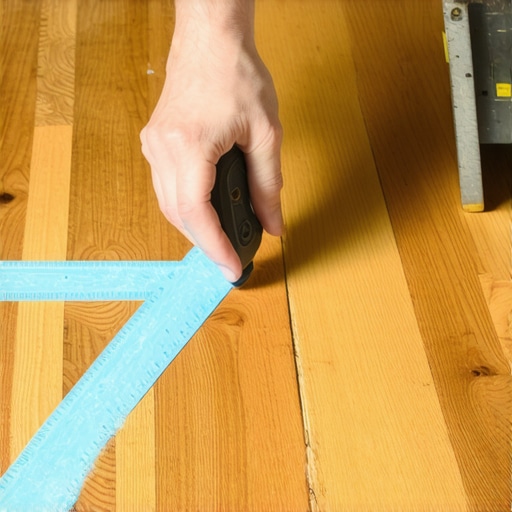
The $5 Chalk Tool for Perfectly Centering Your Hardwood Layout
I spent three days grinding concrete on a job last month just so the floor wouldn’t click like a castanet. Most guys skip the leveling compound. They think the underlayment will hide the dip. It won’t. I walked into a house where the installer had started on a wonky wall without a reference line and by the time he reached the hallway the boards were running at a three degree slant. It looked like a funhouse mirror. That is what happens when you trust a wall instead of geometry. A five dollar chalk line is the only thing standing between a professional grade installation and a total tear out. This tool represents the difference between a floor that lasts fifty years and one that fails before the first seasonal humidity shift. We are talking about the physics of alignment and the chemistry of the subfloor surface. If you do not respect the center line you do not respect the craft.
The geometry of a perfectly centered layout
A perfectly centered layout requires finding the true center of the room by measuring parallel walls and snapping a chalk line that accounts for wall run out. This ensures that the boards at the perimeter are of equal width on both sides of the room. When you install hardwood floors, the visual weight of the planks must be balanced. If you have a full five inch plank on the left wall and a tiny one inch sliver on the right wall, the room will feel tilted. You start by measuring the width of the room at three different points. Walls are never straight. They bow and lean based on the whims of the framers. You find the midpoint of the two shortest distances and mark them. Then you stretch your string tight. The snap must be clean and vertical. If you pull the string at an angle, the line will curve and your entire layout will be compromised from the first row. This is the foundation of every successful project involving laminate or solid wood.
“A floor is only as good as the subfloor beneath it; deflection is the enemy of every joint.” – Master Flooring Axiom
Why your subfloor is lying to you
Subfloors often appear flat to the naked eye but contain significant deviations that affect the structural integrity of the tongue and groove joints. You cannot trust your eyes. You need a ten foot straightedge and a set of feeler gauges. The industry standard is 3/16 of an inch over ten feet or 1/8 of an inch over six feet. If your subfloor has a dip, the chalk line will not snap correctly. It will blur as the string hits the bottom of the depression. I have seen guys try to shim their way out of a bad subfloor using extra layers of felt paper. That is a hack move. You need to use a high compression strength self leveling underlayment or a cementitious patch. When you are dealing with hardwood floors, any vertical movement in the subfloor leads to squeaks. Those squeaks are the sound of wood fibers rubbing together under the pressure of the fasteners. Eventually the staples or cleats will loosen and the floor will start to move. That is when the gaps appear. That is when the homeowner calls me to fix a mess that should have been prevented with a bag of leveler and a chalk line.
The 1/8 inch that ruins everything
The expansion gap is the most misunderstood component of a floor layout because it requires anticipating the atmospheric changes of the coming seasons. Wood is a hygroscopic material. It breathes. It expands when the humidity hits eighty percent in the summer and it shrinks when the furnace kicks on in the winter. If you jam your boards tight against the drywall, the floor will buckle. I have seen solid oak floors lift four inches off the subfloor because there was no room for them to go. You need a minimum of 3/4 of an inch for solid wood and at least 1/2 inch for laminate. The chalk line helps you track this distance across the entire length of the room. You snap a line exactly 3/4 of an inch away from your starting wall. This line serves as your guide for the first row. You do not trust the sheetrock. Sheetrock is often hung unevenly. You trust the line. If you are transitioning into a bathroom where there is tile in showers and heavy grout lines, you must ensure that your transition point is centered under the door. A sloppy layout here will leave an ugly gap that no T molding can hide.
| Material Type | Janka Hardness Rating | Required Acclimation Time | Expansion Gap Requirement |
|---|---|---|---|
| Solid White Oak | 1360 | 7 to 10 Days | 3/4 Inch |
| Engineered Hickory | 1820 | 3 to 5 Days | 1/2 Inch |
| Premium Laminate | N/A | 48 Hours | 3/8 Inch |
| Brazilian Cherry | 2350 | 14 to 21 Days | 3/4 Inch |
The physics of the chalk snap
The physical act of snapping a chalk line involves high tension and a vertical release to ensure a crisp mark on the subfloor surface. Not all chalk is created equal. For most flooring jobs, you want blue chalk. Red chalk is permanent and contains iron oxide which can bleed into the finish of a site finished floor. White chalk is good for very dark subfloors but can be hard to see. When you pull that string, you need to lift it straight up about four inches and let go. The vibration of the string hitting the plywood or concrete deposits the pigment in a perfectly straight line. This line is your north star. If you are working in a large open concept space, you might need to snap a line forty feet long. This requires a partner. One person holds the hook and the other holds the reel. You both pull until the string is singing with tension. Then you snap it together. If the line is fuzzy, you have too much chalk on the string. Reel it back in, shake it out, and try again. A blurry line leads to a blurry layout. Precision is the only thing that separates a craftsman from a handyman.
Hardwood floors and the expansion gap tragedy
Ignoring the expansion requirements of a specific wood species can lead to catastrophic failure as the material reacts to the local microclimate. I once worked a job in a coastal town where the installer didn’t account for the salt air humidity. He used a tight layout with minimal gaps. Within six months, the floor had expanded so much it pushed the baseboards off the wall. The pressure was so intense that the grout in the adjacent kitchen tile began to crack and pop out of the joints. Wood is a living thing. Even after it is cut, dried, and milled into a plank, it still reacts to moisture. You have to check the moisture content of the subfloor and the wood itself before you even think about snapping a line. They should be within two to four percent of each other. If the subfloor is at twelve percent and the wood is at six percent, that floor is going to cup the moment you nail it down. You are essentially trapping moisture underneath a sealed surface. It has nowhere to go but up into the wood fibers.
“A floor is only as good as the subfloor beneath it; deflection is the enemy of every joint.” – Master Flooring Axiom
The checklist for layout excellence
- Measure the width of the room at both ends and the middle to identify wall taper.
- Snap a primary center line through the longest axis of the home to maintain consistency across rooms.
- Verify the square of your starter line using the 3-4-5 triangle method.
- Calculate your ending row width to ensure you don’t finish with a board narrower than two inches.
- Check the moisture content of the subfloor in at least twenty locations per thousand square feet.
- Inspect the chalk line for clarity and resnap if the line is faded or obstructed by dust.
The relationship between showers and floor stability
Wet areas like showers create a localized humidity zone that can significantly impact the stability of adjacent wood flooring. This is why the layout around a bathroom door is so critical. You have to treat the transition point like a structural joint. If the grout in the bathroom is failing, moisture will seep under the threshold and rot the subfloor beneath your hardwood floors. I always recommend using a silicone based sealer at the transition to prevent this capillary action. When you are planning your layout, look at the door jambs. You should be undercutting the jambs so the floor can slide underneath. This allows for expansion and contraction without showing a gap. If you try to cut the wood around the casing, you are asking for trouble. It looks amateur and it locks the floor in place. A floor that is locked cannot move. A floor that cannot move will eventually break its own locking mechanisms or pull the staples right out of the joists.
Comparing laminate and hardwood floor stability
Laminate flooring offers higher dimensional stability than solid wood but is more susceptible to joint failure if the subfloor is not perfectly level. While hardwood floors are held down by fasteners, laminate is a floating system. It relies on its own weight and the integrity of the click lock joints to stay together. If there is a dip in the subfloor, the laminate will flex every time someone walks over it. This constant flexing puts immense stress on the thin tongues of the locking system. Eventually, they will snap. Once a joint snaps, there is no fixing it. You have to pull up the whole floor. This is why the chalk line is even more important for floating systems. You use it to map out the high and low spots of the room. You can actually use the chalk line as a visual reference for your level. If you see the string hovering a quarter inch above the subfloor, you know you have a major low spot that needs to be filled before you lay a single plank.