
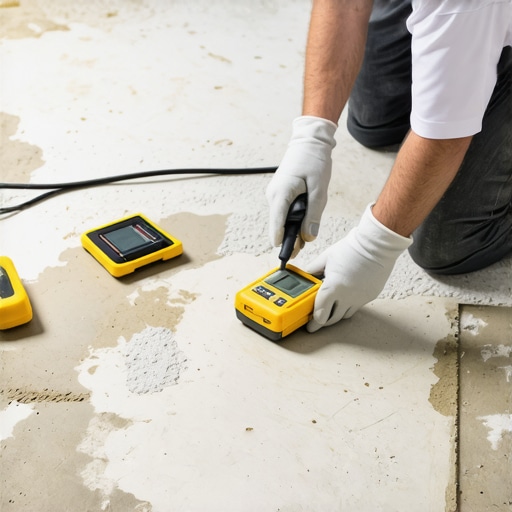
The 5-Minute Moisture Test for Concrete Subfloors
I spent three days grinding concrete on a job last month just so the floor wouldn’t click like a castanet. Most guys skip the leveling compound. They think the underlayment will hide the dip. It won’t. I have seen this mistake destroy more hardwood floors than termites ever could. I once walked into a luxury condo where the wide-plank oak was literally weeping water at the seams. The installer did not check the slab. He just rolled out the foam and started clicking boards together. Three weeks later, the homeowner had a fifteen thousand dollar sponge. You cannot argue with the physics of a concrete slab. It is a breathing, porous organism that will fight your flooring choice every single day if you do not respect the moisture levels. My hands are calloused and my knees are shot because I spent twenty-five years doing things the right way, which usually means the hard way. Concrete is never truly dry. It is simply in a state of managed evaporation. If you do not understand the vapor pressure of your subfloor, you are not an installer, you are a gambler. This guide is for the people who want their floors to last longer than the warranty.
The invisible flood beneath your feet
A concrete slab functions as a hard sponge containing billions of microscopic pores that transport moisture through capillary action. Even a slab that looks bone dry on the surface can hold enough internal humidity to delaminate adhesives and warp organic materials like wood or bamboo. Concrete is the product of a chemical reaction between water and Portland cement. This process, called hydration, creates calcium silicate hydrate gel. As the concrete cures, the excess water that was not used in the chemical bond must escape. It moves upward through the slab, creating tiny tunnels called capillaries. When you cover these tunnels with a non-porous material like luxury vinyl plank or a moisture-sensitive material like hardwood, the water gets trapped. This creates hydrostatic pressure. This pressure is strong enough to push a wood floor off the ground or turn your expensive adhesive into a sticky, useless soup. I have seen the results of ignored moisture too many times. It smells like mildew and looks like a lawsuit. You need to know exactly how much vapor is escaping before you even think about opening a box of flooring.
The plastic sheet method provides a baseline of truth
The 5-minute moisture test is actually a 24-hour commitment to observing how much vapor your slab emits under sealed conditions. By taping a clear plastic square to the concrete, you create a micro-environment that captures escaping moisture and reveals the hidden humidity levels of the subfloor. This is the most basic test in the industry, often called the ASTM D4263 standard. You take a sixteen inch square of clear polyethylene plastic. You tape all four edges down with high-quality duct tape. You wait. If the concrete is darker after twenty-four hours, or if there are beads of water on the underside of the plastic, you have a major problem. This simple test tells you if the slab is still ‘green’ or if you have a failing vapor barrier under the house. However, it is not the final word. It is just the first warning shot. You have to look at the chemistry. If the slab is damp, the pH levels will also be high. High alkalinity is the silent killer of floor glues. It eats the bond. It turns the glue into a liquid again. You cannot just ignore it. You have to treat the slab or wait for it to reach equilibrium.
“A floor is only as good as the subfloor beneath it; deflection is the enemy of every joint.” – Master Flooring Axiom
The chemistry of the calcium chloride test
Measuring the moisture vapor emission rate involves using anhydrous calcium chloride to absorb water from the air trapped under a plastic dome for sixty to seventy-two hours. This test quantifies the amount of water in pounds that is escaping from one thousand square feet of concrete. This is the ASTM F1869 standard. It was the gold standard for years. You weigh a small dish of the salt, place it on the floor under a dome, and let it sit. The salt is hungry for water. It sucks the moisture right out of the air. When you weigh it again, the difference in weight tells you the emission rate. Most manufacturers want to see less than three pounds of moisture per one thousand square feet. If you see five pounds, you are in the danger zone. If you see eight pounds, you might as well be laying your floor in a swamp. But even this test has flaws. It only tells you what is happening at the surface. It does not tell you what is hiding three inches deep in the concrete. That is why the pros use relative humidity probes. We drill holes. We insert sensors. We get the real story from the heart of the slab. Don’t let a salesman tell you a surface test is enough for a high-stakes job.
Hardwood floors and the hydrostatic trap
Solid hardwood floors are hygroscopic materials that expand and contract in direct response to the moisture content of the environment and the subfloor below. If the concrete slab emits too much vapor, the bottom of the wood planks will swell while the top remains dry. This imbalance causes cupping. The edges of the boards rise up while the center stays low. It looks like a washboard. You can sand it flat, but the problem will just come back because you haven’t fixed the source. The cells in a piece of oak are like little straws. They want to drink. When they drink from a wet subfloor, they grow. A standard three-quarter inch solid oak floor needs a subfloor with a moisture content within four percent of the wood itself. If the slab is throwing off vapor, that wood is going to move. There is no stopping it. No amount of nails or glue will hold back the power of expanding wood cells. This is why engineered hardwood was invented. The cross-grain layers provide stability, but even engineered wood has limits. If you trap enough water under it, the plywood core will eventually delaminate and the whole thing will fall apart.
| Flooring Type | Max Moisture Emission (lbs) | Max Relative Humidity (%) | Acclimation Time |
|---|---|---|---|
| Solid Hardwood | 3.0 | 75 | 7-14 Days |
| Engineered Wood | 4.0 | 80 | 3-5 Days |
| Laminate Flooring | 5.0 | 85 | 48 Hours |
| Luxury Vinyl (LVP) | 5.0 | 85 | 48 Hours |
| Ceramic Tile | 6.0 | 90 | None |
What happens when laminate meets a damp slab
Laminate flooring consists of a high-density fiberboard core that is extremely sensitive to moisture and will swell permanently if exposed to high vapor emissions from concrete. Unlike solid wood which can sometimes dry out and return to shape, fiberboard cores often undergo irreversible thickness swelling. When the vapor hits that HDF core, the edges start to peak. You will feel it under your socks before you see it. It feels like a little ridge at every joint. That is the fiberboard absorbing water and growing. Once those edges peak, they are prone to chipping. The protective wear layer is compromised. Many people buy ‘waterproof’ laminate thinking they are safe. That label usually only refers to spills on the top surface. It does not mean the floor can handle a wet subfloor. If you don’t put down a six-mil poly vapor barrier over that concrete, you are asking for a failure. I have seen laminate floors turn into a series of small mountains because the installer forgot a five dollar roll of plastic. It is a tragedy of laziness. Always use a moisture barrier. Always. No exceptions.
Showers and the myth of waterproof grout
Grout is a cementitious material that is naturally porous and serves as a filter rather than a waterproof barrier in a shower installation. Water passes through the grout joints and must be managed by an underlying waterproofing membrane or a properly sloped mortar bed. People think that because tile is hard and grout is like stone, the shower is sealed. It is not. If you have a concrete subfloor under a walk-in shower, that concrete is getting wet. Every time you shower, water travels through the grout and hits the substrate. If you do not have a topical waterproofing system like Kerdi or a high-quality liquid membrane, that moisture is going to sit on the slab. It will eventually find its way out into the hallway or into the walls. This is where mold starts. I have torn out showers where the subfloor was a black, slimy mess because the installer thought ‘waterproof grout’ was a real thing. It is not. Grout is just there to fill the gaps and provide structural support for the tile edges. It is not a shield. If you are doing a shower on concrete, you need to test the slab first to ensure it isn’t already saturated from a plumbing leak or ground moisture.
“Cement is the glue of the world, but water is the solvent that eventually breaks it all down.” – TCNA Technical Manual Reference
The 1/8 inch that ruins everything
Subfloor levelness is just as important as moisture content because a dip in the concrete allows for vertical movement that stresses the locking mechanisms of modern floating floors. A variance of more than one-eighth of an inch over a ten-foot radius is enough to cause structural failure in the click joints of laminate and LVP. I spent three days on that job last month just grinding high spots. My back still hurts. But if I hadn’t done it, the floor would have felt like a trampoline. When a floor has a void under it, every step forces the tongue and groove to bend. Over time, the plastic or wood fibers fatigue. They snap. Then the boards start to separate. You get gaps. Dirt gets in the gaps. Then the moisture from your mop gets into the gaps and hits the core. It is a chain reaction of failure that starts with a lazy installer who didn’t want to use a straightedge. You have to be meticulous. You have to be a stickler for the numbers. If the floor isn’t flat to within an eighth of an inch, you don’t lay a single board. You pull out the level. You pull out the grinder. You do the work.
The master installer checklist for concrete prep
- Verify the slab age is at least 28 days for basic curing and up to 4 months for full desiccation.
- Conduct a pH test to ensure the alkalinity is between 7 and 9 for standard adhesive compatibility.
- Perform the 24-hour plastic sheet test at multiple locations across the floor area.
- Measure the relative humidity of the room and ensure it is between 35 and 55 percent.
- Grind down all high spots and fills all low spots with a high-compressive strength Portland-based leveler.
- Remove all old adhesive residue, paint, or drywall mud that could interfere with the bond.
- Install a minimum 6-mil polyethylene vapor retarder for all floating floor applications.
The ghost in the expansion gap
Expansion gaps at the perimeter of a room are the lungs of a flooring system and must be kept clear of all obstructions to allow for the natural movement of the material. If a floor is pinned against a wall or a heavy kitchen island, the pressure built up from moisture expansion will cause the floor to buckle in the center. I have seen floors lift six inches off the ground because there was no gap. The installer ran the boards tight against the baseboard. When summer hit and the humidity rose, the floor had nowhere to go but up. It is a powerful force. It can move furniture. It can pop trim right off the wall. You need at least a quarter-inch gap for LVP and a half-inch for solid wood. And don’t you dare fill that gap with caulk or grout. It needs to be empty. You cover it with baseboard or shoe molding, but the floor itself must be free to slide. If you lock it down under a kitchen island, you have created a fixed point. The floor will pull apart at the weakest joint nearby. It is basic engineering. Treat the floor like a moving machine, because that is exactly what it is. It is a machine for walking, and it needs room to breathe.
Why your subfloor is lying to you
Surface appearances are deceiving because concrete can suffer from a condition called ‘case hardening’ where the top layer looks dry while the core remains saturated with moisture. Testing only the surface will result in a false sense of security and a guaranteed flooring failure within the first year. I have walked onto jobs where the slab was white and dusty, looking like a desert. Then I drilled a hole for an RH probe and the readings came back at 95 percent. That slab was a ticking time bomb. The air in the room was dry, so the surface of the concrete looked great, but the water was still trapped deep inside. This often happens in new construction where the roof wasn’t on for several months. The slab soaked up all that rain, and then the builders closed it in and turned on the HVAC. The surface dried, but the depths did not. You have to wait. You have to test. You have to be the adult in the room who tells the homeowner they can’t move in their furniture next week because the subfloor isn’t ready. They won’t like it. But they will like it a lot less when their new floor starts to curl up like a potato chip. Do the test. Trust the data. Ignore the visual. That is how you survive in this business for twenty-five years without a single callback. Flooring is not a decoration. It is a structural engineering challenge. Respect the slab or it will humiliate you.