The physics of a stubborn laminate joint
Laminate joints fail to seat when the tongue and groove profile experiences friction from subfloor debris or manufacturing burrs. Achieving a flush connection requires overcoming the static friction of the HDF core without compromising the structural integrity of the click-lock mechanism. Proper seating is not about brute force. It is about the precise application of kinetic energy to settle the locking profile into its final resting position. When a plank refuses to click, most installers reach for a heavy hammer, but that leads to mushroomed edges and fractured tongues. The rubber mallet trick uses vibration and soft impact to nudge the plank home. This method preserves the aluminum oxide wear layer while ensuring the long-term stability of the floating floor system. Understanding the internal geometry of these joints is the first step toward a floor that does not squeak or gap under seasonal shifts.
The subfloor secret that ruins your weekend
Most guys skip the leveling compound. They think the underlayment will hide the dip. It won’t. I spent three days grinding concrete on a job last month just so the floor wouldn’t click like a castanet. I walked into that house and saw the previous installer had tried to bridge a half-inch valley with extra foam. The result was a floor that bounced like a trampoline every time someone walked to the kitchen. When the subfloor is not flat to within three-sixteenths of an inch over a ten-foot radius, the locking mechanisms are under constant tension. This tension is why your joints won’t seat. You can beat on it all day with a mallet, but if the plank is trying to span a hole, it will never stay locked. The rubber mallet trick only works if you have done the hard work of grinding high spots and filling low spots. My knees are a testament to the fact that you cannot cheat the slab. I smell like oak dust and grinding residue most days because I know the floor is only as good as what is under it. If you ignore the concrete, you are just installing a future failure. I have seen fifteen thousand dollar projects go to waste because the installer was too lazy to check the moisture levels or the flatness of the substrate. You need a straightedge and a bag of self-leveler if you want a professional result.
“A floor is only as good as the subfloor beneath it; deflection is the enemy of every joint.” – Master Flooring Axiom
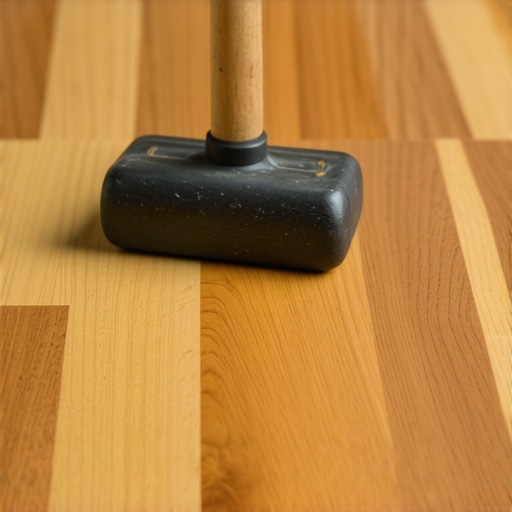
The five dollar mallet and the secondary vibration
The $5 rubber mallet trick involves using a white rubber mallet to strike a scrap piece of laminate placed against the tongue of the stubborn plank. This strike creates a localized vibration that breaks the surface tension between the two interlocking profiles. You do not hit the floor itself. You hit a sacrificial block. The trick is in the bounce. A black rubber mallet will leave scuff marks that require chemicals to remove, so always opt for white rubber. When you strike the tapping block, the energy travels through the block and into the edge of the plank. This creates a microscopic wave of movement that allows the tongue to slide over the locking ridge of the groove. If you are struggling with a joint that is ninety percent there but has a hairline gap, a sharp, light tap with the mallet usually settles it. It is about the frequency of the hit, not the weight. Heavy blows will shear the thin HDF tongue right off the board. I have seen homeowners ruin three boxes of material by swinging for the fences. You want a controlled tap that vibrates the joint into submission. This is especially true with older laminate systems that used a more aggressive locking angle. Modern drop-lock systems are more forgiving, but even they benefit from the mallet trick when you are working around door jambs or under cabinets where you cannot get a good angle with a pull bar.
The chemistry of the HDF core and expansion gaps
High-density fiberboard or HDF is the heart of your laminate floor and its density determines how much force the joints can withstand during installation. The core is composed of compressed wood fibers and resins that react to changes in relative humidity. Because laminate is essentially a wood product, it expands and contracts. If you seat the joints too tightly without an expansion gap at the perimeter, the floor will eventually buckle. The mallet trick helps you get a tight joint, but you must respect the physics of the material. I always leave a minimum of three-eighths of an inch at every vertical obstruction. This includes walls, pipes, and transitions to other flooring types like grout or tile. Without this gap, the floor has nowhere to go when the humidity rises in the summer. It will lift off the subfloor and create a hollow sound. Laminate is not like solid hardwood floors that you can nail down to restrict movement. It is a living, moving entity that needs room to breathe. The resin content in the HDF core also matters. Cheaper boards have more air and less resin, making the tongues brittle. When you use the mallet, you are testing the strength of those resins. If the tongue snaps, you are working with a low-grade product that won’t last five years in a high-traffic area.
| Material Type | Expansion Coefficient | Janka Hardness Equivalent | Acclimation Time |
|---|---|---|---|
| Standard Laminate | Medium | Approx. 3000 | 48 Hours |
| Water-Resistant Laminate | Low | Approx. 3500 | 72 Hours |
| Solid White Oak | High | 1360 | 7-10 Days |
| Engineered Hardwood | Medium-Low | 1200-2000 | 3-5 Days |
Why your laminate is not a boat
Waterproof laminate is a marketing term that refers to the surface wear layer and the topical protection of the joints rather than the entire plank’s ability to be submerged. If water gets under the floor from a shower or a leaky pipe, the HDF core will swell and the floor will be ruined. I see this mistake constantly in bathrooms. People think they can install laminate right up to the edge of showers without a proper silicone seal. When you use the rubber mallet to seat those joints near a water source, you are creating a tight seal, but it is not a waterproof one. You still need to use a high-quality 100 percent silicone caulk in the expansion gap around wet areas. The grout on your bathroom walls might be waterproof, but the wood-fiber floor below it is not. The moment moisture hits the bottom of that plank, the capillary action will pull it into the core. Within hours, the edges will start to curl. This is called peaking. Once a laminate floor peaks, it is permanent. No amount of weight or drying will flatten those joints back out. If you are installing near showers, you must be meticulous. The mallet trick ensures the joint is as tight as the manufacturer intended, which helps the topical coatings do their job, but the perimeter is your primary line of defense.
The underlayment trap and sound dampening
While most people want the thickest underlayment, too much cushion actually causes the locking mechanisms on laminate to snap under pressure. A subfloor needs to be rigid to support the thin tongues and grooves of the HDF planks. I always recommend a high-density foam or a felt underlayment that is no thicker than three millimeters. If you go thicker, the floor will have too much vertical travel. Every time you step on a joint, the tongue will flex. Over time, that flex leads to material fatigue. Eventually, the tongue snaps, and you have a permanent gap that collects dirt and moisture. I have seen people try to use double layers of underlayment to fix an uneven subfloor. This is a recipe for disaster. The rubber mallet trick won’t save a floor that is sitting on a sponge. You want the underlayment to provide a moisture barrier and a slight sound dampening, not a cushion. The IIC (Impact Insulation Class) rating is what you should look for, not the thickness of the padding. A thin, dense pad will always outperform a thick, soft one in the long run. It provides the necessary resistance so that when you use your mallet to seat a joint, the plank doesn’t just sink into the floor. It stays level, allowing the tongue to slide perfectly into the groove.
“Deflection is the silent killer of the modern floating floor; if it moves, it will eventually break.” – TCNA Flooring Guide
The regional humidity factor
The climate where you live changes how you should approach the mallet trick. In a swampy environment, the planks will be at their maximum expansion during the summer. If you install them tight without a massive gap, they will buckle by August. In a dry desert climate, the wood fibers will shrink. You might seat the joints perfectly with your mallet in January, only to find gaps appearing in July when the air gets even drier. I always tell my clients to acclimate the flooring in the room where it will be installed for at least forty-eight hours. This allows the HDF core to reach an equilibrium with the local atmosphere. If you take the planks straight from a cold truck and mallet them together in a warm house, they will grow. This growth creates pressure that can actually shear the locking mechanisms off. I have seen entire floors lift four inches off the subfloor because they were installed in a humid basement without acclimation. You have to respect the moisture. Use a pinless moisture meter to check both the subfloor and the laminate before you start. If the difference is more than three percent, wait. Your mallet can’t fight the laws of thermodynamics.
The mallet trick checklist for professional results
- Use a white rubber mallet to avoid leaving black carbon streaks on the wear layer.
- Always use a sacrificial tapping block made from a scrap piece of the same flooring.
- Inspect the groove for any manufacturing debris or broken HDF bits before attempting to seat the joint.
- Angle the plank at roughly thirty degrees for the initial insert before dropping it flat and using the mallet.
- Maintain a consistent one-quarter to three-eighths inch expansion gap at all walls using spacers.
- Check the subfloor for flatness of three-sixteenths of an inch over ten feet before laying the first plank.
- Apply the mallet strike horizontally to the tapping block, never vertically onto the surface of the floor.
The transition to grout and tile surfaces
When your laminate installation reaches a bathroom or kitchen with existing tile, the transition becomes the focus. You cannot use the mallet to force a laminate plank against a tile edge. You need a T-molding or a Reducer. The gap between the laminate and the tile should be treated with the same respect as a wall. This is where people often get lazy. They try to butt the laminate right up to the grout line of the tile. Because the laminate needs to move and the tile is fixed, this joint will always fail. I use the mallet trick to seat the final row of laminate near the transition, ensuring it is locked tight to the previous row, then I install a track for the transition strip. This allows the floating floor to slide under the lip of the molding. If you are working near showers, make sure the transition is sealed with silicone. I have spent too many years replacing rotted subfloors because someone forgot to seal the transition between the laminate and the shower curb. The mallet trick is great for the middle of the room, but the edges are where the real craftsmanship shows. A master installer knows when to use the hammer and when to use the caulk gun. Your floor is a system, and every part of that system must work together to handle the stresses of daily life.
Final inspection of the joints
After you have used the rubber mallet to seat a stubborn joint, run your hand over it. You should not feel a lip. If you can catch your fingernail on the edge of a plank, it is not seated correctly. This is called over-wood or lippage. In the world of hardwood floors, you can sand that out. In the world of laminate, you are stuck with it. That small lip will catch the edge of a vacuum cleaner or a sock, eventually chipping the wear layer. If the mallet trick doesn’t solve the lippage, pull the plank up. There is likely a piece of debris in the groove or the subfloor has a hump you missed. I have pulled up dozens of planks just to find a single staple or a pebble that was preventing a perfect fit. It is frustrating, but it is the difference between a floor that lasts twenty years and one that fails in two. My knees might hurt and my hands might be stained with adhesive, but I never leave a job with a gapping joint. Use the mallet, trust the vibration, and never forget that the subfloor is the boss. If you treat the material with respect and follow the physics of the click-lock system, you will have a floor that looks as good as site-finished oak without the ten thousand dollar price tag.