
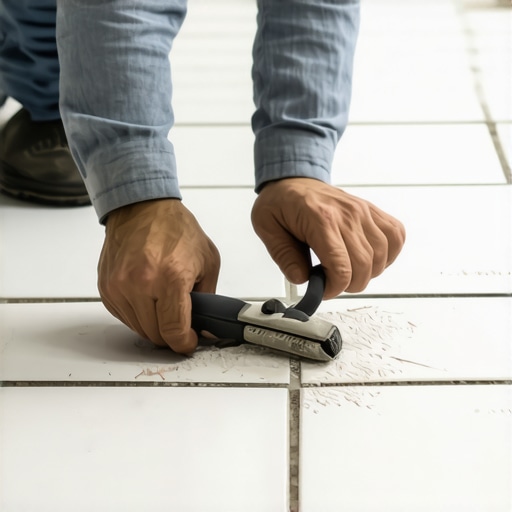
The myth of the easy grout repair
To remove grout without breaking tile, the oscillating multi-tool with a diamond-grit blade is the most effective and safest professional choice. This tool provides the precise vibration frequency required to pulverize cementitious grout while minimizing the lateral impact that typically causes ceramic or porcelain edges to chip during the demolition phase.
I spent three days grinding concrete on a job last month just so the floor wouldn’t click like a castanet. Most guys skip the leveling compound. They think the underlayment will hide the dip. It won’t. I was on my knees with a diamond cup wheel, watching the grey dust turn my respirator filters black, all because the original installer thought a sixteenth of an inch didn’t matter. That is the same mindset people bring to grout removal. They think they can just whack it with a hammer and a flathead screwdriver. Do that and you will be buying a new floor. I have seen beautiful, vintage bathrooms destroyed in forty minutes because someone got impatient with a hammer. You have to respect the bond between the grout and the tile edge. It is a chemical and mechanical lock that does not want to be broken. If you do not approach it with the right tool, the tile will take the path of least resistance and crack right down the middle.
The physics of the oscillating multi-tool
Oscillating multi-tools function by vibrating at speeds up to twenty thousand oscillations per minute over a very small arc. This high-frequency movement allows the blade to grind through the grout through abrasion rather than impact, which is why it is the superior choice for preserving the integrity of expensive tile installations in showers and kitchens.
When you are dealing with a shower, you are not just looking at grout. You are looking at a system that includes a waterproof membrane, a mortar bed, and possibly a foam backer board. If you use a tool that is too aggressive, like a reciprocating saw, you risk piercing the liner. I always tell my apprentices that the tool should do the work. You do not push. You guide. The diamond grit on the blade is harder than the Portland cement in the grout. According to the Mohs scale, that grout is a three or a four, while your diamond blade is a ten. It is an unfair fight, and that is exactly what you want. You want the tool to eat the grout while you maintain a steady hand. If the blade jumps, it is because you are forcing it. Let the vibration do the heavy lifting. This is especially true when you are working near laminate or hardwood floors that might be adjacent to your tile. One slip and you are gouging a piece of oak that cannot be easily patched.
“The structural integrity of a tile installation is dependent on the removal of failing grout without inducing micro-fractures in the tile edge.” – Master Flooring Axiom
Manual carbide scrapers for surgical precision
Manual carbide scrapers offer the highest level of control for removing grout in tight corners or along delicate transitions. These hand tools feature a triangular or V-shaped blade coated in tungsten carbide grit, allowing the user to apply targeted pressure to specific points of failure without the risk of power tool over-travel.
I keep a manual scraper in my back pocket at all times. It is the tool I reach for when I am inches away from a custom glass shower door or a fragile marble mosaic. Power tools are great for the long runs, but they have a tendency to wander if you hit a hard spot in the mix. A manual scraper lets you feel the resistance. You can tell if the grout is soft and sandy or if it is a high-polymer modified mix that is going to fight you every inch of the way. When you are working around showers, you often find that the grout at the base is mushy due to water infiltration. A hand tool lets you scrape that out without vibrating the whole wall. It is about finesse. You are a surgeon, not a demolition derby driver. You have to think about the layers. Beneath that grout is the thin-set. If you dig too deep, you are compromising the bond of the tile itself. I have seen guys rake out so much material that the tiles started falling off the wall like autumn leaves.
The danger of rotary tools and high speed discs
Rotary tools like a Dremel can remove grout quickly but carry a significant risk of slipping and gouging the tile surface. The high rotational speed creates a gyroscopic effect that makes the tool difficult to stabilize, often leading to unsightly scars on the glaze of the tile that cannot be repaired without replacement.
I hate seeing a Dremel on a job site for grout removal. It is a hobbyist tool. The problem is the direction of the spin. If that bit catches a piece of sand, it wants to walk right across the face of your porcelain. I once had a client try to save money by doing the guest bath himself with a rotary tool. By the time I got there, it looked like a tiger had used the floor as a scratching post. Every single tile had a little swirl mark where the bit jumped. You also have to consider the heat. High-speed rotation generates friction. Friction generates heat. If you get that tile edge too hot, you can actually cause the glaze to pop or discolor. It is the same reason we use wet saws for cutting. Heat is the enemy of ceramics. If you are going to use one, you better have a steady hand and a lot of luck. I prefer to leave the luck out of my estimates.
Comparing grout removal tools for performance
| Tool Type | Precision Level | Speed Rating | Risk to Tile |
|---|---|---|---|
| Oscillating Multi-Tool | High | Very Fast | Moderate |
| Manual Carbide Scraper | Extreme | Slow | Very Low |
| Rotary Dremel | Moderate | Fast | Very High |
| Reciprocating Saw Blade | Low | Aggressive | Dangerous |
The chemistry of grout and why it sticks
Grout is essentially a mixture of Portland cement and sand that forms a mechanical bond with the microscopic pores of the tile edge. Understanding this bond is vital because it dictates how much force is required to break the grout free without pulling chunks of the tile body with it during the removal process.
When I am looking at a floor, I am looking at the ratio of sand to cement. If it is a wide joint, probably an eighth of an inch or larger, it has sanded grout. That sand acts like a thousand little anchors. If it is a thin joint, it is unsanded, which is basically just cement paste. The unsanded stuff is actually harder to get out because it is denser and more brittle. It chips away in sharp flakes. You have to be careful with the vibrations there. If you use a tool that is too heavy, the vibration will travel through the grout and crack the neighboring tile before you even touch it. This is why the frequency of your multi-tool matters. You want to stay in that sweet spot where the grout is turning to powder but the tile is staying still. It is a delicate balance of physics. Most people think grout is just colored mud. It is not. It is a structural component of the assembly that distributes stress across the floor.
“Proper grout removal requires clearing at least two-thirds of the depth of the tile to ensure adequate bond for new material.” – Master Flooring Axiom
Professional checklist for a clean grout removal
- Inspect the entire area for loose or hollow-sounding tiles before starting.
- Vacuum the joints every five minutes to maintain visibility of the tile edges.
- Wear a P100 respirator to protect against crystalline silica dust.
- Always work from the center of the grout line toward the tile edge.
- Keep a damp sponge nearby to cool the tile if using power tools.
- Check the depth of your progress with a thin spacer or a nail.
Dust management and site protection
Effective dust management during grout removal requires the use of HEPA-filtered vacuums and containment barriers to prevent silica particles from settling. Crystalline silica is a hazardous byproduct of grinding cement-based products and must be controlled at the source to ensure a safe working environment for both the installer and the homeowner.
If you don’t use a vacuum, that fine white dust will find its way into every closet and drawer in the house. I have had homeowners call me months later saying they found grout dust on top of their water heater. You have to tape off the vents. You have to hang plastic. But the best way is to suck it up as it happens. Most high-end multi-tools now have a vacuum attachment. Use it. It also helps you see what you are doing. If the joint is buried in dust, you are flying blind. You will hit a tile edge and won’t even know it until the dust clears and you see the chip. This is particularly important when working near hardwood floors. That abrasive dust is like sandpaper. If you walk on it, you will scratch the finish of your oak or walnut floors. I always put down ram board or heavy moving blankets to create a clean path. It is about professionalism. You want the only evidence of your presence to be a perfect floor, not a layer of gray silt on the kitchen table.