
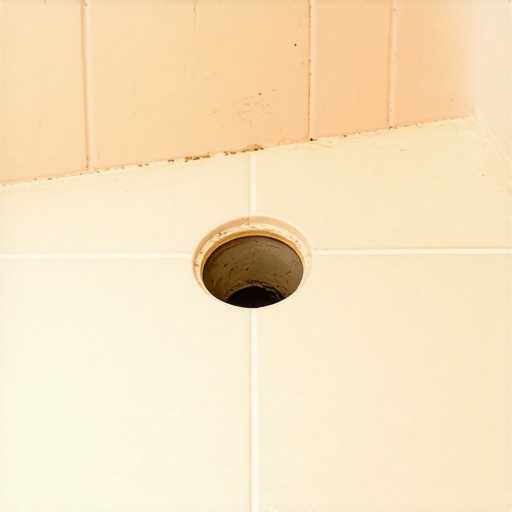
The structural reality of subfloor decay
Patching a shower subfloor hole requires structural blocking, marine-grade plywood, and ANSI-rated adhesives to ensure a waterproof foundation. You must cut back to the joists, install sister joists for support, and seal all seams with polymer-modified thin-set to prevent tile cracking and mold growth in the shower assembly.
I have spent twenty five years with sawdust under my nails and the smell of floor wax on my boots. Most guys skip the leveling compound. They think the underlayment will hide the dip. It won’t. I spent three days grinding concrete on a job last month just so the floor wouldn’t click like a castanet. That same logic applies to shower subfloors. If you ignore a hole, you are not just ignoring a gap in wood. You are ignoring a structural failure that will eventually snap your grout lines like dry twigs. When I walk into a bathroom and see a soft spot near the drain, I know exactly what I will find. It is usually a mess of black mold and spongy OSB that someone thought they could fix with a bit of spray foam and a prayer. It does not work that way. A floor is a performance surface. If the skeleton is rotten, the skin will never stay pretty.
The math of a structural patch
Subfloor repair calculations involve measuring the deflection limit of the joist span, typically aiming for L/360 for ceramic or L/720 for natural stone. You must identify the nominal thickness of the existing CDX plywood or Advantech flooring and match it exactly to maintain a flush surface for the waterproofing membrane.
You cannot simply slap a piece of wood over a hole. The physics of weight distribution dictate that a patch must be supported on at least two parallel edges. This means you are going to be cutting. You need to pull back the tile and the cement board until you expose the center of the nearest floor joists. I use a circular saw set to the exact depth of the subfloor. If you go too deep, you are nicking a copper pipe or a drain line, and then your afternoon just got expensive. Once the rot is out, you look at the joists. If they are soft, you sister them. This means taking a new piece of kiln dried lumber and bolting it to the old one. It creates a wider shoulder for your new patch to sit on. This is not about aesthetics. This is about the shear strength of the fasteners. You want those screws to bite into solid wood, not the pulpy remains of a leak that should have been fixed in 2004.
“A floor is only as good as the subfloor beneath it; deflection is the enemy of every joint.” – Master Flooring Axiom
The chemical reality of moisture barriers
Waterproofing a subfloor patch necessitates the use of liquid-applied membranes like RedGard or uncoupling mats such as Schluter-Ditra. These systems create a vapor-tight seal that protects the wood fibers from capillary action and hydrostatic pressure, ensuring the alkalinity of the grout does not degrade the adhesive bond.
Most homeowners think that grout is waterproof. It is not. Grout is a sieve. Water moves through it via capillary action. When that water hits the subfloor, it triggers a biological process. The lignin in the wood fibers begins to break down. This is why you cannot use standard interior grade plywood for a shower patch. You need something with exterior glue. The resins used in exterior or marine grade plywood are designed to withstand high humidity without delaminating. When you set your patch, you leave a 1/8 inch gap. This is the expansion gap. Wood moves. It breathes. If you butt the pieces tight, they will buckle when the humidity hits 80 percent. I fill that gap with a high quality sealant or a modified thin-set. The chemistry of the bond matters more than the thickness of the board. You are looking for a chemical weld between the patch and the existing structure.
| Material Type | Janka Hardness | Moisture Resistance | Application |
|---|---|---|---|
| Marine Grade Plywood | N/A (Softwood) | Maximum | Shower Subfloors |
| CDX Plywood | N/A (Softwood) | Moderate | General Subfloors |
| OSB (Oriented Strand Board) | N/A | Low | Dry Living Areas |
| Cement Backer Board | High | High (Inert) | Tile Underlayment |
The physics of deflection and grout failure
Grout failure and tile tenting are the direct results of subfloor deflection, where the vertical movement exceeds the elastic modulus of the setting material. To prevent this, you must ensure the subfloor assembly meets the TCNA Handbook standards for dead and live load capacity to avoid stress fractures in the porcelain surface.
When you walk on a floor, it bends. You might not see it, but it does. If your patch is weak, it bends more than the surrounding floor. This differential movement is what kills tile. The grout is rigid. It cannot stretch. When the subfloor dips, the grout snaps. Then the water gets in. Then the cycle starts all over again. I have seen guys try to fix this by using more grout. That is like putting a band-aid on a broken leg. You need to stiffen the assembly. Sometimes that means adding a second layer of 3/8 inch plywood over the entire floor, offset from the seams of the first layer. This is called a double-layer subfloor system. It is the gold standard for high-end tile work. It reduces the bounce to almost zero. It makes the floor feel like stone rather than a trampoline.
- Inspect the joists for any signs of fungal decay or carpenter ant damage.
- Check the moisture content of the new plywood using a pin-type meter.
- Use 2-inch deck screws spaced every 6 inches along the perimeter.
- Apply a bead of subfloor adhesive to the joist before laying the patch.
- Vacuum all debris from the joist bays to prevent future squeaks.
- Verify that the patch is level with the surrounding floor within 1/16 of an inch.
The ghost in the expansion gap
Expansion gaps in flooring provide the necessary tolerance for thermal expansion and moisture-induced swelling of the wood substrate. Without a perimetrical gap, the lateral force generated by expanding wood fibers can cause subfloor peaking and structural shearing of the fastener heads.
I have seen floors lift two inches off the joists because the installer didn’t leave a gap at the walls. In a shower, that movement is amplified by the heat of the water. When you patch that hole, you are creating new edges. Those edges need room to breathe. I often hear people complain that their floor clicks. That is the sound of wood rubbing against wood. It is a sign of a lazy install. You want silence. Silence comes from precision. I use a multi-tool to clean up the edges of the old subfloor. I make sure the cut is square. A square cut means a predictable gap. A predictable gap means a stable floor. People want the thickest underlayment they can find, but too much cushion actually causes the locking mechanisms on laminate or LVP to snap under pressure. For a shower, you don’t want cushion. You want rigidity. You want the kind of solid foundation that makes a tile floor last for fifty years.
“Deflection is the silent killer of the bathroom renovation; if the wood moves, the tile fails.” – TCNA Installation Guide
The 1/8 inch that ruins everything
Precision leveling in subflooring is measured by the 1/8 inch over 10 feet rule, which is the industry standard for flatness required by large format tile. Any abrupt changes in plane height will cause lippage, where one tile edge sits higher than its neighbor, creating a trip hazard.
If your patch sits a 1/8 inch too high, your tile will have a lip. You will stub your toe on it every morning. If it sits too low, you will have a pool of thin-set that takes forever to dry and might shrink, pulling the tile down with it. This is why I keep a stack of wood shims and a long aluminum straightedge on my truck. I spend more time checking for flat than I do actually screwing the wood down. The goal is a flat plane. Not level, flat. A floor can be out of level but still be perfectly flat. In a shower, you are dealing with a pitch toward the drain. That pitch has to be perfect. If your patch messes up the slope, you get standing water. Standing water leads to grout discoloration and eventually, more rot. It is a game of millimeters. If you are not willing to use a planer to shave down a high joist, you should not be patching a shower floor. This is a job for someone who values the structural integrity of the home over the speed of the finish.
The chemistry of the thin-set you use over the patch is just as important as the wood. You need a polymer-modified mortar that is rated for plywood. Standard mortars do not stick well to the resins in the wood. The polymers act as a bridge. They provide a bit of flexibility. Think of it like this. The wood is moving at one rate, and the tile is moving at another. The thin-set is the shock absorber between them. If you use a cheap, unmodified mortar, the bond will shear the first time someone takes a hot shower. I don’t care what the bucket says at the big-box store. Buy the professional grade stuff. It costs ten dollars more, but it saves you from a ten thousand dollar failure. You want a product that meets or exceeds ANSI A118.11 standards. This is the mark of quality in our world. Anything less is just mud. I have seen the results of using inferior products. It looks like a spiderweb of cracks across a beautiful marble floor. It is heartbreaking because it was avoidable. Do it right the first time so I don’t have to come out and fix it in two years. My knees cannot take much more of that.