
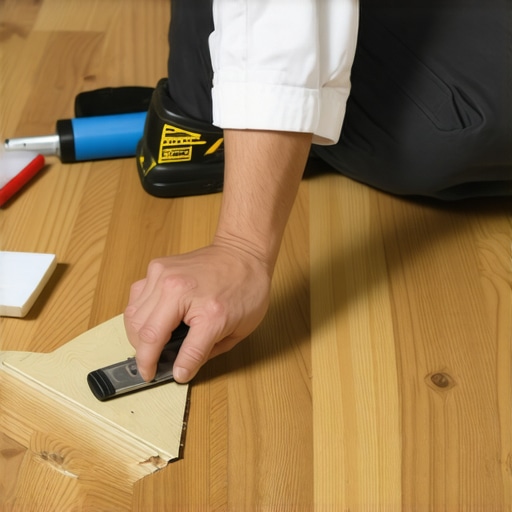
The Best Way to Repair a Gouge in Your Laminate Floor
Most guys skip the leveling compound. They think the underlayment will hide the dip. It won’t. I spent three days grinding concrete on a job last month just so the floor wouldn’t click like a castanet. When you see a gouge in a laminate floor, you aren’t just looking at an aesthetic blemish. You are looking at a breach in a complex, layered engineering system. Laminate is a composite of melamine resin, a high resolution photograph, and a high density fiberboard core. Once that top wear layer is compromised, the moisture sensitive core is exposed to the world. If you don’t seal it correctly, that core will swell like a sponge the next time a wet dog walks over it. I have spent twenty five years fixing these mistakes, and most of them happen because people treat laminate like it is wood. It is not wood. It is a structural sandwich that demands respect for its chemistry.
The microscopic anatomy of a laminate failure
Repairing a laminate gouge requires understanding the high density fiberboard core and its susceptibility to hydrostatic pressure. You must first clean the site with 99 percent isopropyl alcohol to remove any wax or factory residue. If the gouge is deeper than the decorative layer, you are dealing with a structural vulnerability that can lead to edge peaking if moisture enters the HDF core and causes cell wall expansion. I always tell my apprentices that the wear layer is the only thing standing between a beautiful floor and a pile of wet sawdust. When a heavy object hits the floor, it creates a fracture in the crystalline structure of the aluminum oxide coating. This isn’t just a scratch. It is a doorway for humidity. If you live in a high humidity region like the Gulf Coast, that tiny chip will be a bubble within six months if you don’t seal it immediately. You need to use a repair medium that has the same expansion and contraction coefficient as the original board. Most big box store kits are garbage because they use soft waxes that shrink over time. You want a hard wax or a specialized acrylic resin that bonds at the molecular level with the melamine.
“A floor is only as good as the subfloor beneath it; deflection is the enemy of every joint.” – Master Flooring Axiom
The reason your wax filler keeps popping out
Wax fillers fail because of thermal expansion and the lack of mechanical tooth in the smooth melamine surface. To make a repair stick, you have to create a surface profile that allows the filler to bite into the HDF core. Use a small hobby knife to slightly undercut the edges of the gouge. This creates a dovetail effect that mechanically locks the filler into place. If you just smear it on top, the microscopic movement of the floor as people walk across it will pop that filler out in a week. I have seen guys try to use wood putty on laminate. That is a rookie move. Wood putty is designed for porous surfaces, and laminate is a non porous plastic shell over a dense core. The chemistry does not match. You need a meltable hard wax stick or a two part epoxy filler specifically formulated for laminate surfaces. This is where the physics of the floor come into play. Every time someone steps on the floor, the boards flex. If the subfloor has even a 1/8 inch dip, that flex is enough to crack a brittle filler. This is why I obsess over subfloor flatness before I even pull a board out of the box.
| Filler Type | Durability Level | Moisture Resistance | Complexity of Install |
|---|---|---|---|
| Soft Wax Stick | Low | Moderate | Low |
| Hard Wax Melt | High | Excellent | Medium |
| Acrylic Resin | Extreme | Superior | High |
| Wood Putty | None | Poor | Avoid |
The precise chemistry of acrylic resin fills
Acrylic resin fills work by creating a cross linked polymer bond that mimics the hardness of the original aluminum oxide wear layer. When you mix a two part resin, the chemical reaction creates heat, which helps the material penetrate the top fibers of the HDF core. This creates a unified structure that is virtually impossible to remove. The problem most DIYers face is color matching. Laminate isn’t a solid color. It is a print. To fix it right, you have to layer your colors. Start with a base color that matches the darkest grain in the plank. Then, use a lighter shade to mimic the highlights. If you use one solid color, the repair will look like a piece of chewing gum stuck to the floor. Professionals use a graining pen to draw the wood grain lines back into the repair. It takes patience and a steady hand. You also have to consider the sheen. Laminate comes in matte, semi gloss, and high gloss. If your repair is matte and the floor is gloss, it will catch the light and scream for attention. I always carry a bottle of gloss adjuster to fine tune the finish once the filler has cured. It is about the refraction of light as much as it is about the color.
- Vacuum the gouge to remove any loose HDF fibers.
- Decontaminate the area with a solvent that leaves no residue.
- Undercut the edges to provide a mechanical lock.
- Apply the filler in thin layers to avoid air pockets.
- Level the filler with a plastic scraper to avoid scratching the surrounding wear layer.
- Buff the area with a lint free cloth to match the surrounding sheen.
Why a bouncy subfloor is the real culprit
Subfloor deflection causes the locking mechanisms to grind against each other, creating stress fractures that eventually manifest as chips and gouges. If you notice gouges appearing near the short joints of your planks, it is likely not an accident but a sign of structural failure. When the subfloor is uneven, the laminate boards act like a bridge. Every time you walk over that bridge, it bows. This bowing puts immense pressure on the tongue and groove system. Eventually, the top layer will chip off because it cannot handle the tension. This is why the TCNA and NWFA are so strict about subfloor flat specifications. You need less than 3/16 of an inch of deviation over a ten foot radius. If you have more than that, your floor is a ticking time bomb. I have walked onto jobs where the homeowner complained about cheap laminate, only to find that the concrete slab looked like a topographical map of the Andes. No amount of filler will fix a floor that is moving. You have to address the root cause, which usually means pulling up the boards and pouring self leveling underlayment. It is a pain, but it is the only way to ensure the floor lasts twenty years instead of two.
“Failure to account for moisture vapor emission rates is the leading cause of floor system delamination.” – NWFA Technical Manual
The equipment that separates pros from weekend warriors
Professional grade floor repair requires specialized tools including a butane heating iron, high melting point waxes, and precision graining pens. You cannot do this job with a butter knife and a candle. A butane iron allows for precise temperature control, which is vital because if you overheat the wax, you change its chemical properties and make it brittle. You also need a variety of clear coats. I prefer a spray lacquer with a variable sheen nozzle. This allows me to feather the edges of the repair into the original finish. If you are working on a textured floor, like an embossed in register finish, you also have to recreate the texture. I use a small silicone mold or a textured cloth to press the grain pattern into the cooling wax. It is these small details that make a repair invisible. If you are dealing with hardwood floors, the process is different because the material is organic. But with laminate, you are essentially a plastic surgeon. You are working with synthetic materials that have very specific thermal limits. If you push it too far, you will melt the original melamine and make the problem ten times worse. Take your time, work in small increments, and always test your color on a scrap piece of flooring first.
The impact of regional climate on HDF stability
In regions with high humidity like New Orleans or Houston, the high density fiberboard core will expand and contract at a much higher rate. This means your repair must be flexible enough to move with the board. If you use a rock hard epoxy in a humid environment, the board will expand around it and the repair will eventually crack or pop out. This is why I often lean toward high quality hard waxes for residential repairs. They have just enough give to accommodate the natural movement of the house. Conversely, in dry climates like Phoenix, the HDF core will shrink. This can lead to gaps in the locking system, which exposes the edges of the boards to even more damage. If you are repairing a floor in a dry area, you have to be careful not to overfill the gouge, as the shrinking board will put lateral pressure on the repair site. Always check the moisture content of your subfloor and the ambient humidity of the room before starting. If the room is at 60 percent humidity during the repair and then drops to 20 percent in the winter, that floor is going to move significantly. Understanding the local climate is just as important as knowing how to mix the colors. Every floor is a living system, even if it is made of plastic and sawdust.
The information gain regarding underlayment thickness
While most people want the thickest underlayment, too much cushion actually causes the locking mechanisms on laminate to snap under pressure. This is a hard truth that many retailers won’t tell you. They want to sell you the expensive, plush foam. But that foam creates a trampoline effect. When you step on a plank, it sinks. The plank next to it stays put. This creates a vertical shear force on the tongue and groove. Over time, this shear force will cause the top melamine layer to chip at the edges, creating what looks like a gouge but is actually an edge failure. I always recommend a high density, thin underlayment. You want something that provides a vapor barrier and sound dampening without allowing the floor to bounce. A 2mm or 3mm high density rubber or felt is usually the sweet spot. If you are fixing a gouge that was caused by this kind of edge chipping, you must realize that the repair is only temporary. Until you fix the subfloor or the underlayment, the floor will continue to eat itself. It is a hard pill to swallow, but it is the reality of flooring mechanics. You have to build from the ground up if you want it to last. Final thoughts for the job site are simple. Keep your tools clean, keep your moisture meter handy, and never trust a subfloor that you haven’t put a straight edge on yourself. Respect the chemistry of the laminate and it will serve you well for decades. Use the right fillers, match the sheen, and always look for the root cause of the damage. A gouge is rarely just a gouge. It is a story about the physics of your home.