
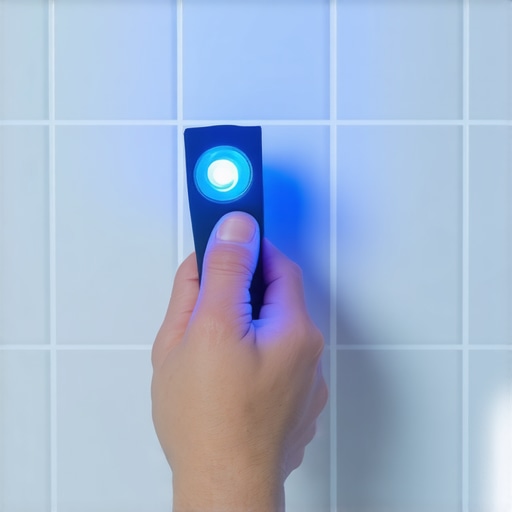
I have spent twenty five years with sawdust under my nails and the smell of WD-40 on my clothes. I am not here to discuss which color of oak looks best in your dining room. I am here to talk about the physics of a floor. Most guys skip the leveling compound. They think the underlayment will hide the dip. It won’t. I spent three days grinding concrete on a job last month just so the floor wouldn’t click like a castanet. That is the reality of the trade. Flooring is a structural engineering challenge, not a decorative whim. If you ignore the subfloor, you are building on sand. If you ignore the chemistry of your grout, you are leaving a permanent film on your investment. We are going to look at the microscopic reality of installation, specifically focusing on the invisible threat of grout haze and why a simple blue light can save a forty thousand dollar installation in showers and across hardwood floors transitions.
The microscopic residue that ruins high end tile
Grout haze is a polymer film or silicate residue left on the tile surface after the installation of ceramic or porcelain tile. It occurs when the cleaning process is incomplete, allowing Portland cement particles and chemical additives to harden. Spotting it requires specific lighting before the cross-linking process finishes. When you are working in showers, the lighting is often subpar. The overhead bulb might show you a clean surface, but the microscopic reality is different. Modern high-performance grouts are packed with polymers designed to make them waterproof and flexible. These same polymers form a bond with the microscopic pores of your tile. If you do not catch this film within the first four hours, you are going to be using harsh acids that can eat away at your finishes. The blue light hack involves using a 400nm to 450nm light source held at an oblique angle. This wavelength causes the polymer residue to fluoresce or creates a distinct shadow that standard work lights miss. It is about the refraction of light off the silicate film. It is a technical necessity for any professional.
“A floor is only as good as the subfloor beneath it; deflection is the enemy of every joint.” – Master Flooring Axiom
Why your subfloor is lying to you
Subfloor levelness is the foundation of every successful flooring project, requiring a flatness tolerance of 1/8 inch over a ten foot radius. Failure to achieve this leads to joint fatigue in laminate and cracked grout lines in tile showers. Never trust a visual inspection alone. I have seen slabs that looked like a mirror but had a two inch trough in the center. In the world of showers, subfloor deflection is the primary cause of waterproofing failure. If the wood or concrete shifts, the bond between the thin-set and the substrate breaks. This is why I insist on a rigid subfloor. For hardwood floors, an uneven subfloor causes the planks to rub against each other, creating that annoying squeak. It is not the wood talking, it is the subfloor screaming for help. You must use a mechanical grinder or a self-leveling underlayment. There are no shortcuts here. The chemistry of the bond depends on the physical stability of the base. If your base moves, your floor fails.
The blue light strategy for perfect showers
Using a blue light during the grout cleanup phase allows installers to identify invisible polymer films before they chemically bond to the tile. This technique involves low-angle illumination which highlights surface irregularities and chemical residues that standard 5000K lighting cannot detect. I have walked onto jobs where the tile looked pristine under the contractor’s halogen lamps. I turned on my blue light and the entire wall looked like a map of the moon. This is especially critical for textured tiles or natural stone. The pits in the stone hold the grout. If you don’t see it, you don’t clean it. By the time the homeowner moves in and the natural sunlight hits that shower at 4:00 PM, the haze will be all they see. At that point, you are looking at a chemical strip job that puts the waterproofing at risk. You use the blue light during the second wipe down. It shows you exactly where the sponge missed. It is blunt, it is honest, and it is the only way to ensure a professional finish.
Comparing performance across floor types
Different flooring materials require specific installation protocols based on their Janka hardness and moisture resistance. While laminate offers ease of install, it lacks the structural integrity of solid hardwood floors or the impermeability of porcelain tile in wet environments. Understanding the data is the only way to make a smart choice for your home. Below is a breakdown of how these materials stack up under professional scrutiny.
| Material Type | Janka Hardness | Acclimation Time | Moisture Tolerance |
|---|---|---|---|
| Solid White Oak | 1360 lbf | 7 to 14 Days | Low |
| Engineered Walnut | 1010 lbf | 3 to 5 Days | Moderate |
| High-Density Laminate | N/A | 48 Hours | Moderate |
| Porcelain Tile | N/A | None | High |
While most people want the thickest underlayment, too much cushion actually causes the locking mechanisms on LVP or laminate to snap under pressure. You want a high-density, low-profile barrier, not a sponge. A thick underlayment allows for too much vertical movement. This movement acts like a lever on the tongue and groove joints. Over time, those joints will shear off. I have replaced thousands of square feet of flooring because a salesman told a homeowner that a thick pad would feel softer. It feels softer until the floor falls apart. Stick to a 1.5mm or 2mm high-density foam or felt. That is the professional way.
The hardwood moisture trap
Hardwood floors require strict moisture monitoring of both the wood planks and the subfloor substrate to prevent cupping and crowning. The equilibrium moisture content must be within a 2 percent to 4 percent range between the two materials before the first nail is driven. I once walked into a house where a $15,000 wide-plank walnut floor was cupping so bad it looked like a potato chip because the installer didn’t check the crawlspace humidity. The wood was sucking up moisture from below while the air conditioner was drying the top. It was a tug of war the wood was never going to win. You must use a pin-less moisture meter. You must document the readings. In places like Houston, the humidity is your primary enemy. In Phoenix, the dry air will shrink your boards until the gaps look like canyons. You have to account for the local climate. If you are installing over a crawlspace, you need a 6-mil poly vapor barrier. No exceptions.
“Standard cementitious grout requires a specific hydration window to ensure the polymer chains lock correctly.” – Master Flooring Axiom
The 1/8 inch that ruins everything
Precision in flooring is measured in fractions of an inch, specifically the expansion gaps left at the perimeter of a room. A quarter-inch gap is standard, allowing the floor to expand and contract with seasonal humidity changes without buckling against the walls. If you pin the floor against the drywall, it has nowhere to go but up. I have seen floors tent in the middle of a room because some handyman wanted a tight fit against the baseboards. It is a rookie mistake. You need that gap. You cover it with baseboard or shoe molding. It is a breathing room for the material. Whether it is laminate or hardwood floors, the material is alive. It reacts to the environment. If you do not respect the expansion gap, the floor will eventually destroy itself. This is especially true for large spans. If the room is wider than 30 feet, you might even need an intermediate transition strip, though most architects hate the look of them.
A checklist for professional results
Achieving a professional floor installation requires a systematic approach to substrate preparation and final cleaning. Following a strict protocol ensures that the aesthetic finish is backed by structural durability. This is the checklist I use on every job site to ensure nothing is missed.
- Verify subfloor flatness to within 1/8 inch over 10 feet using a straightedge.
- Perform moisture tests on concrete slabs and wood subfloors.
- Acclimate all hardwood or laminate materials in the room for at least 72 hours.
- Check the blue light hack during the second grout wash in showers.
- Maintain a consistent 1/4 inch expansion gap around all vertical obstructions.
- Vacuum all debris from the tongue and groove channels before clicking.
- Inspect each plank for manufacturer defects under high-output lighting.
The ghost in the expansion gap
Many homeowners ask why their waterproof vinyl is buckling. Usually, it is because they locked it under a heavy kitchen island, killing the floor’s ability to breathe. A floating floor must be allowed to float. When you put a 500-pound cabinet on top of it, you have effectively nailed it to the subfloor. This creates a pivot point. As the rest of the floor expands with heat, it pushes against that island. The result is a buckle three feet away. People blame the product, but the fault lies in the architecture of the install. You install the cabinets first, then you floor around them. Or you use a rigid-core product that has a very low coefficient of expansion, but even then, you are taking a risk. Understanding the physics of movement is what separates a master from a weekend warrior. This applies to showers as well, where the change in plane requires a flexible sealant rather than rigid grout. If you grout a corner, it will crack. It is not a matter of if, it is a matter of when. Use a color-matched silicone for all changes in plane. It handles the movement that grout cannot. This is how you build a floor that lasts thirty years instead of three.