
I once walked into a house where a $15,000 wide-plank walnut floor was cupping so bad it looked like a potato chip because the installer did not check the crawlspace humidity. The homeowner was in tears, and the contractor was nowhere to be found. That walnut was high-end material, but it was functionally dead because the basics of moisture physics were ignored. I spent three days ripping it out with a pry bar and a heavy heart. I smell like WD-40 and oak dust most days, and I have learned that the difference between a floor that lasts a century and one that fails in a season is usually about an eighth of an inch and a lot of patience. If you are looking for aesthetic fluff, go buy a magazine. If you want to understand the structural engineering of a precision hardwood installation, you are in the right place.
The physics of wood expansion and the eighth inch rule
Hardwood floors are living organisms that respond to the hygroscopic environment of your home through constant expansion and contraction. Wood cells absorb water molecules from the air, causing the lignin and cellulose structures to swell across the grain. This is why an expansion gap is not a suggestion but a structural requirement for every professional installation. When we talk about complex border cuts, we are talking about the intersection of fixed architectural elements and a moving floor. If you cut a plank too tight against a stone fireplace or a curved marble transition near showers, the wood will eventually have nowhere to go. It will buckle, it will squeak, and it will eventually destroy the locking mechanism or the tongue-and-groove joint. We use the cardboard template trick to ensure that we maintain that vital gap while creating a visual fit that looks like it was grown in place. Most installers fail because they try to measure with a tape. You cannot measure a curve with a straight tape. You have to scribe it.
“A floor is only as good as the subfloor beneath it; deflection is the enemy of every joint.” – Master Flooring Axiom
The cardboard savior for curved walls
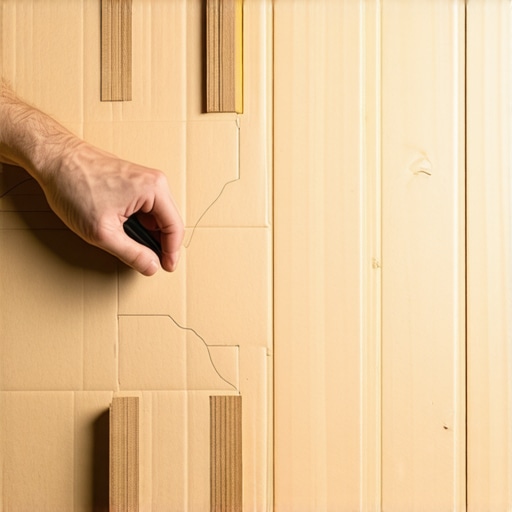
The cardboard template trick involves using rigid fragments of scrap boxes to create a physical map of a complex architectural obstacle. This method is superior to paper templates because cardboard maintains its shape and thickness, allowing you to trace the exact profile of a stone hearth or a rounded staircase. You start by laying your planks up to the point where the complex cut begins. Then, you take a piece of clean, flat cardboard and butt it against the obstacle. Use a compass or a simple scribing tool to follow the contour of the wall or stone. The pencil on the other end of the scribe transfers that exact undulating line onto the cardboard. Once you cut the cardboard with a sharp utility knife, you have a perfect 1-to-1 replica of the obstacle. This is the only way to handle the irregular edges of natural stone where grout lines create deep recesses and protrusions. If you try to eye-ball this, you will end up with gaps that are too wide to cover with molding, or worse, planks that are jammed against the stone. When the humidity hits 60 percent in the summer, that jammed plank will lift the entire floor off the subfloor. I have seen it happen in luxury condos where the installer thought he was too good for templates.
Why your subfloor is lying to you
Subfloor levelness is the hidden variable that determines whether your hardwood or laminate floor will click like a castanet when you walk on it. Before we even think about the cardboard template, we have to address the substrate. I spend more time grinding concrete and pouring self-leveling compound than I do actually laying wood. If there is a dip greater than 3/16 of an inch over a 10-foot span, your floor is going to fail. The physics are simple. When you step on a plank that is bridging a low spot, the tongue is forced down into the groove. This creates friction, which creates noise. Over thousands of footfalls, that friction wears down the wood fibers, and the joint eventually snaps. On concrete slabs, we also have to deal with the chemical reality of moisture vapor. A slab might look dry, but it is a porous sponge. I always use a calcium chloride test or an in-situ probe to check the internal relative humidity. If it is over 75 percent, you are not laying wood without a high-grade moisture barrier. I have seen guys try to use cheap plastic underlayment near showers and then wonder why their laminate started to swell at the edges. The moisture travels through the grout of the adjacent tile and gets trapped under the wood. It is a recipe for mold and rot.
| Wood Species | Janka Hardness Rating | Acclimation Time (Days) | Expansion Coefficient |
|---|---|---|---|
| Red Oak | 1290 | 7-10 | Medium |
| Brazilian Cherry | 2350 | 14-21 | High |
| Engineered Oak | 1360 | 3-5 | Low |
| White Walnut | 1010 | 7-10 | Medium |
The chemistry of the adhesive bond
Modern flooring adhesives are not just glue but sophisticated polymers designed to allow for the natural movement of timber while maintaining a permanent grip on the subfloor. When we do a glue-down installation, we are looking for a chemical bond that can withstand the shear forces of wood expansion. We use moisture-cured silane-modified polymers because they stay flexible. Old-school yellow glues dry brittle. When the wood moves, a brittle glue line snaps. A flexible polymer acts like a shock absorber. This is especially vital when you are transitioning between different materials, such as where your hardwood meets the grout of a bathroom floor. That transition point is a high-stress zone. If you are using laminate, you have to be even more careful. Laminate is essentially a photograph of wood glued to a high-density fiberboard core. That core is incredibly thirsty. If any water from the shower seeps under the transition strip, the core will blow up like a sponge. This is why I always run a bead of 100 percent silicone in the expansion gap around wet areas. It is the only way to protect the investment.
Essential tools for the template method
- Rigid cardboard scraps (preferably double-wall for stability)
- Professional scribing compass with a locking nut
- Sharp utility knife with extra carbide blades
- High-visibility marking pencil or fine-tip felt pen
- Painter’s tape to secure the template during the tracing phase
- Jig saw with a fine-tooth wood blade for the final cut
The ghost in the expansion gap
The most common mistake in complex border cuts is the refusal to accept that the gap must exist even if it looks ugly during the process. People want their hardwood to tuck perfectly under the stone of a fireplace with zero space. That is a fantasy that leads to structural failure. The professional way to handle this is to use the cardboard template to get the shape right, then offset your cut by 3/4 of an inch. You then cover that gap with a sacrificial piece of trim or you undercut the stone. Undercutting the stone is the gold standard. You use a diamond-blade jamb saw to cut a kerf into the bottom of the fireplace. Your hardwood then slides into that kerf. The expansion gap is still there, hidden behind the stone. It looks like the fireplace was built on top of the wood. This requires precision. If you undercut too high, you see the gap. If you undercut too low, the wood won’t fit. This is why we use the template first. We check the fit of the cardboard in the kerf before we ever put a saw to a piece of expensive lumber. Precision is not about speed. It is about the refusal to do it twice.
“Wood is hygroscopic. It moves. If you don’t account for the seasonal swing in humidity, your craftsmanship is irrelevant.” – NWFA Field Manual Reference
The molecular reality of engineered versus solid wood
Engineered hardwood was designed to solve the problem of dimensional instability by layering wood veneers in opposing directions. When you are dealing with complex borders and templates, the material choice matters. Solid wood is a monolithic block of cells all running the same way. When it gets wet, it expands significantly in one direction. Engineered wood uses a plywood-style core. One layer expands north-south, the next expands east-west. They cancel each other out. This makes engineered wood much safer for installs near showers or over radiant heat systems. However, do not be fooled by the marketing. It still moves. It still needs a template for a proper fit. If you are working with laminate, remember that you are working with a floating system. The entire floor moves as a single unit. If you pin it down at a complex border cut because you didn’t leave enough room in your template, the whole floor will peak at the joints. I have spent years explaining to homeowners that their floor is not a static object. It is a slow-motion wave. My job is to make sure that wave never hits a wall it cannot climb.
The final word on precision
Precision in flooring is not an accident of talent but a result of a repeatable process. The cardboard template trick is a core part of that process. It bridges the gap between the messy reality of a construction site and the geometric perfection of a finished floor. When you take the time to scribe your borders, you are acknowledging that the house is not square, the walls are not straight, and the materials are not static. You are acting as an architect of a performance surface. Take your moisture readings. Level your subfloor. Use your templates. If you do those things, the floor will stay quiet, the joints will stay tight, and you won’t have to call someone like me to come rip it out in five years. Quality is what happens when you care about the parts that nobody will ever see.