
I spent three days grinding concrete on a job last month just so the floor would not click like a castanet. Most guys skip the leveling compound because they think the underlayment will hide the dip. It will not. I have seen guys try to float 3/4 inch solid oak over a slab that looked like the surface of the moon. Within six months the tongue and groove joints are rubbing together and screaming. If you do not respect the subfloor it will eventually humiliate you in front of the client. I have spent twenty five years on my knees with a moisture meter and a level. I know exactly how a floor reacts when it meets the humid environment of a bathroom. It is not just about the wood. It is about the physics of the structural layer beneath it and the chemical bond of the adhesives that hold it all together.
Why your subfloor is lying to you
Subfloor prep requires checking for flatness within three sixteenths of an inch over a ten foot radius to prevent joint failure. Most installers mistake a level floor for a flat one. You can have a floor that is perfectly level but has a massive birdbath in the middle that will cause your hardwood to flex and eventually snap the locking mechanism. When we talk about bathrooms specifically the subfloor is often compromised by previous slow leaks around the flange. I have pulled up carpet in million dollar homes only to find the plywood around the toilet was the consistency of wet oatmeal. You cannot build a fortress on a swamp. You need to verify the structural integrity of every square inch before the first plank of hardwood floors or laminate touches the room.
“A floor is only as good as the subfloor beneath it; deflection is the enemy of every joint.” – Master Flooring Axiom
The cardboard template secret
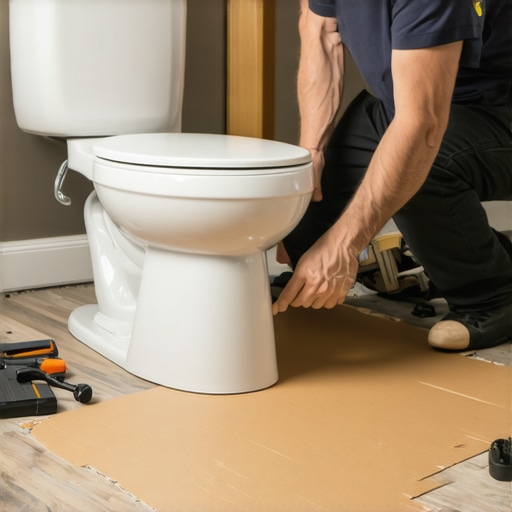
The cardboard template trick involves tracing the exact diameter of the toilet base onto a rigid piece of scrap material to create a perfect jig. This is the only way to get a tight fit without ruining expensive planks. You do not just eyeball a curve around a toilet flange. You take the box the flooring came in and cut a piece that is slightly larger than the fixture. You slide it up against the toilet and mark the contour with a scribe tool or a heavy pencil. This creates a physical reference that accounts for the irregular curves of porcelain which are never perfectly symmetrical. Most rookies try to use a jigsaw on the fly and end up with a gap you could drive a truck through. If the gap is too big the baseboard or the toilet footprint will not cover it. If it is too small the wood will buckle against the fixture as the humidity rises.
The physics of the expansion gap
Maintaining a consistent expansion gap around the perimeter of the bathroom is mandatory to allow for the hygroscopic expansion of wood fibers. Wood is a living material even after it is milled and finished. It breathes. It reacts to the moisture coming off the showers and the humidity trapped in the air. When you install hardwood floors near a toilet you have to remember that the wood will expand and contract. If you pin the wood tight against the toilet flange it has nowhere to go. The floor will eventually lift in the center of the room. I have seen entire floors tent because some installer forgot that wood needs room to move. You need at least a quarter inch gap which will be hidden by the base of the toilet or a bead of high quality flexible silicone.
Why laminate fails where grout succeeds
Laminate flooring often fails in high moisture areas because the fiberboard core absorbs ambient humidity through the seams leading to edge swelling. Traditional grout and tile are impervious to this type of damage because they do not have a cellulose based core. If you are determined to put laminate or hardwood in a bathroom you have to be obsessive about sealing the edges. This is where the chemistry comes in. You need a 100 percent silicone sealant around the toilet and the shower transition. Standard builders grade caulk will shrink and crack within a year. Once that seal is broken the water from a simple bath mat will find its way into the core of your laminate and it is game over. The floor will look like a topographical map of the Andes within three months.
| Material Type | Janka Rating | Acclimation Time | Moisture Tolerance |
|---|---|---|---|
| Solid White Oak | 1360 | 7-10 Days | Low |
| Engineered Hickory | 1820 | 3-5 Days | Medium |
| High Density Laminate | N/A | 48 Hours | Moderate |
| Porcelain Tile | N/A | None | High |
The 1/8 inch that ruins everything
A deviation of only one eighth of an inch in floor height can prevent a toilet from sealing correctly against the wax ring. This is the structural zooming most people ignore. When you add 3/4 inch hardwood on top of a subfloor you are raising the height of the floor significantly. The toilet flange which was originally flush with the subfloor is now recessed. If you do not use a flange extender or a jumbo wax ring you will have a slow leak that rots your new floor from the bottom up. You will not even see it until the wood starts to blacken. This is why I always carry a variety of flange spacers. You have to ensure the transition from the waste pipe to the porcelain is airtight and watertight. A beautiful cut around the toilet is useless if the underside is a mess of sewer gas and gray water.
“Wood flooring shall not be installed until the building is enclosed and the HVAC system is operational.” – NWFA Technical Guidelines
The bathroom installation checklist
- Test the subfloor moisture content using a pin-type meter to ensure it is within 4 percent of the flooring material.
- Remove the toilet entirely rather than trying to cut around it while it is bolted down.
- Scribe the cardboard template to match the exact radius of the porcelain base.
- Apply a moisture barrier or a liquid-applied waterproof membrane over the subfloor near the shower and toilet.
- Leave a consistent expansion gap and fill it with 100 percent mold-resistant silicone.
- Verify the height of the toilet flange and install extenders if the new floor height exceeds the flange lip.
The ghost in the expansion gap
The ghost refers to the squeaking sound produced when wood planks rub against a hidden obstruction like a poorly placed nail or a tight fixture. In a bathroom this usually happens right at the toilet. If your cuts are too tight the wood will rub against the porcelain or the flange every time someone sits down. It is an annoying high pitched sound that is nearly impossible to fix once the floor is down. You have to be precise with your jigsaw. Use a fine-tooth blade to prevent splintering the wear layer. If you are working with engineered wood the veneer can chip easily if you use a standard rip blade. I always tape the cut line with blue painters tape to keep the edges clean. This small step separates the masters from the hackers who are just looking to get to the next job site. Precision is the only thing that lasts in this business.
The chemical bond of urethane adhesives
Modern urethane adhesives provide a moisture vapor barrier while maintaining the flexibility needed for natural wood movement. If you are glueing down your floor instead of nailing it you need to understand the molecular structure of the glue. Water based adhesives are a disaster for hardwood because they introduce moisture directly to the bottom of the plank. I only use premium moisture-cure urethanes. These adhesives actually use the moisture in the air and the subfloor to trigger the curing process. They create a rubbery membrane that stays flexible for decades. This allows the wood to expand and contract without breaking the bond to the subfloor. It is expensive but it is the only way to ensure the floor stays flat in a high humidity zone like a master bath. Cheap glue is just an invitation for a callback and I do not have time for callbacks.