
I once walked into a house where a $15,000 wide-plank walnut floor was cupping so bad it looked like a potato chip because the installer didn’t check the crawlspace humidity. That sight haunts me. It was a failure of basic physics and a lack of respect for the material. Most guys think they can just eye a cut or use a cheap plastic angle finder to navigate a stone fireplace or a curved shower transition. They are wrong. When you are working with solid oak or engineered maple, the margin for error is non-existent. Wood is a living, breathing thing. It responds to the atmosphere. If you force a bad cut or ignore the subfloor, the floor will eventually fight back. It will buckle. It will squeak. It will fail. My decades in the trade have taught me that the difference between a master and a hack is found in the preparation and the template.
The physics of the cardboard template trace
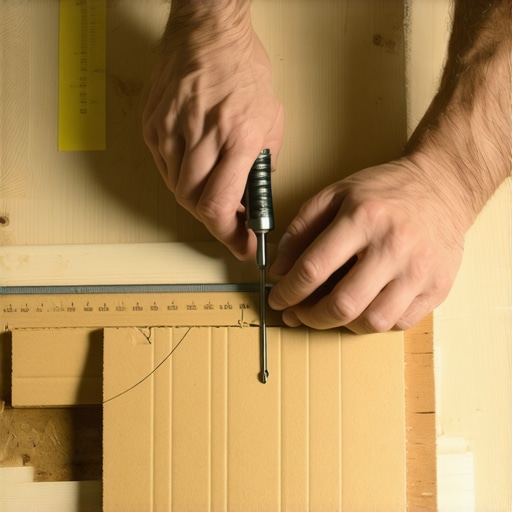
Templating with cardboard involves creating a physical 1:1 scale replica of a complex architectural footprint to ensure that hardwood floors or laminate planks fit perfectly against irregular surfaces like rock walls or circular columns. This method relies on the principle of scribing. You are not measuring with a tape; you are capturing the unique geometry of the space. You take a piece of heavy corrugated cardboard and lay it as close to the obstacle as possible. Using a scribe tool or a simple compass, you follow the contour of the wall while the pencil end marks the exact same path onto the cardboard. This transfers the organic, irregular line of a stone fireplace or a tile grout line directly to your template. When you transfer this to your wood, the fit is so tight you couldn’t slide a business card into the gap. This is vital because you need a precise 1/4 inch expansion gap that remains consistent even around difficult curves. If the gap varies, the trim won’t hide it, and the floor won’t have the space it needs to move during seasonal humidity shifts.
“A floor is only as good as the subfloor beneath it; deflection is the enemy of every joint.” – Master Flooring Axiom
Why your subfloor is lying to you
Subfloor levelness and structural integrity are the most overlooked aspects of a professional installation. A concrete slab might look flat to the naked eye, but it is often a landscape of valleys and peaks. I spent three days grinding concrete on a job last month just so the floor wouldn’t click like a castanet. If you have a dip of more than 1/8 inch over a 10 foot span, your floor is going to fail. For floating floors like laminate, that dip causes the tongue and groove locking mechanisms to flex every time someone walks over them. Eventually, those thin pieces of HDF or plastic will snap. For nail-down hardwood floors, a dip creates a void. When you walk on it, the plank rubs against the nail, creating that annoying squeak that homeowners hate. You must use a 10 foot straight edge. You must identify the high spots. You must grind them down or fill the low spots with a high-quality Portland-based leveling compound. Never use gypsum-based products if you are going to glue down your floor. The chemical bond simply won’t hold.
Molecular chemistry of modern floor adhesives
The adhesive bond between the subfloor and the wood depends on the cross-linking of polymers within the glue. Most high-end installers have moved away from water-based glues toward silane-terminated polymers or moisture-cure urethanes. These adhesives are engineered to be elastomeric, meaning they stay slightly flexible even after they cure. This is a structural necessity. Wood expands and contracts. If you use a brittle glue, the shear force of the wood moving will break the bond or, worse, pull chunks out of your concrete slab. Silane-modified polymers also act as a vapor retarder. They create a microscopic barrier that prevents moisture from the concrete from reaching the wood. When we talk about moisture, we are talking about the vapor drive. Even a dry-looking slab is constantly emitting water vapor. If that vapor gets trapped under the wood without a proper barrier, the wood cells will absorb it, the cell walls will swell, and your beautiful floor will cup. This is why we use a moisture meter on every single job. No exceptions.
Technical specifications for flooring materials
| Material Type | Janka Hardness Rating | Acclimation Time | Ideal Humidity Range |
|---|---|---|---|
| White Oak | 1360 | 7 to 10 Days | 35% to 55% |
| Brazilian Cherry | 2350 | 10 to 14 Days | 30% to 50% |
| Engineered Maple | 1450 | 3 to 5 Days | 35% to 55% |
| Laminate Flooring | N/A | 48 Hours | 40% to 60% |
The unseen threat of moisture migration
Moisture content in the subfloor must be within a specific percentage of the flooring material before the first plank is laid. For solid hardwood, the wood and the subfloor should be within 4% of each other. If you are installing wide-plank flooring, that margin drops to 2%. I have seen guys deliver wood to a job site and start nailing it down the same day. That is professional malpractice. The wood needs to sit in the environment where it will live. It needs to reach an equilibrium moisture content. If you take wood from a dry warehouse and put it into a humid house in New Orleans, it will expand. If you nail it down immediately, it will grow so much that it can actually push baseboards off the wall. We use pin-type meters for the wood and calcium chloride or in-situ RH probes for the concrete. The industry standard set by the NWFA is clear. If the slab is over 75% relative humidity, you need a high-performance moisture barrier. This is non-negotiable for anyone who values their reputation.
Checklist for precision angle execution
- Heavyweight cardboard or 1/4 inch luan for templating
- Fixed-point scribe tool or professional compass
- High-quality jigsaw with fine-tooth downward cutting blades
- T-bevel for measuring fixed wall angles
- Blue painter tape to protect the wood surface during marking
- Moisture meter with both pin and pinless modes
The ghost in the expansion gap
Expansion gaps at the perimeter are the lungs of a flooring system. Every floor, from laminate to solid oak, needs to breathe. I see people shove the wood tight against the drywall. They think it looks better. Six months later, the floor is peaking in the middle of the room because it has nowhere to go. You need at least 1/2 inch of space around the entire perimeter for solid wood. For showers and wet areas, this gap is even more critical. When you transition from a tile shower to a hardwood floor, you are dealing with two materials that react differently to water. You must use a proper transition strip and ensure that the grout line of the tile does not touch the wood. If water wicks from the shower area into the end-grain of the hardwood, the wood will rot from the inside out. Use a silicone-based caulk that matches the grout color to fill the transition gap, allowing for movement while keeping water out. This is the level of detail that separates a floor that lasts five years from a floor that lasts a lifetime.
“Wood moves. It is not a matter of if, but when and how much. Ignore the expansion gap at your own peril.” – National Wood Flooring Association
The 1/8 inch that ruins everything
Precision in the final cut is where the cardboard trick pays off. Once you have your template, you must transfer it to the wood with absolute care. Use a sharp pencil. A dull lead can add 1/16 of an inch to your line, which is enough to ruin a tight scribe. When you cut with the jigsaw, stay on the waste side of the line. You can always sand back a little wood, but you can’t put it back once it is gone. For complex angles around door casings, I prefer to undercut the jambs. This allows the wood to slide underneath the trim, creating a much cleaner look than trying to scribe around the molding. This technique, combined with a perfect cardboard template for the floor’s footprint, results in an installation that looks like it grew out of the walls. It takes more time. It takes more effort. But when you see the light hit a perfectly flat, perfectly fit floor, you know it was worth the sweat. Don’t be the guy who relies on wood filler to hide his mistakes. Be the guy who doesn’t make them in the first place.