
I smell like WD-40 and oak dust most days. My knees have the permanent calluses of a man who has spent twenty five years refusing to trust a floor that hasn’t been verified by a laser and a six foot level. Most guys skip the leveling compound. They think the underlayment will hide the dip. It won’t. I spent three days grinding concrete on a job last month just so the floor wouldn’t click like a castanet. That is the grit of the trade. If you do not respect the substrate, the substrate will eventually bite you. When it comes to showers, the stakes are even higher. You are building a vessel to hold water, not just a place to stand. Centering tile in a small shower is where the amateurs reveal themselves. They start at one wall and pray. By the time they hit the drain, they are cutting slivers of tile that look like toothpicks. It looks amateur and it is structurally weak. You need a chalk line and the discipline to use it before a single drop of mortar hits the pan.
The snap that defines your entire layout
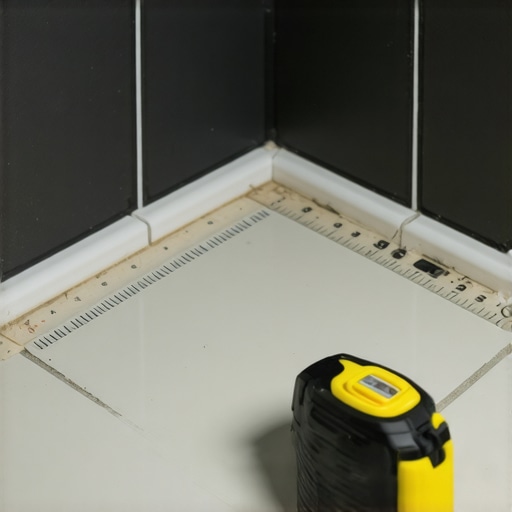
To center tile in a small shower you must establish two perpendicular reference lines using a chalk box and the 3-4-5 triangle method. This ensures the layout is square to the entry wall rather than the potentially crooked side walls which prevents unsightly sliver cuts at the edges of the shower. Precision starts with a snap. In a small space, even a 1/16 inch deviation at the starting wall will grow into a massive gap by the time you reach the far corner. You have to find the actual center of the room, not what the builder said was the center. This involves measuring the total width of the shower pan at both the front and the back. If the walls are out of square, which they always are, you have to split the difference. You mark the center point on the threshold and the back wall. You pull your chalk line tight, tighter than you think you need to. You snap it once. You now have a longitudinal axis. But a single line is not enough. You need a transverse line that is exactly 90 degrees to the first one. This is where the 3-4-5 rule comes in. Measure three feet on your first line, four feet on the perpendicular potential, and the diagonal must be exactly five feet. If it is not, your grout lines will eventually looks like a staircase. [IMAGE_PLACEHOLDER]
The physics of the subfloor and the bond
A shower floor is a structural assembly that requires a substrate variation of less than 1/8 inch over 10 feet to prevent tile cracking. The bond between the tile and the mortar depends on the mechanical keying and the chemical polymers within the thin set itself. You cannot just slap tile onto a piece of plywood and hope for the best. You need a cementitious backer unit or a mud bed that has been properly cured. When we talk about centering, we are also talking about load distribution. If your tiles are off center, your weight is not distributed evenly across the joists or the slab. I have seen grout crack because an installer put a heavy porcelain tile over a dip in the concrete without using a self leveling underlayment. The physics are simple. Any air gap under the tile is a point of failure. This is why back buttering is not a suggestion, it is a requirement. You apply a thin layer of mortar to the back of the tile with the flat side of your trowel. This ensures 100 percent coverage. Without it, the moisture in the shower will eventually find those voids, and you will have mold growing under your feet within three years. It is a biological disaster waiting to happen.
“A floor is only as good as the subfloor beneath it; deflection is the enemy of every joint.” – Master Flooring Axiom
The geometry of the perfect shower floor
Calculating your tile layout requires subtracting the width of the grout joints from the total span to ensure that the perimeter tiles are at least half the width of a full tile. This creates a balanced visual appearance and provides superior structural integrity at the wall transitions. If you are using a 12×12 tile in a 36 inch shower, you might think you need three full tiles. You are wrong. You forgot the grout joints and the expansion gap at the wall. If you start with a full tile at the wall, your final tile will be a tiny strip because of the thickness of the thin set on the wall. You must shift the entire layout by half a tile. This means your chalk line should actually represent the center of a tile or the center of a grout joint. This is the secret that separates the masters from the hackers. In a small shower, you want the largest possible pieces at the perimeter. Small slivers of tile have very little surface area for the mortar to grab. They are the first ones to pop loose when the house settles or when the temperature changes. We are talking about thermal expansion. Porcelain and ceramic move at different rates than the wood or concrete beneath them. If you do not leave an expansion gap at the perimeter, the floor will tent. It will lift right off the ground. It is a violent process that can shatter the tiles.
| Substrate Component | Standard Requirement | Real World Tolerance |
| :— | :— | :— |
| Concrete Slab | ANSI A108.01 | 1/8 inch per 10 feet |
| Plywood Subfloor | L/360 Deflection | Two layers 1-1/8 inch total |
| Mortar Coverage | 95% in wet areas | Zero voids allowed |
| Expansion Gap | 1/4 inch minimum | Perimeter of all walls |
The chemistry of grout and moisture resistance
Grout is not waterproof and serves as a sacrificial joint that allows for microscopic movement while preventing large debris from entering the tile assembly. High performance epoxy grouts offer superior chemical resistance and lower absorption rates compared to standard cementitious mixtures. People think grout is the seal. It is not. The waterproofing is the membrane under the tile. Grout is porous. If you use a cheap, sanded grout from a big box store, it will soak up water like a sponge. That water then sits on your waterproofing membrane. If that membrane has a single pinhole, you have a leak. This is why I prefer epoxy or high performance calcium aluminate grouts. They are harder to work with. They have a short pot life. They require a specific cleaning routine. But they are nearly impervious to water. When you are centering your tile, the width of your grout line is a technical decision. For a small shower, a 1/8 inch joint is standard. Anything larger and you are inviting more water into the system. Anything smaller and you risk not getting enough grout into the joint to create a proper bond. You have to pack it in. You don’t just wipe it over the top. You use a rubber float at a 45 degree angle to the joint and you push. You want that grout to hit the bottom of the tile. It should be a solid column of material.
“The maximum allowable variation for a tile substrate is 1/8 inch in 10 feet for large format tiles.” – TCNA Handbook Standards
The 1/8 inch that ruins everything
A single measurement error of 1/8 inch during the initial chalk line snap will compound across the entire floor leading to irregular grout joints and misalignment with the plumbing fixtures. Professional installers use a laser level to verify the chalk lines before setting the first tile. I have seen guys lose their minds over a tiny gap. They try to make it up in the grout joint. They widen one joint and narrow the next. By the middle of the shower, the floor looks like it was installed by someone with vertigo. You cannot hide bad geometry with grout. If your center line is off, your drain will not be centered. If your drain is not centered, the whole room feels broken. You have to measure from the center of the drain to your chalk lines. It should be equidistant. If it is not, move the line. It is easier to move a chalk line than it is to rip up a set tile. This is why I tell people to dry fit the floor first. Lay the tiles out on the dry pan. See how they hit the walls. See how they interact with the drain. Adjust your lines until the perimeter cuts are equal on all sides. It takes an extra hour. It saves you three days of regret. In the dry climate of Arizona, your thin set will skin over faster than you think. If you spend too much time thinking while the mortar is down, you will lose the bond. Plan first. Mix later.
- Measure the total width and depth of the shower pan at three different points.
- Mark the mathematical center on the threshold and the back wall.
- Snap a primary longitudinal chalk line between these two marks.
- Determine the perpendicular center and use the 3-4-5 rule to snap the transverse line.
- Dry lay a row of tiles in both directions to verify perimeter cut sizes.
- Adjust the lines if the perimeter cuts are less than two inches wide.
- Verify that the drain is centered or aesthetically aligned with the grid.
- Check the subfloor for any humps or dips greater than 1/8 inch.
The regional climate of your job site dictates your mortar selection. In high humidity areas like New Orleans, you need a thin set with a higher polymer content to resist the constant vapor pressure. In the desert, you need to dampen your substrate before applying mortar so the dry concrete doesn’t suck the moisture out of the thin set before it can hydrate. This is the chemistry of the trade. It is not about looking pretty. It is about a chemical reaction between Portland cement and water. If that reaction is interrupted, the floor fails. If you follow the chalk line, and you respect the chemistry, that floor will outlive the house. If you don’t, you’ll be calling someone like me to come out and grind your mistakes off the slab. And I don’t work cheap. Respect the layout. Respect the subfloor. Snap the line.