
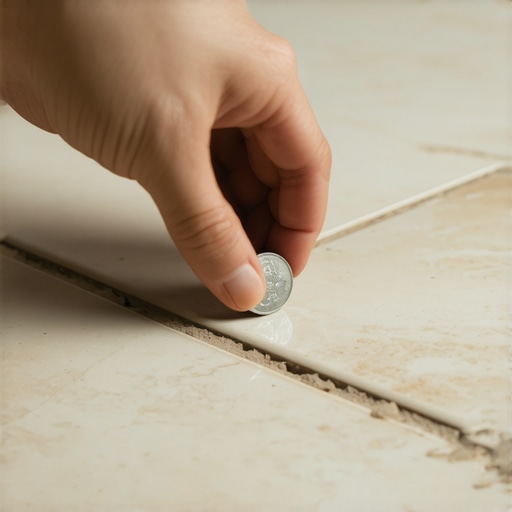
Hollow spots in floor tile are air pockets between the tile and the substrate caused by improper thin-set coverage or subfloor deflection. Detecting these voids early with the coin test prevents cracked grout and shattered ceramic. It is the most reliable low-tech diagnostic tool for homeowners and inspectors who need immediate results without expensive ultrasonic equipment.
The sound of a failing bond
The acoustic resonance of a floor tile changes based on the density of the material directly beneath it. When you strike a tile that has 100 percent mortar coverage, the sound wave travels through the tile and into the subfloor, creating a high-pitched, solid click. If there is an air gap, the sound wave reflects back, creating a dull, hollow thud. This is the physics of the coin test. Most guys skip the leveling compound. They think the underlayment will hide the dip. It won’t. I spent three days grinding concrete on a job last month just so the floor wouldn’t click like a castanet. That job was a nightmare because the previous installer thought he could just ‘spot bond’ the large format tiles. Spot bonding is a crime in the flooring world. It creates a series of structural bridges with empty caverns between them. When a heavy appliance or even a person in high heels walks over those caverns, the tile has nowhere to transfer the load. The result is a clean snap. This is especially vital in showers where water can sit in those hollow pockets and grow mold. Hardwood floors have their own issues with subfloor flatness, but with tile, the lack of support is catastrophic. Laminate might bounce, but tile will shatter. Grout will crack and fall out in chunks because the tile is moving independently of its neighbor. This movement is called deflection.
“A floor is only as good as the subfloor beneath it; deflection is the enemy of every joint.” – Master Flooring Axiom
Why the trowel notch matters
Trowel notch size determines the final bond thickness and the ability of the mortar to collapse into a solid bed. If an installer uses a notch that is too small for the tile size, the ridges will not meet the back of the tile. This leaves a grid of air. In the world of Large Format Tile (LFT), you need a 1/2 inch by 1/2 inch square notch at minimum. You also need to back-butter the tile. Back-buttering is the process of applying a thin layer of mortar to the back of the tile with the flat side of the trowel. This ensures 100 percent transfer. Without it, you are just hoping the ridges collapse. They rarely do perfectly on their own. The chemistry of the thin-set also plays a role. Modified thin-sets contain polymers that allow for a tiny bit of flexibility and a much stronger chemical bond. However, if the thin-set skins over because the installer waited too long to set the tile, the bond will fail. You can have a full bed of mortar that is not actually stuck to the tile. The coin test will find these ‘ghost’ bonds. The sound will be slightly different than a deep hollow spot. It sounds like a rattle rather than a thud. It means the tile is literally floating on top of the dried mortar.
The 1/8 inch rule for subfloor flatness
Subfloor flatness is measured by the maximum allowable deviation over a specific distance, typically 1/8 inch over 10 feet for large tile. If your subfloor looks like a mountain range, your tile will have hollow spots. You cannot ‘build up’ thin-set to level a floor. Thin-set is a bonding agent, not a leveling agent. It shrinks as it cures. If one side of a tile has 1/4 inch of mortar and the other has 3/4 inch, the thick side will pull the tile down more as the water evaporates. This creates lippage and hollow spots. You must use a self-leveling underlayment (SLU) to get the floor within spec before the first tile touches the ground. I have seen guys try to use plywood to shim a floor under laminate or hardwood floors, but for tile, you need a rigid, flat surface like cement board or a high-quality uncoupling membrane. These membranes allow the tile and the subfloor to move independently, which prevents the grout from cracking during seasonal humidity shifts. In places like Houston, the humidity can make a subfloor swell. In Phoenix, it dries out and shrinks. Your tile needs to be isolated from that movement.
| Condition | Sound Profile | Probable Cause | Risk Level |
|---|---|---|---|
| Solid Bond | High-pitched click | 95%+ coverage | Minimal |
| Hollow Center | Dull thud | Spot bonding | High |
| Hollow Corner | Short rattle | Poor back-buttering | Medium |
| Edge Void | Metallic ping | Trowel ridge failure | Medium |
The chemistry of adhesive failure
Adhesive failure occurs when the mechanical or chemical bond between the mortar and the tile or substrate is broken. This is often due to contamination. Dust is the silent killer of floors. If you do not vacuum the subfloor and wipe the back of the tile, the mortar sticks to the dust instead of the surface. It creates a cleavage plane. I have seen entire floors lift up like a carpet because the installer did not wipe off the factory dust from the back of the porcelain. Another factor is the water-to-powder ratio. If you add too much water to your thin-set to make it easier to spread, you are weakening the crystalline structure of the cement. When the water evaporates, it leaves behind microscopic voids. This makes the mortar brittle. It will sound hollow over time as the bond disintegrates under foot traffic. Always follow the manufacturer instructions for mixing. Use a low-speed drill to avoid whipping air into the mix. Air bubbles in the mortar are just tiny hollow spots waiting to happen.
“Standard thin-set mortar requires a minimum of 80 percent coverage in dry areas and 95 percent in wet areas or for natural stone.” – TCNA Handbook Standards
The professional hollow spot audit
A professional audit involves mapping the entire floor surface using a systematic grid to identify patterns of failure. Do not just tap randomly. Follow these steps to ensure you do not miss a hidden void.
- Clean the floor of all debris and area rugs.
- Use a heavy coin like a quarter or a 1-inch steel ball bearing.
- Tap each corner of the tile and the center.
- Listen for the pitch change between the center and the edges.
- Mark any hollow areas with blue painter’s tape.
- Observe the grout lines near the hollow spots for hairline cracks.
- Check the transition areas near hardwood floors or carpet.
The ghost in the expansion gap
Expansion gaps at the perimeter of a room are required to allow the floor system to expand and contract without building internal pressure. If you jam your tile tight against the wall, the floor has nowhere to go. It will ‘tent.’ Tenting is when two tiles push against each other until they pop up off the floor, creating a massive hollow V-shape. This can happen years after installation. I once saw a floor tent so violently it sounded like a shotgun blast. The homeowners thought a tree had hit the house. All because the installer did not leave a 1/4 inch gap at the baseboard. This is the same principle used for laminate and hardwood floors. Every material moves. If you do not respect the movement, the floor will destroy itself. The coin test can sometimes identify areas where pressure is building before the tiles actually pop. The sound will be tight and strained, almost like a drum head being tuned. If you find this, you might be able to save the floor by cutting out the perimeter grout and replacing it with a color-matched caulk.
Why your subfloor is lying to you
A subfloor might look flat to the naked eye while hiding significant structural deflection that causes tile failure. You need to check the joist span. If your joists are 24 inches on center, a standard 3/4 inch plywood subfloor is not enough for tile. It will flex. That flex breaks the bond of the thin-set. You need to add a second layer of plywood or use a specialized isolation membrane. I have walked onto jobs where the client spent a fortune on Italian marble only to have it crack within a month because the house was built with ‘builder-grade’ thin joists. The coin test in these cases will show hollow spots developing along the lines of the joists. It is a heartbreaking sight. You can fix a lot of things, but you cannot easily fix a bouncy house. If you are installing over concrete, check for moisture. A wet slab will push the thin-set off the surface as the moisture tries to escape. This is called osmotic blistering. It creates hollow spots that eventually lead to total delamination. Use a moisture meter. Do not guess. Your reputation is under that tile. Wear layers on laminate or the thickness of hardwood floors will not save you from a bad foundation. Get the base right or do not bother laying the first piece. This is the reality of professional flooring. It is not about what looks pretty on day one. It is about what stays solid for thirty years.