
Most guys skip the leveling compound. They think the underlayment will hide the dip. It won’t. I spent three days grinding concrete on a job last month just so the floor wouldn’t click like a castanet. That sound is the death rattle of a locking system. When the floor moves, the surface wears unevenly. I’ve spent twenty-five years on my knees with a moisture meter and a level, and I can tell you that a floor is a performance surface, not a decoration. If you treat it like a rug, it will fail you in five years. You need to treat it like a structural engineering challenge.
The physics of grazing light on synthetic surfaces
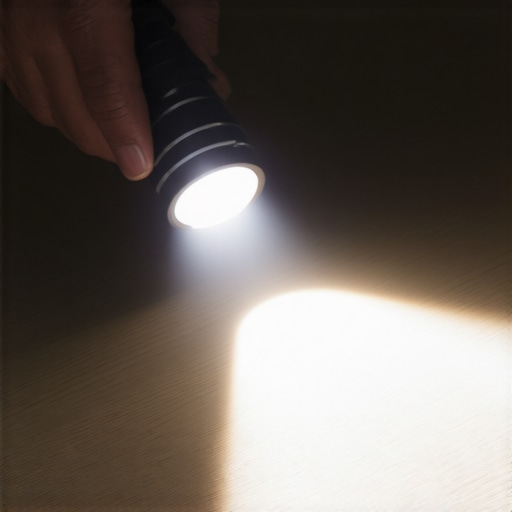
Identifying invisible scratches on laminate requires a technique known as grazing light to reveal topographic variations. By placing a high-lumen flashlight directly on the floor surface, you create long shadows that highlight micro-abrasions, surface haze, and structural compromises in the aluminum oxide wear layer. This method exposes damage that is invisible from a standard standing height. Modern laminate is built with a photographic layer protected by a resin-infused wear layer. While this surface is incredibly hard, it is not invincible. The flashlight trick is the only way to see if your cleaning habits are slowly sanding away the protection. If you see thousands of tiny parallel lines, you are likely using a vacuum with a beater bar that is too aggressive or a mop that is trapping grit.
The 1/8 inch that ruins everything
Subfloor flatness is the single most important factor in preventing surface damage and locking mechanism failure. Most manufacturers require a subfloor to be flat within 1/8 inch over a 6 foot radius or 3/16 inch over a 10 foot span. If your subfloor has a valley, the laminate planks will flex every time you walk over them. This deflection causes the tongue and groove to rub together, creating friction and heat. Eventually, the protective wear layer at the edges will begin to chip. I have seen countless homeowners blame the product when the fault lies entirely with the concrete slab or the plywood sheets beneath. You cannot fix a bad floor with a pretty plank. You fix it with a grinder and a bag of self-leveling underlayment.
“A floor is only as good as the subfloor beneath it; deflection is the enemy of every joint.” – Master Flooring Axiom
Distinguishing between micro-scratches and structural failure
Micro-scratches are shallow abrasions in the wear layer while structural failure involves the core material or the locking joints. When you use the flashlight trick, pay attention to the depth of the shadows. A micro-scratch will look like a thin hair. A structural crack or a peaked seam will cast a much wider shadow. Laminate is essentially a sandwich of high-density fiberboard and resin. If moisture gets into the core because of a scratch that penetrated the wear layer, the board will swell. This is common in areas near kitchens or entryways. Unlike hardwood floors, you cannot sand and refinish laminate. Once the wear layer is gone, the board is effectively dead. This is why identifying these issues early with the flashlight trick is so vital for the longevity of your investment.
| AC Rating | Traffic Level | Recommended Application | Wear Layer Thickness |
|---|---|---|---|
| AC1 | Moderate | Guest Bedrooms | Low mil-thickness |
| AC2 | General | Living Rooms | Medium mil-thickness |
| AC3 | Heavy | All Residential | High mil-thickness |
| AC4 | Commercial | Boutiques and Offices | Extreme durability |
| AC5 | Industrial | Public Buildings | Maximum impact resistance |
The ghost in the expansion gap
Every floating floor requires a minimum 1/4 inch expansion gap around the entire perimeter to allow for seasonal movement. Laminate is a wood-based product. Even though it is engineered, it still reacts to changes in relative humidity. If you pin the floor under a heavy kitchen island or fail to leave enough space at the walls, the floor will buckle. When the floor buckles, it lifts off the subfloor. This creates a trampoline effect. Every step you take on a buckled floor adds massive stress to the locking mechanisms. I have walked into homes where the floor looked fine at noon, but as the sun hit the boards and they expanded, the whole surface began to crown. The flashlight trick during these peak expansion hours will show you exactly where the tension is highest.
Why your subfloor is lying to you
A subfloor that looks flat to the naked eye can still have significant undulations that compromise the floor. You must use a straight edge to verify the surface before you ever click the first plank together. I once saw a job where the installer thought the foam underlayment would compensate for a 1/2 inch dip. Within six months, the planks had separated and the edges were shredded. The homeowner thought the dog had scratched the floor, but the flashlight revealed that the planks were actually rubbing against each other because of the vertical movement. This is why I advocate for rigid core products in areas with high temperature swings, as they offer slightly more stability, though they still require a flat base.
- High-lumen LED flashlight with a flat side to prevent rolling.
- A 6-foot or 8-foot professional straight edge.
- A moisture meter capable of reading both wood and concrete.
- Knee pads with non-marring rubber caps.
- Painter’s tape to mark identified scratches for repair.
The chemistry of cleaning agents and surface haze
Using the wrong chemicals on a laminate floor can create a sticky residue that attracts dirt and causes micro-abrasions. Many people use soap-based cleaners or waxes that are designed for hardwood floors. Laminate is non-porous. Those cleaners just sit on top and create a film. When you walk across that film, the dirt particles act like sandpaper. Using the flashlight trick, you can often see a cloudy haze on the floor. This is not damage to the floor itself, but a layer of dried chemicals. You need a pH-neutral cleaner specifically formulated for laminate. If you use a steam mop, you are asking for trouble. The heat and moisture can force their way past the seams and blow out the core of the boards. I have seen $10,000 floors ruined in a year by the regular use of a steam mop.
“Wood flooring is a living material that reacts to its environment; respect the moisture or prepare for failure.” – Master Flooring Axiom
Regional moisture protocols and humidity logic
In high-humidity regions like the Gulf Coast, managing the moisture vapor transmission rate is the difference between success and disaster. If you are installing over a concrete slab, you must use a 6-mil poly film moisture barrier. Concrete is like a sponge. It pulls moisture from the earth and releases it into your home. If that moisture gets trapped under your laminate without a barrier, it will rot the fiberboard core from the bottom up. In dry climates like Arizona, the opposite happens. The low humidity can cause the boards to shrink, leading to gaps between the planks. You must acclimate your flooring to the room environment for at least 48 to 72 hours before installation. Do not just leave the boxes in the garage. They need to be in the room where they will be installed, with the boxes cut open to allow air circulation.
The truth about waterproof laminate and showers
No laminate floor is truly waterproof in the same way that tile and grout are. Manufacturers often market products as waterproof, but they are usually referring to the surface. If water sits on the seams for more than a few hours, it will eventually find a way into the core. This is why laminate has no place in bathrooms with showers or in laundry rooms. If you want the look of wood in a wet area, you go with a luxury vinyl plank or a porcelain tile. Real grout in a shower is designed to handle standing water. Laminate is designed to handle an occasional spill that is wiped up immediately. If you use the flashlight trick in a bathroom, you will almost always find swelling at the seams near the tub or the toilet. It is a fundamental misapplication of the product.
Repairing the damage identified by the light
Once you have mapped out the scratches using the grazing light technique, you must decide on the repair method. For shallow scratches in the wear layer, a specialized floor repair marker or a wax filler stick can be used to hide the visual defect. You match the color to the darkest grain in the plank. For deeper gouges that reach the decorative paper, you need a floor paste that hardens into a plastic-like consistency. However, if the damage is widespread, board replacement is your only option. This is why I always tell my clients to buy two extra boxes of flooring. Ten years from now, that specific dye lot will be gone, and if you need to replace a plank in the middle of the room, you will be glad you have the stock. Replacing a plank involves cutting out the center of the damaged board and carefully removing the remaining pieces from the locking system before gluing in a new one with the bottom of the groove removed.
Final summary of maintenance and inspection
Routine inspection with the flashlight trick should be performed every six months. It allows you to catch issues before they become catastrophic. Check your transition strips and T-moldings to ensure they are not pinched. Look at the areas under your rolling office chairs. If you see micro-scratching starting to form, put down a polycarbonate mat immediately. Flooring is the most abused surface in your home. It bears the weight of your furniture and the friction of your footsteps. If you understand the structural requirements and the physics of the wear layer, your laminate floor can last for decades. Ignore the subfloor, skip the acclimation, or use the wrong cleaners, and you will be calling someone like me to tear it all out and start over. Build it right the first time.