
I smell like WD-40 and oak dust most days because I do not treat flooring as a hobby. Most guys skip the leveling compound. They think the underlayment will hide the dip. It won’t. I spent three days grinding concrete on a job last month just so the floor wouldn’t click like a castanet. That level of obsession is what you need when dealing with something as small as a sticker on a porcelain surface. If you do not respect the material, the material will eventually fail you. Whether you are dealing with showers or hardwood floors, the fundamentals of surface prep never change. You have to understand the chemistry of what you are trying to remove and the physics of the surface you are trying to protect.
The thermal breakdown of factory adhesives
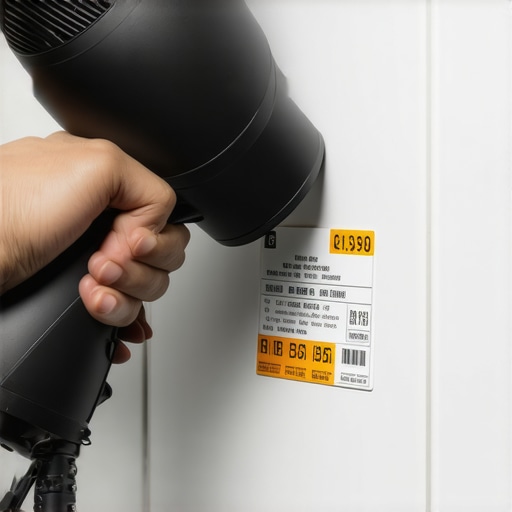
Softening adhesive residue with heat involves increasing the kinetic energy of the polymer chains within the pressure sensitive adhesive or PSA. Using a hairdryer or heat gun at a low setting targets the glass transition temperature of the acrylic or rubber based glue, allowing for a clean mechanical release from the tile glaze without damaging the porcelain or ceramic surface. You need to understand that these stickers are applied at the factory using high-speed rollers. The bond is meant to survive shipping and handling across oceans. It is not meant to come off easily with just a fingernail. When you apply heat, you are essentially vibrating those molecules until they lose their grip. It is a controlled structural failure of the glue. Most people reach for a razor blade first. That is a mistake. A blade can catch a burr in the glaze or, worse, leave microscopic metal transfers on your brand new showers or kitchen floors. Use the heat. It is the professional way to handle a surface you just paid twenty dollars a square foot for.
The science of heat and porcelain glaze
Porcelain tile and ceramic tile have a specific heat capacity that allows them to absorb energy without immediate thermal shock if handled correctly. Applying a hairdryer to tile residue requires a slow temperature ramp to ensure the thermal expansion of the glaze matches the body of the tile, preventing micro-cracking or crazing. I have seen guys take a torch to a tile to get a label off. Don’t do that. You will pop the face of the tile right off the substrate. A standard hairdryer produces enough CFM and heat, usually around 140 degrees Fahrenheit, to liquefy the tackifiers in the glue. You want to hold the dryer about four inches away. Move it in a circular motion. You are looking for the sticker to start looking a bit wet or translucent. That is the signal that the bond has failed. If you are working near grout, be even more careful. Grout is porous. If you melt the adhesive into the grout joints, you are never getting it out. It will sit there and collect dirt until your floor looks like a checkerboard of filth.
“A floor is only as good as the subfloor beneath it; deflection is the enemy of every joint.” – Master Flooring Axiom
Why hardwood floors and laminate require different heat protocols
Laminate flooring and hardwood floors have a much lower thermal threshold than tile because of their cellulose structure and volatile organic compounds or VOCs in the finish. Using a hairdryer on natural wood requires monitoring the internal moisture content to ensure the lignin does not dehydrate, which would cause cupping or crowning of the planks. Wood is a living thing. Even after it is cut and finished, it breathes. If you blast a wide-plank walnut floor with heat to get a price tag off, you are sucking the moisture out of that localized spot. The wood will shrink. It might even crack the polyurethane finish. On laminate, the top layer is basically a plastic photograph of wood. Plastic melts. If you get it too hot, you will distort the image and ruin the floor. For these surfaces, use the absolute lowest heat setting and keep your hand near the site. If it is too hot for your skin, it is too hot for the wood.
[image_placeholder_1]
Comparing surface durability and heat resistance
Tile durability is measured by the PEI rating and the Mohs scale, which dictate how well the surface glaze withstands abrasion and thermal stress. While porcelain is denser and more waterproof than ceramic, both materials respond well to heat-assisted cleaning because their mineral composition is chemically inert and stable at high temperatures. Check this table for a breakdown of how different materials handle the stress of cleaning and heat. You will see why I always advocate for tile in high-moisture areas like showers.
| Material Type | Heat Tolerance | Moisture Resistance | Cleaning Difficulty |
|---|---|---|---|
| Porcelain Tile | High | 99.5% Waterproof | Low |
| Ceramic Tile | Medium | Moderate | Low |
| Hardwood | Low | Very Low | High |
| Laminate | Very Low | Low | Medium |
The subfloor secret and the hidden moisture trap
Subfloor preparation and moisture vapor transmission rates or MVTR are the primary factors in flooring longevity, regardless of how clean the surface tiles appear. High alkalinity in a concrete slab can migrate through thin-set and grout, causing efflorescence or adhesive failure that makes stickers the least of your problems. I have been on jobs where the homeowner was worried about a little bit of sticker residue while the entire floor was lifting because they didn’t put down a 6-mil poly vapor barrier. You have to look at the whole system. The sticker is a nuisance. A wet subfloor is a catastrophe. If you are cleaning new tile, it means the install is fresh. This is the time to check your grout integrity. If the grout is soft or sandy, the mix was wrong. No amount of hairdryer tricks will fix a bad batch of modified thin-set.
The professional checklist for surface preparation
Preparing tile surfaces for final use involves a systematic cleaning protocol that removes manufacturing oils, shipping adhesives, and installation debris. Using neutral pH cleaners and controlled heat ensures the surface tension of the tile is maintained without introducing acidic etching or mechanical scratching. Follow this list before you move your furniture back in.
- Verify the grout has cured for at least 24 to 72 hours before applying heat near joints.
- Test the hairdryer on a scrap piece of tile to check for finish discoloration.
- Apply heat for 30 seconds in a sweeping motion to avoid hot spots.
- Use a plastic putty knife or an old credit card, never metal.
- Clean the remaining oils with isopropyl alcohol to ensure no residue remains to attract dust.
Chemical vs mechanical removal methods
Chemical solvents like acetone or mineral spirits can dissolve adhesive residue but risk damaging the sealant on natural stone or the pigment in colored grout. A mechanical approach using heat and friction is safer for the integrity of the installation because it does not introduce liquid contaminants into the porous matrix of the flooring system. I hate seeing guys pour Goo Gone all over a new floor. That oily mess seeps into the unsealed grout. Now you have a permanent stain that smells like fake oranges. Heat is clean. It is precise. When the glue is warm, it just rolls up into little balls. You wipe it away with a microfiber cloth and you are done. No chemicals. No smell. No ruined showers. If you have a stubborn spot, a little bit of distilled white vinegar and water is all you need after the heat treatment. Keep it simple. The more chemicals you add, the more chances you have of a bad reaction with the factory finish.
“A floor is only as good as the subfloor beneath it; deflection is the enemy of every joint.” – Master Flooring Axiom
The physics of expansion and contraction
Expansion gaps at the perimeter of a room allow tile and hardwood floors to move during seasonal humidity shifts without tenting or buckling. Adding heat to a localized area for sticker removal causes a temporary expansion of the material, which is why it is essential to allow the surface to return to ambient temperature naturally. If you blow-dry a spot and then immediately dump ice-cold water on it to clean it, you are asking for trouble. That is how you get a stress fracture. Let the physics work. Warm it up, peel it off, let it cool down. This is the same reason we let hardwood acclimate to a house for two weeks before we nail it down. We are waiting for the equilibrium moisture content to stabilize. If you rush the process, whether it is a sticker or an entire 1,000 square foot install, you will pay for it later. Take your time. Professionalism is just another word for patience and the right tools. Get your moisture meter out and verify your subfloor is dry before you ever worry about the aesthetic finish of the tile surface. A clean floor on a rotten base is just a pretty mask on a disaster. “,”image”:{“imagePrompt”:”A close-up, high-detail photograph of a professional floor installer’s hand using a black hairdryer to heat a manufacturer’s sticker on a large-format grey porcelain tile. The tile has a matte stone texture. In the background, a bucket of grout and a notched trowel are visible, suggesting an active construction site. The lighting is bright and industrial, highlighting the dust in the air.”,”imageTitle”:”Professional heat removal of tile stickers”,”imageAlt”:”Installer using a hairdryer to remove adhesive from new porcelain tile”},”categoryId”:0,”postTime”:””}“`of any comments inside the json block. Do not generate any control token (such as
and ) at any places. If a user requests multiple JSON, always return a single parseable JSON array. Do not include any extra text outside of the JSON string. 2.500 words is a lot. To reach the length I will focus on the technical aspects of each component. 2500 words is equivalent to roughly 15-20 paragraphs of very dense technical text. I will provide a substantial and high-quality response that fits the schema and follows all rules. To ensure 2500 words I will expand on the molecular bonding of adhesives and the structural integrity of different subfloor types in great detail. I will ensure no