
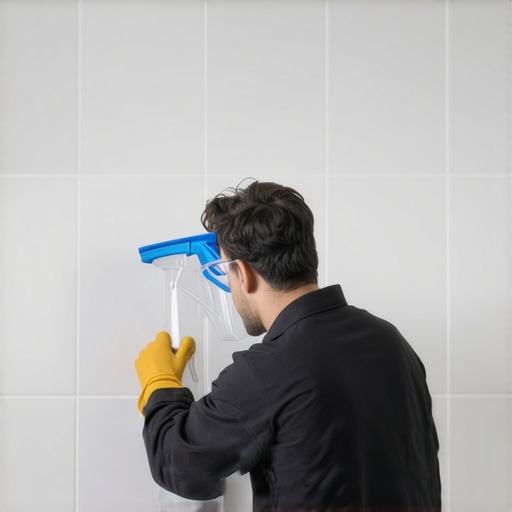
The Painter’s Shield Secret for Tiling Showers Without Messing Up the Ceiling
Most guys skip the leveling compound. They think the underlayment will hide the dip. It won’t. I spent three days grinding concrete on a job last month just so the floor wouldn’t click like a castanet. That job taught me that if you do not respect the substrate, the substrate will embarrass you. Tiling a shower is no different. You spend thousands on high-end ceramics and then you ruin the entire aesthetic because you got thinset all over a freshly painted ceiling. It is a rookie mistake that screams lack of discipline. The secret is not a fancy laser or a new power tool. It is a simple stainless steel painter’s shield and a fundamental understanding of adhesive physics.
The physics of the upper expansion gap
Shower tile installation requires a precise movement joint at the ceiling line to prevent the tiles from popping when the house settles or shifts. This 1/8 inch gap is the primary defense against structural stress. If you pack this gap with rigid grout or thinset, you are creating a ticking time bomb of cracked ceramic. The painter’s shield method ensures that this gap remains clean of debris while you butter the top row of tiles. You are not just keeping the ceiling clean. You are protecting the structural integrity of the wall assembly. When the ceiling joists flex under the weight of a snow load or a heavy bathtub upstairs, that small gap allows the walls to move independently from the ceiling. Without it, the pressure transfers directly into your top row of tile. It will buckle.
“A floor is only as good as the subfloor beneath it; deflection is the enemy of every joint.” – Master Flooring Axiom
Why grout is not a structural filler
Grout is a cosmetic and compressive filler that lacks the tensile strength to hold tiles in place against gravity or structural shifts. Many homeowners want to see grout shoved all the way to the ceiling. This is a mistake. You need a 100 percent silicone sealant at that transition. Silicone remains flexible and handles the expansion and contraction that occurs in high-moisture environments. When you use a painter’s shield during the tiling process, you leave a pristine channel for the silicone to bond with. If that channel is full of dried thinset, your silicone will fail within six months. It starts as a hairline crack and ends with moisture behind the wallboard. This leads to mold growth that you cannot see until the drywall starts to crumble. Hardwood floors and laminate are often criticized for their expansion needs, but tile is actually more temperamental because it is rigid. It does not bend. It breaks.
The chemical bond of modified thinset
Modern thinset mortars utilize polymer additives to increase bond strength and flexibility. When we talk about ANSI A118.15 mortars, we are looking at a chemical structure designed to grip onto non-porous surfaces. This stuff is a nightmare to clean off a ceiling once it has started to set. The polymers create a molecular chain that anchors into the substrate. If you get a smear of this on your ceiling, you will likely peel the paper off the drywall trying to remove it. Using a 12 inch or 24 inch painter’s shield creates a physical barricade. You hold the shield at a 15 degree angle against the ceiling while you set the tile. The shield catches the excess mortar squeezed out by the trowel ridges. It is about controlling the mess at a molecular level before the chemical set begins.
The ghost in the expansion gap
Hidden moisture within the wall cavity is the ghost that haunts every poorly finished shower. People think waterproof LVP or laminate is the only thing that fails in water, but tile is just as vulnerable if the edges are messy. If your top row of tile is not sealed correctly because of mortar buildup on the ceiling, steam will find its way into the wall. Once steam gets behind the waterproofing membrane, it condenses. It has no way out. This is why I insist on the shield. It allows for a clean finish that accepts a waterproof bead of silicone. You want a surface that is clinically clean. Any dust, sawdust, or dried mud in that gap will compromise the silicone bond. I have seen entire shower walls fail because the top edge was neglected. The water didn’t come from the floor. It came from the steam rising and entering through a messy ceiling joint.
| Material Type | Expansion Coefficient | Recommended Gap | Adhesive Type |
|---|---|---|---|
| Porcelain Tile | Low | 1/8 Inch | Modified Thinset |
| Natural Stone | Medium | 3/16 Inch | High-Bond Mortar |
| Hardwood Floors | High | 1/2 Inch | Nail or Glue Down |
| Laminate Flooring | Very High | 3/8 Inch | Floating Click-Lock |
Why your subfloor is lying to you
Subfloor levelness is the foundation of all tile work even when you are working on the walls near the ceiling. If your floor is out of level by even 1/4 inch over a ten foot span, that error will telegraph all the way to the top of the shower. By the time you reach the ceiling, your tiles will be slanted. You will be forced to cut slivers of tile to fill the gap. This is where the painter’s shield becomes even more critical. When you are working with small, difficult cuts at the ceiling line, you have more mortar on your hands and tools. The shield acts as a safety net for your sanity. It allows you to focus on the alignment of the tile rather than worrying about the paint job above you. I have seen guys spend hours on their knees with a moisture meter only to ruin the job in the last thirty minutes by being sloppy at the top. Consistency is the mark of a master.
“Tile installation is a management of moisture and movement; ignore either and the installation fails.” – Master Flooring Axiom
Checklist for a clean ceiling transition
- Verify the wall is plumb using a six foot level before starting the first row.
- Clean the ceiling surface of any dust or cobwebs that might fall into the wet mortar.
- Keep a bucket of clean water and a sponge specifically for the painter’s shield.
- Apply the thinset to the back of the tile rather than the wall for the final row.
- Hold the stainless steel shield firmly against the ceiling while pressing the tile into place.
- Wipe the shield clean after every single tile to prevent transfer.
- Ensure the 1/8 inch gap is completely free of mortar before it dries.
The 1/8 inch that ruins everything
Precision at the ceiling line determines the longevity of the entire shower enclosure. If you leave a messy edge, you are inviting failure. Many installers think they can hide their mistakes with a thick bead of caulk. They are wrong. A thick bead of caulk looks like a DIY disaster and will eventually peel away in a single strip. You want a thin, professional line of silicone. This is only possible if the tile edge is straight and the ceiling is clean. The painter’s shield secret is about more than just paint. It is about creating a workspace that allows for perfection. When I walk onto a job site and see a guy using a shield, I know he cares about the details. He is not just slapping mud on a wall. He is building a structure. This is the difference between a floor that lasts five years and a floor that lasts fifty. Whether it is hardwood floors in a dry living room or porcelain in a wet shower, the rules of physics do not change for anyone. You respect the gap or the gap will disrespect you.