
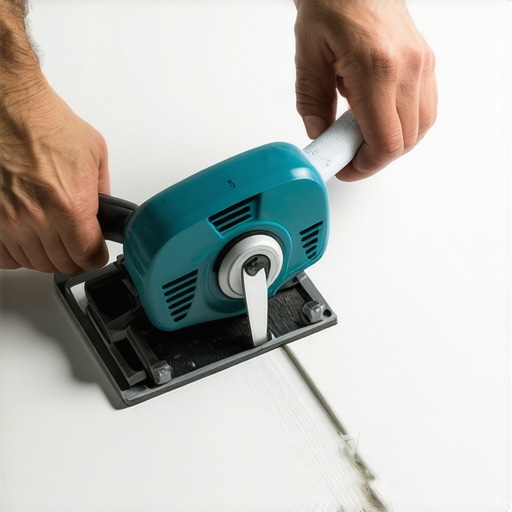
Most guys skip the leveling compound. They think the underlayment will hide the dip. It won’t. I spent three days grinding concrete on a job last month just so the floor wouldn’t click like a castanet. That job is the reason my back hurts today, but it is also why those floors will still be flat when the mortgage is paid off. You cannot hide a bad foundation with a pretty surface. When you are standing in a shower or walking across expensive hardwood floors, the physics of the subfloor dictates the longevity of the finish. It is the same story with cutting tile. You can have a three thousand dollar wet saw, but if you do not understand the surface tension of the glaze, you will end up with jagged edges that look like they were chewed by a dog. The painter’s tape hack is not just a DIY trick, it is a structural intervention that stabilizes the material at the point of impact.
The physics of the fractured glaze
To prevent tile from chipping during a cut, you must apply high-quality painter’s tape along the cut line to stabilize the glaze. The tape acts as a sacrificial layer that dampens the micro-vibrations of the diamond blade, ensuring that the crystalline structure of the porcelain or ceramic remains intact. This simple piece of tape manages the harmonic resonance of the material as the blade enters the surface. Think about the way a diamond blade works. It is not really cutting; it is grinding. When that grinding action hits the brittle glaze of a ceramic tile, it wants to shatter the edge. The adhesive on the tape provides just enough tension to keep those microscopic shards from flying away. It is about control. I have seen guys blow through a box of expensive subway tile because they were moving too fast. Speed is the enemy of a clean edge. You want the blade to do the work, and the tape to hold the fort. This is especially vital when dealing with high-gloss finishes that show every single imperfection. If you are working on showers where the tile is at eye level, a chipped edge is a permanent monument to your laziness.
The structural reality of the slab
A subfloor must be flat within one eighth of an inch over a ten foot radius to support modern large format tile or laminate floors. If the subfloor is not properly prepared, the vertical movement of the floor will eventually snap the locking mechanisms or crack the grout lines. I tell my clients that the floor is a machine. Every piece has to move in harmony. Last month, I walked onto a job where the previous installer had tried to shim a low spot with scraps of roofing felt. It was a disaster. The floor sounded like a haunted house. I had to rip it all up and get out the grinders. We spent hours in a cloud of dust, making sure that slab was true. When you are installing laminate, that thin piece of plastic locking the planks together is the only thing standing between a beautiful floor and a trip hazard. If there is a dip in the subfloor, every time you step on that plank, you are stressing that joint. Eventually, it will fail. It is not a matter of if, but when. We use a ten foot straight edge and we do not stop until the light stays under the bar. It is tedious, but it is the difference between a professional result and a callback.
“A floor is only as good as the subfloor beneath it; deflection is the enemy of every joint.” – Master Flooring Axiom
The tape method for precision results
The successful execution of a chip-free cut requires marking your line on the tile, applying the tape, and then re-marking the line on the tape surface. This dual-layer approach ensures that you have a clear visual guide while providing the necessary structural support to the tile glaze during the grind. Do not use the cheap, dollar-store tape. You need something with a medium tack that will not leave a residue but has enough body to resist the water from the wet saw. I prefer the blue or green varieties designed for multi-surface use. When the blade hits the tape, the fibers of the tape hold the glaze in place. This is the same logic we use when cutting veneered hardwood floors. You want to prevent the grain from splintering. For laminate, the tape serves an additional purpose. It prevents the decorative paper layer from lifting off the HDF core. People think laminate is tough, and it is, but the edges are vulnerable during the installation phase. One bad cut and you have a white line of exposed core showing at your transition. That is why we tape, we mark, and we cut slow. It is about managing the friction and the heat generated by the blade.
| Material Type | Janka Hardness or Grade | Blade Requirement | Tape Strategy |
|---|---|---|---|
| Porcelain Tile | PEI 4-5 | Continuous Rim Diamond | Double Layer Blue Tape |
| Ceramic Tile | PEI 2-3 | Continuous Rim Diamond | Single Layer Blue Tape |
| White Oak Hardwood | 1360 lbf | 80-Tooth Carbide | Low-Tack Green Tape |
| Laminate Flooring | AC3-AC5 | Fine Finish Carbide | High-Tack Masking Tape |
Hardwood floors and the atmospheric battle
Hardwood floors are organic materials that react to the relative humidity of the environment by expanding and contracting across the grain. To prevent cupping or crowning, installers must ensure that the wood has reached its equilibrium moisture content before the first nail is driven. I have seen fifteen thousand dollar walnut floors ruined because someone was in a hurry. They delivered the wood, and the installer started banging it down the next day. The wood was at 12 percent moisture, but the house was at 6 percent. Two weeks later, the floor looked like a washboard. You cannot fight nature. You have to work with it. We use moisture meters on every job. We check the subfloor and we check the planks. If they are more than two percent apart, we wait. I do not care if the homeowner is screaming that they want to move in. I am not putting my name on a floor that is going to fail. We leave expansion gaps at every wall. We call it the ghost in the gap. It is the space the floor needs to breathe. If you pin it against the drywall, it will find another way to move, usually by lifting right off the subfloor. Use a half-inch spacer and cover it with baseboard. It is the only way to keep the peace.
Grout performance and the chemical bond
The strength of a tile installation depends on the chemical bond between the thin-set and the substrate as well as the compressive strength of the grout used in the joints. Modified thin-set mortars contain polymers that allow for slight movement without losing adhesion to the tile. When you are doing showers, the grout is not just for looks. It is a structural component. But people treat it like mud. They add too much water, which weakens the polymer chain. Then they wonder why the grout is crumbling six months later. I always use a distilled water or a specific liquid additive to ensure the mix is perfect. It should have the consistency of peanut butter. If it is runny, you are asking for trouble. And do not get me started on sealer. You can have the best grout in the world, but if you do not seal it, the soap scum and hard water will eat it alive. For hardwood floors, we do not use grout obviously, but the principle of the bond remains. Whether you are using cleats, staples, or adhesive, that bond is what prevents the floor from creaking. A squeaky floor is a sign of a loose fastener or a gap in the glue. It is a failure of the mechanical connection.
- Inspect the subfloor for any protruding nails or screws that could cause a pivot point.
- Vacuum the entire surface to remove sawdust and debris that interfere with adhesive.
- Check the squareness of the room by using the 3-4-5 triangle method to avoid tapered cuts.
- Maintain a consistent temperature in the room for 48 hours prior to and after installation.
- Always use a new blade when starting a project involving expensive or fragile materials.
Shower waterproofing and the invisible barrier
Modern shower installations require a bonded waterproof membrane to prevent moisture from reaching the wall studs and causing structural rot. The tile and grout are water-resistant but not waterproof; the real protection happens behind the surface. This is the part people do not see, so they think they can cut corners. I have torn out showers where the 2x4s were so rotten you could crumble them with your fingers. The installer thought that just putting up cement board was enough. It is not. Cement board is stable when wet, but it lets water pass right through it. You need a liquid-applied membrane or a sheet-membrane system like Schluter-Kerdi. We coat every corner and every screw head. We flood test every pan. If it does not hold water for 24 hours, we do not tile. It is about the integrity of the system. Whether you are laying laminate or installing a custom shower, the goal is the same. You are building something that should last a lifetime. That is why we use the tape hack, why we grind the concrete, and why we obsess over the moisture readings. Because when the job is done, the only thing that should be visible is a perfect, flat, stable surface.