
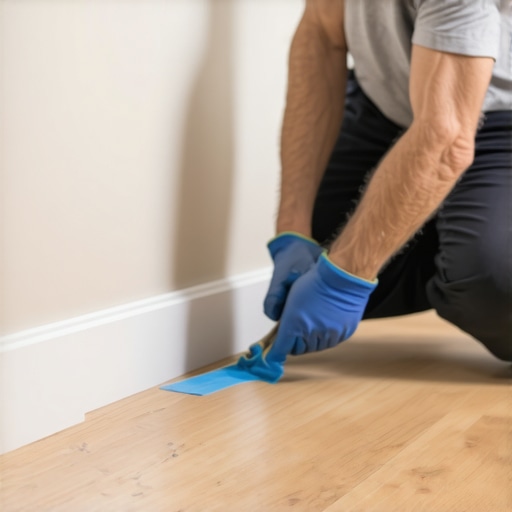
The Painter’s Tape Hack for Cutting Baseboards Without Splinters
Most guys skip the leveling compound. They think the underlayment will hide the dip. It won’t. I spent three days grinding concrete on a job last month just so the floor wouldn’t click like a castanet. That job was for a high-end client who noticed every single gap. If the floor is not flat within 3/16 of an inch over 10 feet, your baseboards will never sit right, and your expensive hardwood floors will eventually fail at the tongue. I have seen it a thousand times. You spend $10,000 on material and then try to save $200 by skipping the floor prep. It is a recipe for a callback that will cost you your reputation. When we talk about baseboards, we are talking about the final frame of a structural masterpiece. If that frame is splintered or jagged, the whole room looks like a DIY disaster. I have been cutting trim for 25 years. My hands are permanently stained with oak dust and I can smell a moisture problem from the front door. You do not get that kind of instinct from a YouTube video. You get it from making mistakes and vowing never to repeat them. One of the most effective tricks in my arsenal is the use of high-quality painter’s tape to maintain the integrity of the wood grain during high-speed mechanical shearing. This is not just about aesthetics. It is about the physics of the blade and the way wood fibers react to tension.
The microscopic reality of a splintered edge
To prevent splintering when cutting baseboards, you must provide external support to the wood fibers at the point where the saw blade exits the material. High-quality painter’s tape acts as a temporary binder that holds the lignins and cellulose together, preventing the blade from lifting and tearing the grain. This occurs because miter saw blades, even those with high tooth counts, exert upward or outward pressure depending on the rotation. When the blade teeth move through the wood, they seek the path of least resistance. On a factory-finished baseboard, that path is often through the brittle topcoat or the soft latewood between the rings. By applying tape, you change the surface tension and provide a sacrificial layer that the blade must pass through before it hits the wood. This is especially vital when dealing with materials like laminate or engineered hardwood floors where the wear layer is thin and prone to chipping. The chemical bond of the tape adhesive, while low-tack, is sufficient to provide the lateral support needed to keep the cut line crisp. We are talking about preventing microscopic fractures that lead to visible daylight in your miter joints.
“A floor is only as good as the subfloor beneath it; deflection is the enemy of every joint.” – Master Flooring Axiom
Why your subfloor is lying to you
Your subfloor is almost never as flat as it looks to the naked eye, and these hidden undulations are what cause baseboards to gap or splinter during installation. Even a slight dip in the plywood or concrete will force you to scribe the trim or deal with unsightly shadows. I have spent hours with a 10-foot straightedge identifying the lies told by general contractors. They say it is ready for flooring. I say it is ready for a jackhammer. If you are installing hardwood floors, you must understand that the wood is a living material. It expands and contracts with the seasons. If the subfloor has a crown, the baseboard will be under constant tension. When you go to cut that baseboard, the internal stresses of the wood are released. If you have not used the tape hack, that release of tension often manifests as a large splinter right at the most visible part of the miter. This is why I insist on checking moisture levels in every slab. A wet subfloor will swell the bottom of your baseboard, pushing it away from the wall and ruining your perfect 45-degree angle. You need to know the relative humidity of the room and the moisture content of the wood. If they are not within 4 percent of each other, you are inviting a disaster that no amount of tape can fix.
The 1/8 inch that ruins everything
The most common mistake in flooring is failing to respect the expansion gap, which must be a minimum of 1/8 inch to 1/4 inch depending on the material and room size. Baseboards are designed to hide this gap, but they should never be pinned tight against the floor. If you jam the baseboard down too hard, you lock the floor in place. This is a death sentence for laminate and floating hardwood floors. When the humidity rises, the floor has nowhere to go but up. It will buckle. I have walked into homes where the floor was hovering three inches off the subfloor because the installer pinned the baseboards like he was building a coffin. When cutting your baseboards to hide these gaps, the tape hack becomes your best friend. It allows you to mark your measurements directly on the tape with a sharp pencil. A pencil mark on dark wood is hard to see. A pencil mark on blue tape is as clear as day. This precision ensures that your expansion gap is consistent around the entire perimeter, allowing the house to breathe without showing the ugly structural edges underneath.
Comparison of wood density and blade performance
| Wood Species | Janka Hardness | Blade Tooth Count | Splinter Risk |
|---|---|---|---|
| White Oak | 1360 | 80 TCG | High |
| Black Walnut | 1010 | 60 ATB | Medium |
| MDF Trim | Variable | 80 ATB | Extreme |
| Pine | 420 | 40 ATB | Low |
The chemistry of the blue tape adhesive
Selecting the right tape requires an understanding of adhesive chemistry and the surface energy of your baseboard finish. You need a tape with enough tack to hold the wood fibers in place but low enough adhesion to prevent pulling off the factory finish when the tape is removed. Not all tapes are created equal. Some cheap masking tapes use a rubber-based adhesive that can leave a residue or, worse, chemically bond with the polyurethane on your hardwood floors. I prefer a medium-tack acrylic adhesive. The acrylic stays stable under the heat generated by the friction of the saw blade. When that blade is spinning at 4,000 RPM, it generates significant thermal energy. A poor adhesive will melt and gum up the teeth of your blade, leading to a jagged cut. The tape also serves as a lubricant of sorts, allowing the guard of the miter saw to slide over the finished surface without leaving those annoying black scuff marks. It is a simple barrier that solves three problems at once: splintering, marking, and measurement visibility. This is the difference between a mechanic and a hack. We think about the friction, the heat, and the molecular bond.
Showers and the grout line nightmare
Transitions between flooring and wet areas like showers require a deep understanding of grout chemistry and waterproofing membranes. You cannot simply run your baseboards up to a shower curb without considering the capillary action of water through the grout joints. Water is a persistent enemy. It will find a way into your subfloor if you give it even a microscopic path. When I install flooring near a bathroom, I am looking at the TCNA handbook. If you are transitioning from hardwood floors to tile, that transition strip is a structural necessity, not a suggestion. I have seen baseboards rot out in six months because the installer didn’t seal the end grain near a shower. When you cut that end grain, use the tape. It keeps the cut square. Then, you must seal that cut with a high-quality primer before it ever touches the wall. Grout is porous. It absorbs moisture from the air and the floor. If your baseboard is touching the grout, it is drinking that moisture. This leads to swelling, mold, and the eventual failure of the adhesive bond. You need a 1/8 inch gap between the trim and the tile, filled with a color-matched 100 percent silicone caulk, never grout. Grout will crack at the change of plane. Silicone will flex.
“Deflection is not just a number on a chart; it is the sound of a floor failing one step at a time.” – Master Flooring Axiom
The step by step guide to splinter free cuts
- Measure the wall twice using a laser distance meter for accuracy within 1/32 of an inch.
- Wrap the cut area of the baseboard with blue painter’s tape, ensuring it is tight against the profile.
- Mark your cut line on the tape using a 0.5mm mechanical pencil for a fine, precise line.
- Set your miter saw to the correct angle, accounting for walls that are rarely a perfect 90 degrees.
- Bring the blade up to full speed before it touches the wood to ensure a clean entry.
- Lower the blade slowly through the material, letting the teeth do the work without forcing it.
- Keep the saw head down until the blade has completely stopped spinning to avoid catch-back.
- Peel the tape back slowly at a 45-degree angle to avoid lifting any of the finish or wood grain.
Laminate transitions and structural movement
Laminate flooring requires specialized cutting techniques because the aluminum oxide wear layer is incredibly brittle and will chip if the blade speed or tooth geometry is incorrect. Using painter’s tape is mandatory for laminate to prevent the decorative paper from delaminating from the HDF core. People think laminate is easy. It is actually one of the hardest materials to get a perfect cut on because it is essentially a photograph glued to sawdust and topped with glass. The tape provides a protective skin. When cutting laminate baseboards or transition T-moldings, I often use a sacrificial backer board behind the trim. This, combined with the tape, creates a sandwich that prevents the wood fibers from blowing out the back. You also have to watch the heat. Laminate cores can scorch. If you see smoke, your blade is dull or you are moving too slow. A scorched edge will not hold wood filler and it will look like garbage. Precision in these cuts is what separates a floor that looks like it was thrown in and a floor that looks like it grew there. You want the latter if you want to get paid the big bucks.
Final thoughts for the job site
Success in this trade is about the details that no one sees until they fail. The tape hack is a small part of a larger philosophy of care. It represents a respect for the material and the craft. When you take the time to wrap a board in tape, you are telling the client that their home is worth the extra thirty seconds. You are saying that you understand the physics of the saw and the nature of the wood. My knees might hurt and I might have sawdust in my lungs, but my miters are tight and my floors don’t squeak. That is the only thing that matters at the end of the day. Don’t be the guy who skips the prep. Don’t be the guy who thinks a dull blade is good enough. Use the tape, check your moisture, and treat every subfloor like it is the foundation of a cathedral. If you do that, you will never have to worry about a callback. You will just have to worry about how to spend all the money you make from being the best installer in town. Keep your blades sharp and your levels true.