
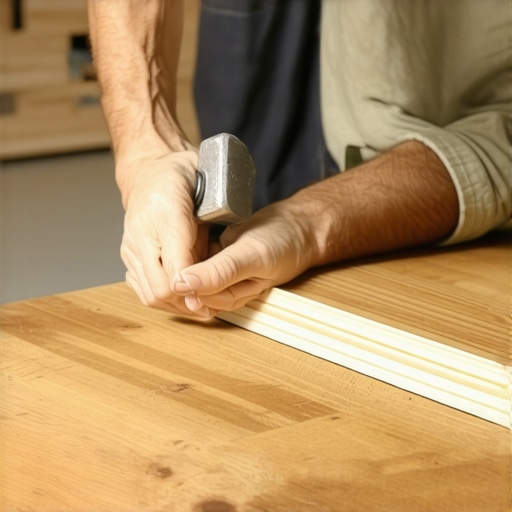
I have spent twenty five years on my knees with a moisture meter and a level. My hands are permanently stained with oak dust and smell like the WD-40 I use to maintain my saw blades. Most guys skip the leveling compound. They think the underlayment will hide the dip. It won’t. I spent three days grinding concrete on a job last month just so the floor wouldn’t click like a castanet. That job reminded me that a floor is not a decoration. It is a structural engineering challenge. If you treat laminate like a puzzle piece, you will fail. You have to treat it like a mechanical assembly that requires precision, force, and a deep understanding of material physics. Seating a stubborn joint is not about brute strength. It is about managing the kinetic energy of a mallet strike through a tapping block to engage the locking mechanism without shearing the high density fiberboard tongue.
The physics of the mallet strike on high density fiberboard
Laminate flooring joints rely on mechanical locking mechanisms such as Uniclic or Valinge profiles to maintain structural integrity. These systems require a specific angle of entry and compressive force to seat the tongue into the groove. Using a rubber mallet provides the necessary impulse while protecting the aluminum oxide wear layer from impact damage or fracturing. Most people think they can just shove the planks together. They are wrong. When you deal with a stubborn joint, you are fighting friction and often a minute manufacturing defect in the HDF core. The rubber mallet trick is about creating a vibration that allows the tongue to slide past the initial resistance point. You never hit the plank directly. You use a tapping block. The block must be seated against the edge, and the strike must be horizontal. If you hit at a downward angle, you will snap the lower lip of the groove. I have seen countless DIY jobs ruined because someone thought they could ‘hammer’ the floor into submission. You are not hammering. You are seating.
“A floor is only as good as the subfloor beneath it; deflection is the enemy of every joint.” – Master Flooring Axiom
Why your subfloor is lying to you
Subfloor flatness is the primary reason laminate joints fail to seat properly or click after installation. According to NWFA standards, a subfloor must be flat within 1/8 inch over a 10 foot radius. Any deviation or dip causes the locking mechanism to sit at an acute angle, preventing the tongue and groove from aligning. When the floor is not flat, the mallet trick becomes a rescue mission. You are essentially forcing a rigid material to conform to a non-planar surface. This creates internal stress. Over time, that stress will lead to joint separation. I always carry a 10-foot straight edge. If I see a dip, I fill it with a high-strength Portland cement-based leveler. If I see a hump, I grind it down. The chemistry of the leveling compound matters too. You want something with high compressive strength, usually over 3,000 PSI, to ensure it doesn’t crumble under the weight of the floating floor system. People ask me about hardwood floors versus laminate in these scenarios. Hardwood can sometimes be shimmed or nailed to compensate, but laminate is a floating system. It has no forgiveness. If the subfloor is off, the mallet trick is just a temporary fix for a permanent problem.
The ghost in the expansion gap
Expansion gaps are mandatory around the perimeter of the room to allow for thermal expansion and hygroscopic movement. Without a 1/4 inch to 1/2 inch gap, the laminate planks will buckle or peak as the HDF core absorbs ambient humidity. The rubber mallet helps ensure that as you seat joints, you are not closing the expansion gap on the opposite side of the room. I once saw a $5,000 floor peak in the middle because the installer didn’t leave a gap at the drywall. He thought he could tight-fit it. Two weeks later, the humidity rose by ten percent and the floor turned into a mountain range. You need spacers. Real spacers, not scraps of wood. You need the plastic ones that won’t compress when you start tapping. Every time you strike that mallet, you are transferring energy across the entire span of the floor. If you don’t have spacers, you are just slamming the floor into the wall, which will eventually cause the joints to bounce back and open up.
| Feature | Standard Specification | Critical Threshold |
|---|---|---|
| Core Density | 850-950 kg/m3 | Less than 800 fails |
| Wear Layer | AC3 to AC5 Rating | AC1 is for bedrooms only |
| Subfloor Flatness | 1/8 inch per 10 feet | 1/4 inch causes joint snap |
| Acclimation Time | 48 to 72 Hours | Zero hours leads to shrinkage |
| Expansion Gap | 1/4 inch minimum | Zero gap causes peaking |
The chemical reality of moisture and melamine resins
Moisture vapor transmission rates or MVTR determine the longevity of laminate and its joint stability. The HDF core is composed of wood fibers bonded with melamine-urea-formaldehyde resins, which are hygroscopic and will swell if exposed to excessive vapor from a concrete slab. This is why you need a 6-mil poly vapor barrier. If the moisture is too high, the edges of the planks swell. This is called ‘telegraphing’ or ‘edge peaking.’ When the edges swell, the mallet trick won’t work because the tongue is now physically larger than the groove it is supposed to enter. I don’t care if the box says ‘waterproof.’ That usually only refers to the top surface. The core is still susceptible to moisture from below. In showers or bathrooms, I usually advise against laminate and suggest grout and tile instead. But if you must use laminate, you need to seal the perimeter with 100 percent silicone. This prevents topical water from reaching the core. The chemistry of the adhesive in the core is designed to resist some moisture, but it is not a submarine. It will fail if submerged.
“Wood and water have a volatile relationship; the installer is the mediator who must ensure they never meet in secret.” – Master Flooring Axiom
The 1/8 inch that ruins everything
Precision cutting at the door jambs and thresholds is where the rubber mallet technique is most frequently tested. If a plank is cut 1/8 inch too long, it will bind against the jamb, preventing the long-side joint from locking. You cannot mallet your way out of a bad cut. I use an undercut saw to make sure the floor can slide underneath the door casing. This allows the floor to move as one unit. If you pin the floor under a heavy cabinet or a jamb, you kill the floor’s ability to breathe. This leads to the locking mechanisms snapping under the pressure of expansion. I have seen guys try to use a pull bar and a mallet to force a piece into a space that was too small. All they did was mushroom the edge of the plank. If it doesn’t go in with a firm, controlled tap, something is wrong with your geometry or your subfloor. Stop and look. Is there a piece of debris in the groove? Is the tongue damaged? Is the subfloor humped? One of the most common issues is a tiny piece of the HDF core that broke off and is sitting inside the groove. You will never seat that joint until you clean it out.
- Check subfloor for 1/8 inch flatness over 10 feet.
- Acclimate planks for 48 hours in the installation environment.
- Install a 6-mil poly vapor barrier over concrete.
- Use 1/2 inch spacers for perimeter expansion gaps.
- Inspect every groove for debris or manufacturing defects.
- Use a white rubber mallet and a professional-grade tapping block.
- Strike horizontally to avoid breaking the groove lip.
Engineering the perfect transition
T-moldings and threshold transitions are necessary in large spans exceeding 30 feet to prevent cumulative expansion stress. The rubber mallet is used here to seat the molding into its track without denting the surface. I hate bulky T-moldings as much as the next guy, but they are a structural necessity. If you try to run laminate through a house without transitions, the floor will eventually pull itself apart at the narrowest point, usually a doorway. The physics are simple. The more mass you have, the more it will move. By breaking the floor into smaller sections, you manage the force of that movement. When you are seating these transitions, the mallet strike should be light. You are clicking plastic into a metal or plastic track. If you hit it too hard, you will bend the track, and the molding will never sit flush. It is a game of finesse, not power. The same applies to grout in tile installations. You don’t force it. You work it. In flooring, if you are forcing something, you are probably breaking it. The mallet is an extension of your hand, a tool for communication between the installer and the material.