
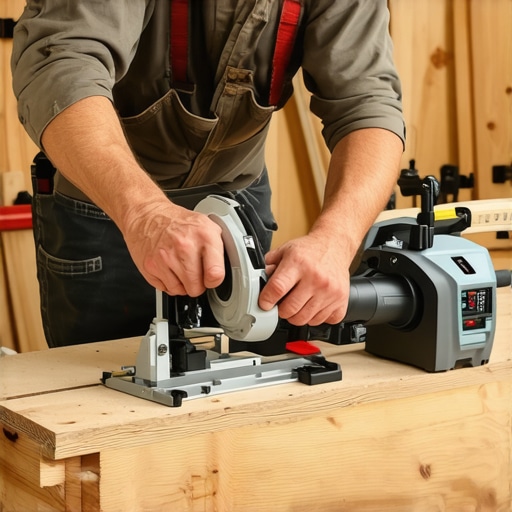
The structural reality of a crooked wall
Baseboard miters fail because wall angles rarely measure exactly ninety degrees. Installers must use protractor measurements and subfloor leveling to ensure the baseboard sits flush. Without a flat substrate, the miter joint will open at the top or bottom. Most guys skip the leveling compound. They think the underlayment will hide the dip. It won’t. I spent three days grinding concrete on a job last month just so the floor wouldn’t click like a castanet. If that floor clicks, those baseboards are going to show a gap every time someone walks past. I can still smell the mix of WD-40 on my saw blade and the fine oak dust hanging in the air. That job taught me that a miter cut is not a carpentry task. It is a structural engineering response to a failed subfloor. You cannot hide a quarter-inch dip with a fancy piece of trim. The floor is a performance surface. If the subfloor is out of spec, your finish work is doomed before you even plug in the miter saw. I see it every day in the field. High-end hardwood floors are ruined because the installer did not understand the physics of the expansion gap. They pin the baseboard too tight, the floor expands, and suddenly the miter joints in the corners start popping like gunshots.
The 1/8 inch that ruins everything
Subfloor flatness is the primary determinant of miter quality. A deviation of one eighth of an inch over ten feet can cause a baseboard to sit at an angle, creating a compound gap in the corner. Professional installers use self-leveling underlayment to mitigate this risk. When you are dealing with hardwood floors, you have to account for the hygroscopic nature of the material. Wood moves. It breathes. It is a living thing even after it is milled and finished. If your subfloor is not flat to within 3/16 of an inch over a 10-foot radius, the floor will deflect under foot traffic. This vertical movement puts immense stress on the baseboard nails. Eventually, the nails pull, and your perfect miter becomes a sloppy mess. I use a digital protractor for every single corner. I do not care if the house is brand new or a hundred years old. Walls are never square. If you cut at 45 degrees for a 90-degree corner that is actually 91 degrees, you have a gap. That gap is where the homeowner sees the lack of craft. It is where the dust collects. It is where the quality of the entire project is judged.
“A floor is only as good as the subfloor beneath it; deflection is the enemy of every joint.” – Master Flooring Axiom
Why your subfloor is lying to you
Concrete slabs and plywood subfloors often contain latent moisture that compromises adhesive bonds. This moisture causes subfloor swelling, which tilts the baseboard plane. Testing with a calcium chloride kit or a pinless moisture meter is the only way to verify substrate readiness. While most people want the thickest underlayment, too much cushion actually causes the locking mechanisms on LVP to snap under pressure. This same over-cushioning allows the floor to sink when someone stands near the wall. If the floor sinks, the baseboard stays put, and a visible line appears. It looks amateur. I prefer a high-density rubber or felt underlayment that offers minimal compression. You want a compression resistance rating of at least 20 psi. Anything less is just a sponge that will ruin your trim lines. When installing laminate, people forget that the floor is a floating raft. It needs to move independently of the walls. If you caulk the bottom of your baseboard to a laminate floor, you are essentially anchoring the raft. When the humidity drops in the winter, the floor will shrink and pull the baseboard off the wall or crack the laminate locking tabs. It is a common mistake made by painters who do not understand flooring physics.
| Actual Wall Angle | Miter Saw Setting | Bevel Adjustment | Gap Potential |
|---|---|---|---|
| 88.5 Degrees | 44.25 | 0.5 | High |
| 89.0 Degrees | 44.50 | 0.0 | Medium |
| 90.0 Degrees | 45.00 | 0.0 | Zero |
| 91.0 Degrees | 45.50 | 0.0 | Medium |
| 92.5 Degrees | 46.25 | 0.75 | High |
The ghost in the expansion gap
Expansion gaps are required for floating floors and solid hardwood to prevent buckling and warping. The baseboard must cover this perimeter gap without being nailed into the flooring material itself. A half-inch gap is standard for most laminate and hardwood floors installations. I have seen guys try to get away with no gap because they wanted a thinner baseboard. That is a recipe for disaster. When the summer humidity hits, that floor has nowhere to go but up. It will crown or cup. If it hits the wall, it can even push the baseboard and the drywall out. It sounds crazy, but the force of expanding wood is powerful enough to crack headers. When I cut my miters, I am thinking about that half-inch of air behind the wood. I use a scrap piece of the flooring as a spacer during the trim phase. This ensures the baseboard is set at the correct height to allow the floor to slide underneath. It is a game of tolerances. If you are off by a fraction, the whole system fails. In wet areas like bathrooms where you might have tile grout meeting the baseboard, the stakes are even higher. Moisture can wick up the back of the trim, causing it to swell and ruin the miter joint from the inside out.
Thermal expansion of polymer cores
Luxury Vinyl Plank and laminate floors feature a Coefficient of Linear Thermal Expansion that dictates how much the material grows with temperature changes. Installers must maintain ambient site conditions for 48 hours prior to baseboard installation. This stabilization period ensures the miter cuts remain tight after the project is completed. I hate it when people treat LVP like it is indestructible. It is plastic. Plastic moves with heat. If you install a floor in a sunroom with huge south-facing windows, that floor is going to expand significantly in the afternoon. If your miters are cut too tight against the floor, or if you have blocked the expansion gap with too many finishing nails, the floor will bubble. I always check the mil-thickness of the wear layer too. A 20-mil wear layer is the standard for commercial durability, but it also adds to the rigidity of the plank. This rigidity makes it even more important that the subfloor is dead flat. If the plank cannot flex into a dip, it will bridge it. When you walk on that bridge, it bounces. That bounce translates directly to the baseboard miter. It is a chain reaction of physics that starts at the concrete and ends at your eye level.
“Wood is hygroscopic, meaning it will gain or lose moisture until it is in equilibrium with the atmosphere.” – NWFA Technical Manual
The chemistry of the perfect bond
Adhesive selection for trim carpentry involves understanding the chemical bond between the wood fibers and the substrate. Using a cyanoacrylate glue for miter joints provides an instant permanent bond that resists seasonal movement. This prevents the miter from opening as the house settles. I do not just rely on nails. Nails are mechanical fasteners that can loosen. Glue is a molecular bond. I use a two-part adhesive system. I spray the activator on one side and the glue on the other. I hold them together for ten seconds. That joint is now stronger than the wood itself. This is especially vital when you are working with pre-finished hardwood trim. You cannot just sand out a bad joint on pre-finished stock. It has to be perfect the first time. I also pay close attention to the grout lines when I am running trim over tile. If the grout is still wet, the moisture will ruin the miter. I have seen guys rush a job and the baseboards look like they were cut with a butter knife within a week because the MDF soaked up the water from the grout. It is a mess that requires a full tear-out.
- Use a 12-inch miter saw with a high-tooth count carbide blade for clean cuts.
- Always measure the wall angle with a digital protractor rather than assuming 90 degrees.
- Apply a high-quality wood glue to both faces of the miter joint before nailing.
- Keep an expansion gap of at least 1/4 inch for LVP and 1/2 inch for solid wood.
- Seal the back of the baseboard with a primer if installing against a concrete outer wall.
- Use a micro-pinner for the returns to avoid splitting the delicate wood grain.
Mastering the transition in wet areas
Showers and bathrooms require waterproof baseboard materials like PVC or sealed hardwoods to prevent rot. The miter joints in these areas should be caulked with silicone rather than standard wood filler to accommodate high humidity. Laminate is generally a poor choice for these spaces, but if it is used, the perimeter must be 100 percent sealed. I have walked into too many bathrooms where the baseboards were fuzzy with mold. It happens because people treat the bathroom like a bedroom. You have to think about the vapor pressure. When you take a hot shower, that steam is looking for a place to condense. If your miters are not sealed, the steam gets into the end grain. The end grain acts like a straw, sucking that moisture deep into the board. This causes the wood to expand and the paint to peel. I always back-prime my trim in wet areas. It is an extra step that most guys skip because they want to get home early. But I am the one who gets the call ten years later to do the next floor because my last one still looks perfect. That is the difference between a floor installer and a master floor architect. You have to care about the things the homeowner will never see, like the moisture barrier under the grout or the alkalinity of the concrete slab. It all matters. Every fraction of a degree on that saw blade is a testament to the work you put into the subfloor. If you do the prep right, the miters are easy. If you skip the prep, you are just fighting the house, and the house always wins. The level doesn’t lie. The moisture meter doesn’t lie. If you listen to them, your floors and your trim will stand the test of time. It is about the chemistry, the physics, and the sawdust under your nails. It is about doing it right because doing it twice is a waste of a man’s life. Stop looking for shortcuts and start looking at your subfloor. That is where the secret to the perfect miter is hidden. It is not in the saw. It is in the ground beneath it.