
The Secret to Matching New Laminate to Old Trim
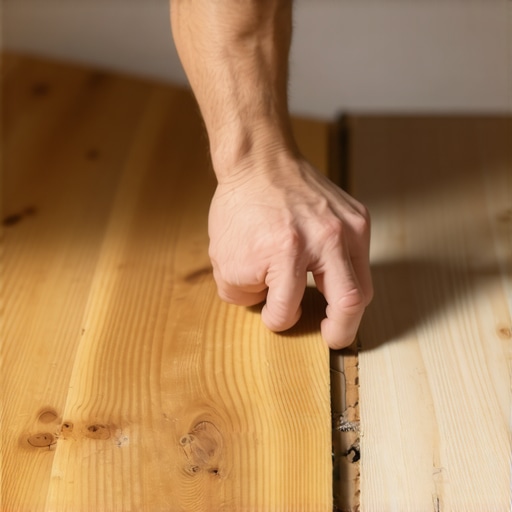
Matching new laminate to old trim requires a deep understanding of color temperature, structural expansion gaps, and subfloor flatness. To achieve a high-end look, you must prioritize the mechanical transition over the aesthetic blend. This involves measuring the millimeter thickness of the laminate plank and its underlayment to ensure the stack height fits under existing baseboards without creating a trip hazard.
Most guys skip the leveling compound. They think the underlayment will hide the dip. It won’t. I spent three days grinding concrete on a job last month just so the floor wouldn’t click like a castanet. I once walked into a house where a homeowner had tried to force a 12mm laminate under 100-year-old oak trim without checking the subfloor. The result was a mess of splintered wood and buckled planks. A floor is a machine. If the parts do not fit with precision, the machine breaks. You are not just laying a floor. You are engineering a surface that will withstand thousands of pounds of pressure over its lifetime. Most people think about the color. I think about the deflection. If that subfloor has more than a 3/16 inch dip over ten feet, your new laminate is going to fail, and it will take your beautiful old trim down with it.
The ghost in the expansion gap
The expansion gap is a mandatory perimeter space of 1/4 to 3/8 inch required for laminate flooring to move during seasonal humidity shifts. Old trim often sits directly on the subfloor, making it difficult to hide this gap without adding quarter round or shoe molding. Successful integration depends on the floating floor principle where the laminate is never pinched by the baseboard. When you are dealing with old growth timber trim, the wood is much denser than modern pine. It has a lower cellular porosity, meaning it does not move at the same rate as your new HDF (High-Density Fiberboard) laminate core. If you pin that laminate under a heavy piece of old oak, the floor will buckle when the humidity hits 60 percent. You need to leave that gap. Use a jamb saw to undercut the baseboards if you want a clean look, but never, ever skip the perimeter space. It is the lungs of the floor. It needs to breathe.
“A floor is only as good as the subfloor beneath it; deflection is the enemy of every joint.” – Master Flooring Axiom
Why your subfloor is lying to you
A flat subfloor is defined by the National Wood Flooring Association as having a deviation of no more than 3/16 inch in a 10-foot radius. Old houses rarely meet this standard, often showing undulation due to joist settlement or foundation shift. If you ignore these dips, your laminate locking mechanisms will eventually snap. I have seen it a hundred times. A guy thinks a 3mm foam underlayment is a magic carpet. It is not. Foam compresses. When you walk on a spot with a dip, the laminate flexes. That flex puts tensile stress on the tongue and groove. Eventually, the melamine resin cracks. Now you have a squeak. Then you have a gap. Then the floor is junk. You have to get out the self-leveling underlayment. It is a chemical bond. You need to prime the wood or concrete first. If you do not prime, the dry substrate will suck the moisture out of the leveler too fast, and it will crack. It is basic chemistry. You are building a foundation.
The 1/8 inch that ruins everything
Vertical transition heights are the most common failure point when matching new laminate to existing trim and hardwood floors in adjacent rooms. A discrepancy of just 1/8 inch can prevent a T-molding from sitting flush, leading to mechanical failure of the transition strip under foot traffic. You have to calculate the stack height. Take the laminate thickness, add the compressed underlayment thickness, and compare it to the bottom of your trim. If the floor is too high, you are shaving the bottom of the trim. If it is too low, you have a massive gap that looks like a DIY disaster. This is where the physics of the floor comes in. You are managing the vertical plane of the entire house. You also have to consider the grout lines if you are transitioning from a tile entryway. If the grout is crumbling or the tile is uneven, your laminate transition will never sit right. It is all connected. One bad surface ruins the next.
| Metric | Laminate Requirement | Hardwood Standard | Impact on Trim |
|---|---|---|---|
| Expansion Gap | 1/4 to 3/8 inch | 3/4 inch | Requires shoe molding |
| Subfloor Flatness | 3/16″ per 10′ | 1/8″ per 6′ | Prevents trim gapping |
| AC Rating | AC3 to AC5 | N/A | Determines wear at doorjambs |
| Acclimation Time | 48 to 72 hours | 7 to 14 days | Prevents post-install shrinking |
Light and the molecular lie
Matching the visual texture of old trim involves analyzing the metamerism of the laminate surface, which is how the color appears under different lighting conditions. Laminate is a photograph of wood printed on paper and sealed with aluminum oxide. It does not reflect light the same way as a site-finished hardwood floor or aged shellac on old trim. The old trim has a deep, amber patina. The new laminate has a digital precision. To bridge this gap, look at the undertones. If the trim is old heart pine, it has orange and red undertones. If you pick a laminate with a gray or cool undertone, it will look hideous. You need to find a balance. Sometimes, the best match is actually a contrast. A dark floor can make light trim pop, whereas a “near match” just looks like a mistake. I tell my clients that if you can’t hit the bullseye, don’t even aim for it. Go for a different color that complements the grain of the old wood.
The chemistry of the bond
When installing laminate near showers or moisture-heavy areas, the hydrostatic pressure from the subfloor can cause delamination of the decorative layer. You must use a moisture barrier of at least 6-mil poly film on concrete slabs to prevent vapor from attacking the HDF core. People see “waterproof” on the box and think they are safe. That is a marketing lie. The surface is waterproof. The joints are not. If water sits on those joints, it seeps into the wood fibers. The wood swells. The melamine cannot stretch, so it peels. If you are matching this to old trim in a bathroom, you need to silicone the expansion gap. But you can’t just glob it in. You use a foam backer rod first, then a thin bead of 100 percent silicone. This allows the floor to move while keeping the water out. It is a technical seal, not a cosmetic one.
“Deflection is the silent killer of the modern click-lock floor; precision is the only cure.” – Master Flooring Axiom
Technical checklist for trim integration
- Measure total stack height including the 1/4 inch underlayment compression.
- Undercut all door casings using a dedicated oscillating tool for a flush fit.
- Check moisture content of the subfloor using a pin-less meter before opening boxes.
- Acclimate the laminate in the room for 72 hours at 35 to 55 percent humidity.
- Scrape all old paint and plaster drips from the baseboard bottom edge.
- Identify the locking profile type to ensure the long-edge joint has room to pivot.
- Seal all potential water entry points near wet areas with flooring-grade sealant.
The failure of the thick underlayment
While most people want the thickest underlayment, too much cushion actually causes the locking mechanisms on LVP or laminate to snap under pressure. This is a contrarian truth in the industry. Big box stores sell 5mm thick pads because they feel soft under your hand. On the floor, they act like a trampoline. Every step you take causes the floor to sink. This puts leverage on the tongue of the plank. It is a simple mechanical advantage problem. The longer the plank, the more leverage. Eventually, the tongue snaps off. Now you have a floating plank that moves when you walk. I always recommend a high-density, low-loft underlayment. It provides better acoustic ratings (IIC and STC) and keeps the floor stable. If the floor is stable, the trim stays tight. If the floor moves, the trim will eventually pull away or the caulk line will crack. You want a solid feel. You want the floor to sound like a solid hardwood floor, not a plastic toy. This requires a dense core and a flat substrate. There are no shortcuts. Every 1/8 inch matters. Every mil of the wear layer matters. If you treat it like a structural project, it will last thirty years. If you treat it like a weekend DIY hobby, you will be ripping it out in five.