
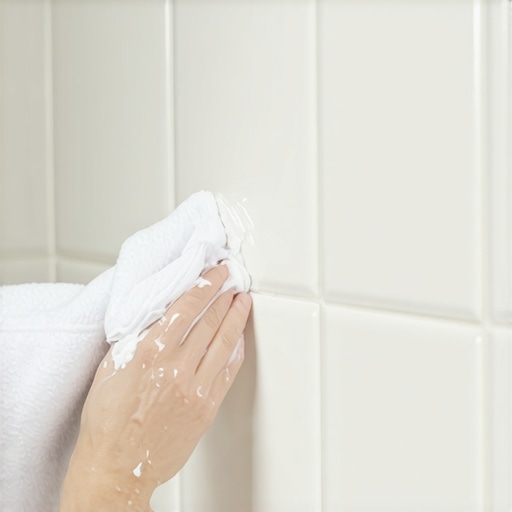
The Shaving Cream Trick for Buffing Scuffs Out of Matte Tile
Most guys skip the leveling compound. They think the underlayment will hide the dip. It won’t. I spent three days grinding concrete on a job last month just so the floor wouldn’t click like a castanet, and it reminded me that the surface is only as good as the prep. If you are staring at a scuffed matte tile floor, you are dealing with a microscopic battleground. Matte finishes are not perfectly smooth; they have a topographical profile of peaks and valleys that trap rubber, grease, and carbon. When a boot heel drags across that surface, it doesn’t just sit on top. It gets embedded in the texture. I have seen homeowners try to scrub these marks out with abrasive pads that permanently etch the glaze, ruining the light refraction of the floor. There is a better way that involves the chemistry of a barber shop rather than the brute force of a belt sander. Shaving cream is the secret weapon for matte porcelain because of its unique molecular structure. It uses surfactants and fatty acids to lift contaminants without the risk of chemical burns on the tile surface.
The chemistry of surfactants on porcelain surfaces
Matte tile scuffs are removed by shaving cream because the triethanolamine and stearic acid in the foam act as emulsifiers that break the bond between rubber debris and the tile surface. This process requires a high pH balance that is gentle enough not to damage grout but strong enough to penetrate the microscopic texture of the matte glaze. When you apply the foam, the surface tension of the liquid is lowered, allowing the cleaning agents to seep into the pores of the tile where standard mops cannot reach. This is a mechanical advantage gained through chemical engineering. The foam structure holds the active ingredients in suspension against the vertical or horizontal surface, preventing the runoff that you get with liquid cleaners. It is a controlled reaction that targets the friction-based transfer of material. You are essentially lubricating the scuff mark until it releases its grip on the silica-based surface of the floor.
“A floor is only as good as the subfloor beneath it; deflection is the enemy of every joint.” – Master Flooring Axiom
The physics of the foam and surface tension
The foam in shaving cream is a dense matrix of air bubbles trapped in a soapy film. In the flooring world, we look at the density of materials to understand how they will react to pressure. When you apply this foam to a matte tile, you are using the high surface area of those bubbles to trap debris. Most matte tiles are fired at temperatures exceeding 2200 degrees Fahrenheit, creating a vitrified surface that is incredibly hard but also contains tiny pits. These pits are the reason why your matte floor looks dull and modern, but they are also why it acts like sandpaper against rubber soles. The shaving cream trick works because the fatty acids, specifically stearic acid, provide a lipid layer that surrounds the rubber particles. This reduces the coefficient of friction. Once that friction is lowered, a simple buffing motion with a microfiber cloth can lift the particle out of the valley in the tile profile. It is a surgical strike against the scuff. I have used this on high-end commercial jobs where a traditional buffer would have created too much heat and potentially glazed the matte finish into an uneven shine. You have to be careful with the dwell time. If you let the foam sit too long in a dry climate like Phoenix, the water evaporates and leaves a sticky residue that is a nightmare to rinse out of grout lines.
Why matte tile requires a different approach than polished stone
Polished tiles have a glass-like layer that reflects light at a single angle, making it easy to see debris but also easy to wipe. Matte tiles diffuse light, which is great for hiding dust but terrible for removing physical transfers like scuffs. If you use a high-alkaline cleaner on matte tile, you risk leaving a film that will attract even more dirt. This is the information gain most big box retailers won’t tell you. They want to sell you a gallon of generic floor cleaner that leaves a surfactant haze. Shaving cream is designed to be rinsed off skin easily, meaning it is also designed to be rinsed off tile without leaving a gummy residue. This is vital for maintaining the slip resistance of the floor. If you mess up the COF of a matte floor, you create a liability. I always tell my apprentices that the goal isn’t just a clean floor; it is a safe floor. Hardwood floors and laminate are a different story entirely. If you put shaving cream on a site-finished oak floor, the moisture will penetrate the grain and cause the edges to swell. Wood is a cellular material that breathes. Tile is a mineral product that is frozen in time. You have to treat them with different levels of respect.
| Material Type | Porosity Rating | Scuff Sensitivity | Recommended Buffing Agent |
|---|---|---|---|
| Matte Porcelain | Low (<0.5%) | High | Shaving Cream (Foam) |
| Glazed Ceramic | Medium | Medium | Neutral pH Cleaner |
| Natural Slate | High | Very High | Stone Soap |
| Polished Marble | Medium | Low | Microfiber Only |
The danger of moisture and the grout line reality
Grout is the weak link in every tile installation. While the tile itself might be impervious to the shaving cream, the grout is a cementitious product that is highly porous. If your grout isn’t sealed, it will suck the moisture and the dyes from the shaving cream right into the substrate. This is why I only recommend white, unscented shaving foam. Do not use the blue gels or anything with heavy perfumes. Those chemicals can stain the grout, leaving you with a clean tile and a blue line that won’t come out without an acid wash. I have seen guys ruin a beautiful shower installation because they used a mint-scented green foam to clean a scuff. The pigment settled into the sand-to-cement ratio of the grout and it was game over. You also need to consider the humidity of the room. In a bathroom environment, the moisture levels are already high. You need to ensure the floor is completely dry before you start the buffing process. If the tile is wet, the shaving cream will just liquefy and lose its ability to suspend the scuff particles. It is a delicate balance of timing and atmospheric conditions. I always carry a moisture meter in my kit, even for tile jobs, because the slab moisture can affect how the grout cures and how the surface reacts to cleaners later in its life.
“Ensure that the surface is free of all debris before attempting mechanical buffing to avoid scratching the wear layer.” – TCNA Maintenance Guidelines
Step by step guide to the buffing process
The following protocol is what I use when a client calls me complaining about black marks from furniture moves. It is a systematic approach that respects the integrity of the installation. Do not skip the rinse phase, as any leftover fatty acids will become a magnet for pet hair and dust once the floor is back in service.
- Inspect the scuff to ensure it is a transfer of material and not a chip in the glaze.
- Apply a mound of white shaving foam directly onto the scuff mark.
- Allow the foam to dwell for exactly three minutes to let the surfactants penetrate.
- Use a dry microfiber cloth to buff the area in a firm, circular motion.
- Wipe the area with a damp cloth to remove all chemical residue.
- Dry the tile immediately with a fresh towel to prevent water spots.
The ghost in the expansion gap
Every floor needs room to move. People think tile is static, but the subfloor beneath it is constantly expanding and contracting with the seasons. If you have scuffs near the edges of the room, be careful not to shove the foam into the expansion gaps under the baseboards. That gap is there for a reason. If it gets filled with dried soap and gunk, it can restrict the movement of the floor. I once saw a floor tent in the middle of a room because the homeowner had been pushing wax and cleaners into the perimeter gaps for years, essentially locking the floor in place. It sounds crazy, but the physics of a floor are unforgiving. You have to treat the perimeter with the same care as the center. When you are buffing out scuffs near the wall, keep the foam localized. Use a finger to apply it if you have to. Precision is the difference between a master and a DIYer. I have spent my life on my knees looking at these details, and I promise you that the small things are what keep a floor looking like new for twenty years instead of five. The shaving cream trick is a perfect example of using the right tool for a specific problem. It is about understanding the molecular reality of the surface you are walking on every day.