
I spent three days grinding concrete on a job last month just so the floor would not click like a castanet. Most guys skip the leveling compound because they think the underlayment will hide the dip. It will not. I have seen thousand dollar laminate jobs ruined because the installer thought he could bridge a quarter inch valley with a foam pad. When the subfloor is not flat, those planks move every time you walk on them. Eventually, that movement breaks the tongue or pulls the joint apart. That is when you end up with a gap in the middle of your kitchen that looks like a missing tooth. Most people think they have to tear up the whole floor to fix one loose plank, but they are wrong. If the locking mechanism is still intact, you can use the physics of vacuum pressure to pull those planks back together without a single hammer strike.
The ghost in the expansion gap
Expansion gaps are the breathing room for every floating laminate floor system. If the perimeter gap is blocked by baseboards or heavy furniture, the laminate planks will buckle or separate because the internal tension has nowhere to go. This structural stress often manifests as a gap in the middle of the room. The High-Density Fiberboard core of a laminate plank reacts to ambient humidity by expanding and contracting. Without a quarter inch gap at the walls, the floor fights itself. When you see a gapping joint, it is often a sign that the floor has shifted toward a wall or under a heavy object. This shift creates frictional resistance that makes manual adjustment difficult. You are not just moving a piece of wood, you are fighting the weight of the entire floor assembly and the friction coefficient of the underlayment. Understanding this mechanical stress is the first step toward a successful suction cup repair.
“A floor is only as good as the subfloor beneath it; deflection is the enemy of every joint.” – Master Flooring Axiom
The physics of the vacuum grip
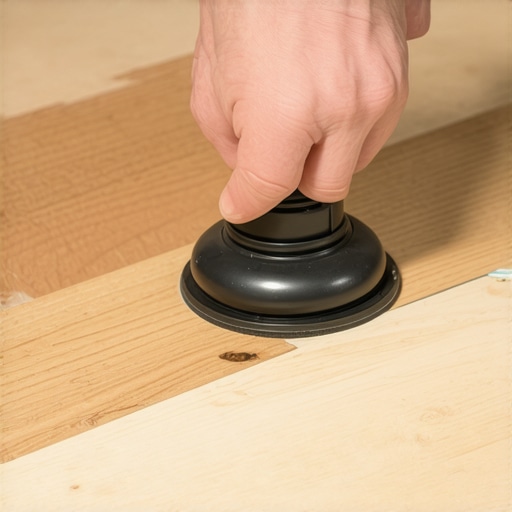
Vacuum suction cups work by creating a low-pressure zone between the rubber pad and the melamine wear layer of the laminate. The atmospheric pressure outside the cup pushes down with fourteen pounds per square inch, locking the tool to the non-porous surface. This molecular seal allows you to apply lateral force directly to the core material without damaging the decorative image layer. For a suction cup to work, the wear layer must be glass-smooth and devoid of debris. If there is wood dust or grout particles in the micro-texture of the floor, the vacuum seal will fail. You need a triple-pad suction lifter rated for at least one hundred pounds of horizontal pull. While glass lifters are the industry standard, specialized flooring pullers often have softer rubber that conforms better to textured laminate finishes. The suction force must overcome the static friction of the underlayment, which is why surface preparation is the difference between success and a slipped cup.
Tools that actually work for floating floors
Professional flooring repairs require a heavy duty suction cup, masking tape, and a rubber mallet. Do not use cheap plastic cups designed for bathroom tiles, as they lack the structural rigidity to transfer lateral momentum. You also need a cleaner that leaves zero residue, such as denatured alcohol or a specific laminate spray. The locking mechanism inside the laminate joint is often clogged with construction dust, so a can of compressed air is helpful for clearing the gap before you attempt to close the joint. If the gap has been open for months, debris has likely packed into the groove, acting like a wedge that prevents the tongue from seating properly. Use a thin wire or dental pick to clean the channel before you ever apply suction. This mechanical cleaning ensures that the locking profile can re-engage without fracturing the HDF.
| Suction Tool Type | Lifting Capacity | Best Use Case |
|---|---|---|
| Single Pad Plastic | 25 lbs | Lightweight vinyl planks |
| Double Pad Aluminum | 75 lbs | Standard laminate repairs |
| Triple Pad Professional | 150 lbs+ | Wide plank hardwood and heavy HDF |
| Pump-Action Vacuum | 200 lbs | Textured or embossed surfaces |
The gentle art of the lateral slide
Lateral momentum is the physical force required to slide a laminate plank across its underlayment. Once the suction cup is vacuum-sealed to the target plank, you do not pull upward, but horizontally toward the open gap. Use a dead-blow hammer to strike the handle of the suction lifter. This impulse force breaks the static friction and nudges the plank into the locking groove of the adjacent piece. It is a calculated impact. If you hit it too hard, you risk shearing the vacuum seal or cracking the handle of the tool. If you hit it too softly, the plank will not move. You must also ensure the adjacent planks are weighted down so the entire floor does not shift. I usually have a helper stand on the planks that are already seated to act as an anchor. This directional force is far safer than using a pull bar at the wall, which can crush the drywall or damage the edge of the perimeter boards.
Why your subfloor is lying to you
Subfloor flatness is often misinterpreted as levelness, but they are entirely different concepts in flooring engineering. A subfloor can be out of level but perfectly flat, which is acceptable for laminate. However, a subfloor with dips and peaks will cause joints to fail. When a plank sits over a low spot, it deflects under foot traffic. This vertical movement acts like a lever, slowly prying the tongue out of the groove. This is why gaps reappear even after you fix them with suction cups. If the underlying geometry is unstable, the repair is temporary. To permanently fix a persistent gap, you may need to inject a low-expansion foam or a specialized floor shim through a small hole to support the plank from beneath. This structural support stops the deflection and preserves the repair. Most homeowners ignore the subfloor, but the subfloor never ignores the floor. If you hear a hollow sound when you tap the plank, you have a void that will eventually kill your locking joint.
“Floor covering is a system, not a product; every component from the slab to the wear layer must function in unison.” – TCNA Installation Handbook
The hidden role of perimeter expansion gaps
Perimeter expansion is the safety valve of a floating floor. If your laminate is pinched against a door frame or a kitchen island, it cannot float. This restriction creates internal pressure that forces joints open at the weakest point. Often, installers will run the floor under heavy cabinets, which anchors the planks and sprevents thermal expansion. This is a violation of NWFA standards. When you use the suction cup trick, check your baseboards. If the floor has slid and is now touching the wall, you must trim the edge of the plank before sliding it back. Use a multitool to create a gap. If you do not restore the expansion space, the plank will simply pop back out the next time the humidity changes. Flooring is a living thing that breathes. You cannot lock it in a cage and expect it to stay flat.
- Check the gap: Ensure at least 1/4 inch of space at all vertical obstructions.
- Clean the joint: Remove every grain of sand or dust from the locking mechanism.
- Apply adhesive: Use a tiny drop of PVA wood glue in the groove for a permanent bond.
- Seal the surface: Clean the plank with alcohol for maximum suction cup grip.
- Weight the repair: Place a heavy box or weight over the joint for 24 hours.
Protecting the tongue and groove integrity
Locking mechanisms are precision-milled from HDF, making them vulnerable to moisture and impact damage. If you force a joint that is clogged with debris, you will snap the tongue. Once the tongue is broken, the suction cup trick will never work because there is nothing left to hold the boards together. This is why microscopic cleaning is mandatory. While waterproof laminate exists, the core is still susceptible to swelling if liquid sits in an open gap. If your gaps are caused by water damage, the edges will be slightly raised or puffy. In this case, suction cups will not help. You cannot compress swollen wood back into its original shape. You must replace the damaged planks. Always inspect the profile of the plank with a flashlight. If the wood fibers look frayed, the mechanical lock is compromised. A drop of flooring glue can sometimes save a weak joint, but it is a last resort that ends the floating nature of that specific plank.
Final checks for a permanent fix
Repairing a gap is only half the job. You must ensure the gap does not return by analyzing the environmental factors. Is the humidity in the home consistent? If you fix a floor in the dead of winter when the air is dry, the joints are at their widest. If you tighten them too much, they might buckle in the summer when the humidity rises. I always recommend acclimating the room to a standard forty-five percent humidity before performing structural repairs. Once the plank is slid back into place, I use a specialized gap sealer or a tiny amount of wood glue inside the groove to lock the repair. This chemical bond complements the mechanical lock. After the repair, do not clean the floor with a steam mop. Steam is the enemy of HDF. It penetrates the joints and softens the core, leading to the very movement that caused the gap in the first place. A dry microfiber mop and proper humidity control will keep your joints tight for decades. If the floor clicks when you walk, check the subfloor. If the floor gaps, check the perimeter. It is simple physics, not magic.