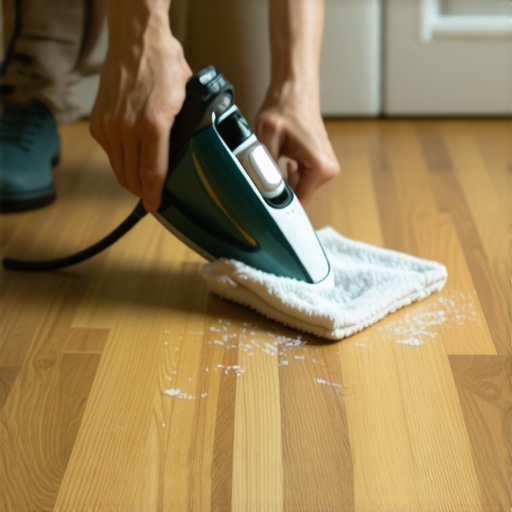
I once walked into a house where a $15,000 wide-plank walnut floor was cupping so bad it looked like a potato chip because the installer didn’t check the crawlspace humidity. The homeowner was devastated. They spent a fortune on the material but ignored the basic physics of moisture. This is why I tell everyone that flooring is a structural engineering challenge. When you drop a heavy cast-iron skillet on your white oak, you haven’t just made a cosmetic mark. You have crushed the cellular structure of the wood. My hands still smell like oak dust and WD-40 from the job I finished this morning, and my knees feel every bit of my twenty five years in the trade. People think wood is a solid block. It is not. It is a bundle of straws. When you dent it, you kink the straws. If you want to fix it, you have to use heat and water to unkink them. This is the logic behind the wet rag and iron trick. It is a molecular level repair that relies on the hygroscopic nature of cellulose. If you try this on laminate, you will destroy your floor. If you try it on wood with a plasticized factory finish, you might fail. But for a site-finished hardwood floor, this is the gold standard for saving a board from the scrap heap. Throughout my career, I have seen every shortcut in the book. I have seen guys try to fill dents with wood putty that eventually cracks and falls out because the wood expands and the putty does not. I have seen homeowners try to sand a deep gouge until they hit the tongue of the board. Physics always wins in the end. You cannot fight the wood; you have to work with its internal memory. The following guide breaks down why this trick works and when you should stay far away from it.
The science of wood fiber memory
Wood fibers are comprised of cellulose and lignin which function as a hygroscopic biological structure. When an impact occurs, the cellular walls collapse but do not always break. Applying moisture and heat allows these cells to reabsorb water and expand back to their original structural state through a process of vapor pressure.
Wood is essentially a collection of microscopic tubes. When you drop something heavy, you are compressing those tubes. If the fibers are not severed, they have what we call memory. This means they want to return to their original shape. The challenge is that the lignin, which acts like the glue holding those tubes together, is stiff. Heat softens the lignin. Water provides the volume needed to push the cell walls back out. When you combine the two, you create a localized steam chamber. This steam penetrates the finish and reaches the raw wood fibers. It is a violent reaction on a microscopic scale. The water turns to gas, expands, and forces the wood to swell. This is why a simple wet rag is not enough. You need the thermal energy of the iron to force that transition from liquid to gas. If you are working in a region like Phoenix, the dry heat has already sucked the life out of your floor. The wood is brittle. In a high humidity place like Houston, the wood is already swollen, making the dent even more of a structural tension point. You have to understand your environment before you start playing with steam. Too much water in a humid environment and you end up with a localized hump that will not go back down.
“A floor is only as good as the subfloor beneath it; deflection is the enemy of every joint.” – Master Flooring Axiom
The fatal flaw of laminate and steam
Laminate flooring is a composite material made of high density fiberboard and a photographic wear layer. Unlike real wood, HDF cores use urea-formaldehyde resins that delaminate when exposed to direct steam. Applying a hot iron to laminate will cause permanent swelling and irreversible edge peaking that cannot be repaired.
I get calls once a week from people who tried the iron trick on their cheap laminate. It never ends well. Laminate is basically sawdust and glue. When you hit it with steam, the glue fails and the sawdust expands like a sponge. It will never go back down. You end up with a bubble that looks like a blister. If you have laminate, your only option for a dent is a wax fill kit or replacing the board. Real hardwood floors are a different beast entirely. Even engineered hardwood can be tricky because the veneer is often thin. If you have a 2mm wear layer and you hit it with too much heat, you might melt the adhesive holding the veneer to the plywood core. You have to know what you are standing on. Most modern houses use a click-lock system which often indicates a thinner wear layer. Solid 3/4 inch oak is the ideal candidate for this repair because there is plenty of material to absorb the shock and the moisture. When you are dealing with showers or transitions to tile, you have to be even more careful. The grout line between your wood and tile is a moisture highway. If you steam near a transition, you might force moisture into the subfloor which can lead to mold or grout failure later on.
| Wood Species | Janka Hardness | Steam Success Rate | Cellular Density |
|---|---|---|---|
| Douglas Fir | 660 | Very High | Low |
| Black Walnut | 1010 | High | Medium |
| White Oak | 1360 | Medium | High |
| Hard Maple | 1450 | Medium | High |
| Brazilian Cherry | 2350 | Low | Extremely High |
Why your subfloor is lying to you
Subfloor integrity dictates how hardwood floors respond to localized repairs and moisture cycles. A concrete slab with high hydrostatic pressure will fight any attempt to control board moisture from the top. Using an iron on a floor with subfloor dampness can trap residual steam and lead to finish blushing or white spots.
Before you even think about fixing a dent, look at your subfloor. If you are on a concrete slab without a proper moisture barrier, your wood is already under stress. When you add steam to the mix, you are inviting trouble. The heat can draw up moisture from the bottom of the board. I always carry a Pin-type moisture meter. I want to see the moisture content of the board before I start. If the wood is already at 12 percent or higher, I am not adding more water. You want the wood around 6 to 9 percent for a stable repair. Most guys skip the leveling compound. They think the underlayment will hide the dip. It won’t. I spent three days grinding concrete on a job last month just so the floor wouldn’t click like a castanet. If your subfloor is uneven, the board with the dent might be bridging a gap. When you press down with the iron, you could actually crack the tongue or groove because the board has no support underneath it. It is all connected. You cannot treat a dent in isolation from the structural reality of the room.
“Wood moves. It breathes, it expands, and it contracts; ignore the expansion gap and the floor will eventually ignore you.” – Master Flooring Axiom
Managing transitions near wet areas and grout
Transitions between hardwood floors and tiled showers require a silicone-based caulk rather than standard grout to allow for differential movement. When performing steam repairs near these intersections, you must protect the porous grout from thermal shock and moisture absorption which causes efflorescence.
I hate seeing wood run right up to a shower. It is a recipe for disaster. But people love the look. If you have a dent near a tile transition, you are in a danger zone. Grout is rigid. Wood is flexible. If you steam the wood near the grout, the wood expands and can actually crush the grout line. This leads to cracks where water from the shower can seep in. Once water gets under that wood, it is game over. You will get buckling and black mold within months. When I do these repairs, I always mask off the tile and grout with high-quality painter tape. I want to keep the heat localized to the dent. I also check the caulking at the transition. If it is hard and cracked, I rip it out and put in a high-quality color-matched silicone. You need that flexibility. The same goes for laminate transitions. Laminate moves even more than wood in some cases because the HDF core reacts so fast to humidity. If you are working near a T-molding, be careful not to melt the plastic or aluminum trim with your iron.
The checklist for a perfect dent lift
- Use only distilled water to avoid mineral staining on the wood grain.
- Select a 100 percent cotton cloth with no dyes that could bleed into the finish.
- Set the iron to the highest steam setting but never leave it stationary for more than ten seconds.
- Lightly sand the finish if it is a thick polyurethane to allow the steam to penetrate the fibers.
- Always test a small inconspicuous area first to check for finish blushing.
- Allow the wood to dry for at least twenty four hours before applying any touch-up finish.
The ghost in the expansion gap
Expansion gaps are the structural lungs of a hardwood installation, usually requiring at least half an inch of space at the perimeter. If a floor is tight against the wall, any localized steaming will increase internal tension and could cause the floor to peak in the middle of the room.
Most homeowners think the baseboard is just there to look pretty. It is actually a mask for the expansion gap. If your installer was lazy and shoved the boards tight against the drywall, your floor is a ticking time bomb. When you use the iron trick, you are adding moisture and heat. This makes the wood expand. If it has nowhere to go, it will push against the other boards. I have seen floors pop off the subfloor because of a simple repair that added just enough expansion to hit the limit. You have to check the perimeter. Take a pry bar and pop off a piece of baseboard. If you don’t see a gap, do not use steam. You need to relieve the tension first. It is these little details that separate a pro from a handyman. You are dealing with a living material. Respect the gap. Respect the grain. And for the love of everything holy, keep the iron away from your laminate. If you follow these steps and understand the physics, you can save a floor. If you ignore them, you are just making an expensive mistake even worse.