
Most guys skip the leveling compound. They think the underlayment will hide the dip. It won’t. I spent three days grinding concrete on a job last month just so the floor wouldn’t click like a castanet. That is the reality of this business. You are either a mechanic or a hack. Most people choosing to install ceramic tile or hardwood floors think the surface is the star. It is not. The subfloor is the foundation of your reputation. If that concrete slab is out of flat by even 1/8 inch over 10 feet, your tile will lippage and your grout will powderize within a year. I have seen $20,000 installations fail because someone was too lazy to run a straightedge across the room. We are talking about the physics of deflection and the chemistry of adhesion. If you do not respect the bond, the bond will not respect you. This is the grit of the trade. My hands smell like WD-40 and oak dust because I do not cut corners. I cut tile. And I cut it with a precision that prevents the micro-fractures that lead to total floor failure.
The molecular reality of a ceramic fracture
Ceramic tile cracks occur when tensile stress exceeds the modulus of rupture. Preventing these failures requires managing thermal expansion, ensuring subfloor rigidity according to TCNA L/360 standards, and utilizing a continuous rim diamond blade on a wet saw to minimize vibration and heat buildup during the cutting process. Ceramic is essentially a glass-like material. When you introduce a cutting tool, you are not just removing material. You are creating a stress path. If that path is jagged or overheated, the tile will fail long after I have left the job site. This is why the wet saw is not just a luxury. It is a structural necessity.
“A floor is only as good as the subfloor beneath it; deflection is the enemy of every joint.” – Master Flooring Axiom
The physics of a crack start at the edge. Most cracks in showers or kitchen floors do not start in the middle of the field. They start at a cut. A dry saw or a cheap snap-cutter creates micro-fissures in the glaze. These fissures are invisible to the naked eye. However, once the tile is set in thin-set and the house begins its natural cycle of expansion and contraction, those fissures grow. They turn into hairline cracks that swallow grout and let moisture seep into the substrate. If you are working on a shower, that moisture leads to mold and rot. I have seen laminate floors buckle because of similar negligence, but with tile, the failure is permanent and expensive. You have to understand the diamond matrix of your blade. A blade is not a solid piece of metal. It is a bond of metal powder and industrial diamonds. As you cut, the metal wears away to expose new diamonds. If you do not use enough water, the metal glazes over. The blade gets hot. The tile expands locally. Then it snaps.
The physics of friction and water cooling
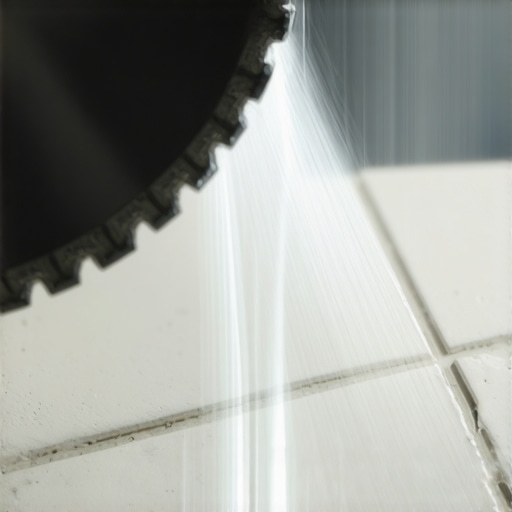
Wet saw techniques rely on hydro-cooling to dissipate thermal energy generated by the diamond blade. Proper water flow reduces frictional heat, prevents glaze chipping, and ensures that the ceramic body remains stable throughout the cutting cycle, which is essential for large format tiles and porcelain. You cannot rush a cut. If you push the tile too hard into the blade, you are creating a recipe for disaster. The blade will wander. The vibration will increase. You want the blade to do the work. I tell my apprentices to listen to the saw. A happy saw has a consistent, high-pitched hum. A saw that is struggling will growl and drop in RPM. That drop in speed means you are forcing the material. You are creating a stress point that will eventually manifest as a crack through the center of your floor.
| Blade Type | Best For | Cooling Requirement | Risk of Cracking |
|---|---|---|---|
| Continuous Rim | Ceramic and Porcelain | High (Constant Flow) | Very Low |
| Segmented Rim | Concrete and Stone | Medium | High on Tile |
| Turbo Rim | Hard Granite | High | Moderate |
The speed of the cut is inversely proportional to the longevity of the tile. I see guys trying to zip through a 12×24 porcelain plank like they are cutting 2x4s. That is how you ruin a blade and a tile. Porcelain is much denser than standard ceramic. It has a water absorption rate of less than 0.5 percent. This density means it holds heat longer. If you do not have a steady stream of water hitting the point of contact, the porcelain will undergo thermal shock. This is the same reason you do not throw cold water on a hot glass dish. It shatters. On a microscopic level, the same thing happens to your tile edge when that dry blade hits it.
Why your subfloor is lying to you
Subfloor preparation involves grinding high spots, filling low spots with self-leveling underlayment, and verifying moisture vapor emission rates. A flat substrate is the only way to prevent point-load stress, which causes ceramic tile to crack even if the wet saw technique was executed perfectly. People think the thin-set is a filler. It is not. Thin-set is an adhesive. It is designed to be a uniform thickness. When you have a dip in the floor and you try to ‘mud it up’ with extra thin-set, you are creating a weak point. As that thick layer of mortar cures, it shrinks more than the thin layers around it. This creates downward tension on the tile. Add a heavy refrigerator or a kitchen island on top of that, and you have a crack. I have spent decades fixing floors where someone thought they could skip the prep work. It never works.
- Verify subfloor flatness within 1/8 inch over 10 feet.
- Check moisture levels in concrete using a calcium chloride test.
- Ensure the joist spacing meets the L/360 deflection standard.
- Use a crack isolation membrane over any existing slab fractures.
- Vacuum all dust before applying primer or thin-set.
The interaction between the tile and the grout is also a matter of chemistry. Grout is not just a filler for the gaps. It is a structural component that allows for minor movement. If your grout is mixing with too much water, it becomes porous and weak. If it dries too fast, it will shrink and pull away from the tile edge. This is why I am a stickler for the mix. I want it like peanut butter. Not soup. If you get the grout wrong, the tile edges are exposed to impact and moisture. It is all connected. The wet saw cut, the subfloor prep, the mortar thickness, and the grout density. You miss one, and the whole system fails.
The ghost in the expansion gap
Expansion joints are mandatory perimeter gaps that allow the flooring assembly to move independently of the vertical walls. Failure to provide an expansion gap of at least 1/4 inch leads to tile tenting, buckling, and grout shear, especially in environments with high humidity or temperature fluctuations. I see this all the time. An installer runs the tile tight against the baseboard or the drywall. The house settles. The seasons change. The floor has nowhere to go. It pushes against the wall. The wall pushes back. The weakest point gives way, which is usually the bond between the tile and the slab. Suddenly, your floor is popping up like a tent. It is a basic rule of physics. Everything expands. If you do not give it room, it will make room.
“Every tile installation is a liquid-to-solid chemical reaction that must be managed with precision.” – TCNA Handbook Principle
This applies to hardwood floors and laminate as well. I have walked into jobs where the laminate was bouncing because it was locked against a door frame. People think tile is different because it is ‘rock.’ It is not. It moves. It breathes in its own way. The wet saw technique is part of this because a clean, straight cut allows for a cleaner expansion gap. If your cuts are jagged, you cannot get a consistent gap. You end up with ‘bridge points’ where the tile touches the wall, transferring all that structural stress directly into the center of the room. This is how you get those mysterious cracks that appear in the middle of a hallway two years later. It is not a mystery. It is bad engineering.
Contrarian views on underlayment thickness
While most people want the thickest underlayment, too much cushion actually causes the locking mechanisms on LVP to snap under pressure. The same logic applies to tile. A thick, squishy membrane under a ceramic floor is a disaster. You want decoupling, not cushioning. A decoupling membrane like Ditra allows the subfloor and the tile to move independently in a horizontal plane. This prevents the cracks in the concrete from telegraphing up through the tile. But if that membrane is not bonded correctly, or if you use the wrong thin-set, you are just building a trampoline. I prefer a rock-solid base. I would rather spend two days with a floor grinder and a vacuum than one hour laying down a subpar ‘quick-fix’ underlayment. The trade is full of guys looking for a shortcut. I am looking for a floor that will outlive me.