
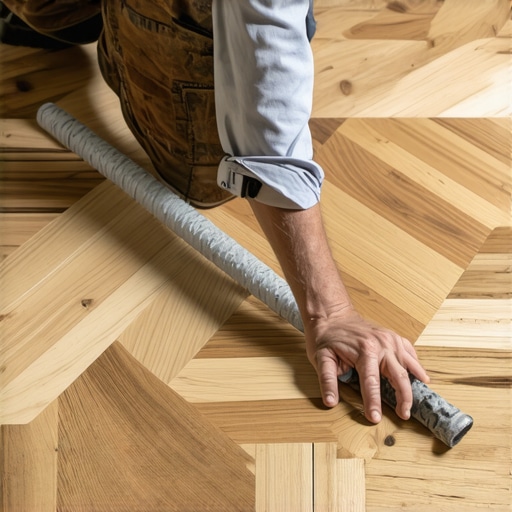
Most guys skip the leveling compound. They think the underlayment will hide the dip. It won’t. I spent three days grinding concrete on a job last month just so the floor wouldn’t click like a castanet. That is the reality of professional flooring that most homeowners never see. When you ask why a herringbone pattern costs twice as much in labor compared to a standard straight lay, you are not just paying for the look. You are paying for the microscopic precision required to keep a geometric pattern from drifting into a chaotic mess. If a straight plank is off by a sixteenth of an inch, it stays off by a sixteenth. If a herringbone block is off by that same margin, that error compounds with every row until your floor is hitting the wall at a crooked angle that no baseboard can hide. I have seen fifteen thousand dollar projects ruined because an installer treated hardwood floors like they were laying a cheap area rug. This is a structural engineering challenge that starts at the molecular level of the concrete slab and ends with the cellular stability of the wood grain.
The foundation of a geometric nightmare
Subfloor preparation for herringbone patterns requires a flatness tolerance of one eighth of an inch over a ten foot radius. Standard installations allow for more variance, but the interlocking nature of herringbone means any dip or hump will cause the tongues and grooves to disengage or gap over time. This is why labor costs spike before the first piece of wood even touches the ground. We are talking about grinding down high spots in a concrete slab using diamond-cup grinders or pouring hundreds of pounds of self-leveling underlayment to create a literal mirror-flat surface. When you are dealing with hardwood floors, the subfloor is the boss. If the boss is crooked, the employees will quit. In this case, the employees are your floorboards, and they will express their frustration by squeaking, popping, and eventually cracking at the joints. Most homeowners think they are buying a product, but they are actually buying the preparation of the space. [image_placeholder]
“A floor is only as good as the subfloor beneath it; deflection is the enemy of every joint.” – Master Flooring Axiom
The geometry of labor costs
The math behind a herringbone floor involves finding the exact center of the room and snapping primary control lines that must remain perfectly square throughout the entire installation. Each piece must be cut with a precision saw to ensure the points meet at exactly ninety degrees without deviation. This is not just slapping boards down. Every single board requires a custom cut. In a standard layout, you only cut at the ends of the rows. In a herringbone layout, you are cutting every single piece. This increases the waste factor from a standard five percent to nearly fifteen or twenty percent. You are paying for the installer to stand at the saw twice as long as they would for a linear floor. The physics of the pattern demand that the leading edge of the pattern stays perfectly aligned with the secondary control lines. If the installer loses even a millimeter of alignment, the entire room begins to fishtail. This is why experienced pros charge a premium. We are not just installers; we are mathematicians with kneepads. This applies whether you are using solid oak, engineered hardwood, or even high-end laminate.
The molecular failure of cheap laminate
Laminate flooring in a herringbone pattern is often more difficult to install than solid wood because the locking mechanisms are rigid and unforgiving. While most people want the thickest underlayment, too much cushion actually causes the locking mechanisms on LVP to snap under pressure. This is a contrarian point that many big-box retailers won’t tell you. They want to sell you the thick, squishy foam. But if you put a herringbone click-lock floor on top of a soft pad, the joints will flex every time you step on them. That vertical movement eventually shears off the thin plastic lip that holds the boards together. I have replaced entire floors because the homeowner wanted a soft walk and ended up with a broken floor. For a successful herringbone, you need a high-density, low-compression underlayment that provides support rather than cushion. You are looking for something that can handle the PSI of a heavy furniture leg without compressing more than a fraction of a millimeter. The chemistry of the core material also matters. A high-density fiberboard core will resist the expansion and contraction that often plagues cheaper materials in humid environments.
| Material Type | Janka Hardness | Acclimation Time | Expansion Risk |
|---|---|---|---|
| Solid White Oak | 1360 | 10 to 14 Days | High |
| Engineered Walnut | 1010 | 3 to 5 Days | Medium |
| High-Density Laminate | N/A | 48 Hours | Low |
| Brazilian Cherry | 2350 | 14 to 21 Days | Extreme |
The centerline is a holy mandate
Establishing the starting point of a herringbone floor is the most critical step of the entire process. If the first row is not perfectly centered and square to the longest wall, the entire pattern will appear skewed when you stand at the entryway of the home. We use laser levels and chalk lines to create a grid. This grid is our map. Without it, the floor is lost. I have seen guys try to eyeball it and end up with a floor that looks like it was installed during an earthquake. The labor cost covers the hours spent measuring, re-measuring, and dry-fitting the first three rows. If those first rows are wrong, the rest of the job is a waste of time. You also have to consider the layout at the walls. A pro will calculate the layout so that you don’t end up with a tiny sliver of wood at the baseboard on one side and a full board on the other. Symmetry is what you are paying for. That level of foresight takes years to develop and hours to execute on every single job site.
Why grout lines ruin a shower herringbone
When you move the herringbone pattern from the floor into showers, the complexity increases because you are now fighting gravity and waterproofing requirements. The grout lines must be perfectly consistent to maintain the visual flow of the pattern across the vertical surface. Showers are notoriously out of square. Plumbers and framers rarely leave us a perfect ninety-degree corner. This means the tile setter has to use thin-set to build out the walls and flatten the surface before the first tile is set. If the wall has a hump, the herringbone tile will lippage, which means the edge of one tile sticks out further than the neighbor. In a shower, this creates a shelf for water to sit on, which eventually leads to mold and grout failure. We use specialized spacers and leveling systems to keep the tiles flat, but this adds hours of meticulous work. The chemical bond of the thin-set is also vital. You need a polymer-modified mortar that can support the weight of the tile without sagging while the pattern is being established. If a tile slips even an eighth of an inch while the mortar is wet, the pattern is ruined.
- Verify subfloor moisture content is below 4 percent for concrete.
- Ensure the room is acclimated to 35 to 55 percent humidity.
- Check that the subfloor is flat within 1/8 inch over 10 feet.
- Acclimate wood flooring in the room for at least 7 days.
- Use a high-quality flooring adhesive with a moisture vapor barrier.
The chemical bond that holds the pattern
Modern adhesives are not just glue; they are sophisticated chemical membranes that provide moisture protection and sound deadening while holding the wood in a vice grip. For herringbone, a full-spread glue-down method is often superior to nailing. Nailing a herringbone floor can be problematic because the force of the nailer can shift the boards slightly, knocking the pattern out of alignment. A full-spread adhesive allows the installer to wiggle the boards into the perfect position and then leave them to set. However, this adhesive is expensive and messy. It requires a specific notched trowel to ensure the correct coverage. If you use too much, it oozes up through the cracks. If you use too little, the floor will develop hollow spots. The labor cost reflects the skill needed to handle these fast-setting chemicals while maintaining the aesthetic integrity of the wood. We are managing the open time of the glue, the humidity of the air, and the structural tension of the wood grain all at once. It is a high-stakes balancing act that leaves no room for error. When people complain about the price, I tell them they are paying for the peace of mind that their floor won’t be a buckled mess in two years.
“Geometric patterns reveal every flaw in the craftsman’s technique; there is nowhere to hide a mistake in a herringbone hall.” – TCNA Handbook Commentary
The 1/8 inch that ruins everything
Precision is the difference between a luxury architectural feature and a DIY disaster. The labor cost is an investment in the structural longevity of your home rather than just a fee for service. You are paying for someone who knows how to read the grain of the wood and the behavior of the slab. You are paying for someone who owns ten thousand dollars in specialized saws and grinders. Most importantly, you are paying for the discipline to stop the job when something isn’t right. If I see the moisture levels are too high in the subfloor, I don’t install. If I see a dip that will cause a gap, I fix it. A cheap installer will just keep going and take your money. A master architect of flooring will ensure that every joint is tight and every line is true. That is why the labor costs what it costs. It is the price of perfection in a world of crooked walls and uneven floors. “