
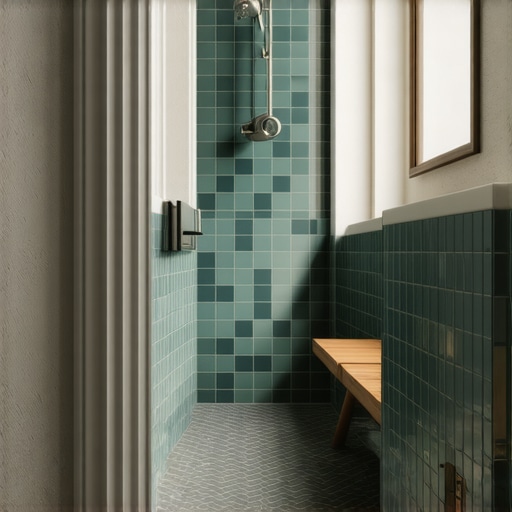
Small Bathroom Herringbone Disasters and Structural Realities
Most guys skip the leveling compound. They think the underlayment will hide the dip. It won’t. I spent three days grinding concrete on a job last month just so the floor wouldn’t click like a castanet. I have spent 25 years on my knees with a moisture meter and a level. I see the same mistakes repeatedly. People want the high-end look of a herringbone pattern in a room the size of a closet. They do not realize that flooring is a structural engineering challenge. A bathroom is a high-moisture environment with complex geometry. When you combine those factors with a difficult pattern like herringbone, you are asking for a failure. I have seen fifteen thousand dollar wide-plank walnut floors turn into potato chips. I have seen waterproof vinyl buckle because it was pinned under a vanity. The reality of a small bathroom is that the physics of the space often work against the aesthetics of the pattern. You need a perfect substrate, a deep understanding of adhesive chemistry, and a plan for the moisture that will inevitably attack your installation.
The geometry of a bathroom disaster
Herringbone patterns fail in small bathrooms because the tight spatial constraints amplify visual clutter and necessitate excessive perimeter cuts that compromise the structural integrity of the floor. In a small space, the 45-degree angle of the pattern creates numerous small triangles at the walls which are prone to shifting. When you are working in a five by eight bathroom, you are dealing with a footprint that barely allows the pattern to repeat. A standard herringbone requires at least two full repetitions of the ‘V’ shape to be visually coherent. In a small bathroom, you might only get one and a half. This creates a lopsided look. Furthermore, the waste factor increases from the standard 10 percent to nearly 20 percent. Every time you hit a wall, a toilet flange, or a shower curb, you are making a complex cut. These tiny pieces of wood or tile lack the surface area to maintain a strong bond with the substrate. If you are using laminate, those small end pieces often lose their locking mechanism entirely. This leads to gapping within months of installation. The pattern becomes a series of loose teeth rather than a unified surface.
“A floor is only as good as the subfloor beneath it; deflection is the enemy of every joint.” – Master Flooring Axiom
Why your subfloor is lying to you
Subfloor flatness is the single most important factor for herringbone success because any dip or crown will cause the long edges of the planks to stand proud. While the industry standard is one eighth of an inch over ten feet, herringbone requires even tighter tolerances to prevent lippage. I have walked onto jobs where the builder swore the slab was level. It never is. When you lay a straight plank, you can sometimes bridge a small dip. With herringbone, the planks meet at opposing angles. If there is a low spot, one plank will dive while the other stays high. This creates a sharp edge known as lippage. In a bathroom, this is more than a trip hazard. It is a point of failure for the finish. Every time you walk on it, you are putting stress on the tongue and groove or the grout line. Eventually, the material will fatigue and crack. For concrete slabs, I use a diamond grinder to take down high spots and a high-flow self-leveling underlayment for the lows. If you are over wood joists, you need to check the deflection. If the floor bounces when you walk, your herringbone grout lines will turn to powder within a year. You need to stiffen that floor with a second layer of exterior grade plywood or a cementitious backer board.
| Material Type | Waste Factor | Moisture Resistance | Subfloor Requirement |
|---|---|---|---|
| Solid Hardwood | 15-20% | Low | Nail-down Plywood |
| Engineered Wood | 12-15% | Medium | Flat to 1/8 inch |
| Porcelain Tile | 18-22% | High | TCNA Compliant Substrate |
| LVP Click-Lock | 10-15% | High | Extremely Flat Slab |
The chemical reality of grout and moisture
Grout failures in small bathroom herringbone patterns are usually caused by improper water-to-powder ratios and the lack of movement joints at the perimeter. In small, wet areas, the high frequency of grout lines in a herringbone pattern increases the points of entry for liquid water and vapor. When you install tile in a herringbone, you are significantly increasing the total linear feet of grout. In a shower or a bathroom floor, every one of those lines is a potential leak path. If you use a cheap, porous grout, you are inviting disaster. I always recommend a high-performance epoxy or a single-component grout that is resistant to stains and moisture. Hardwood floors in this environment are even riskier. Even engineered hardwood floors have a limit to what they can handle. Showers create a localized micro-climate of high humidity. The wood absorbs this moisture and expands. Because herringbone is an interlocking web of planks, that expansion happens in multiple directions simultaneously. If you did not leave a proper expansion gap at the baseboard, the floor will heave in the center. It has nowhere else to go. I have seen floors lift two inches off the subfloor because the installer tight-fitted the planks against the bathtub.
The 1/8 inch that ruins everything
Precision cutting is the difference between a master installation and a DIY failure because a single measurement error of one eighth of an inch will compound across the entire room. In herringbone, every plank relies on the squareness of the previous one to maintain the pattern alignment. If your first row is off by a fraction of a degree, by the time you reach the other side of the bathroom, you will be off by inches. This is what I call pattern drift. In a small bathroom, this is glaringly obvious because the walls are so close. You will see the pattern running crooked against the vanity or the shower door. You must spend the time to snap chalk lines and dry-fit the center spine of the pattern. While most people want the thickest underlayment, too much cushion actually causes the locking mechanisms on LVP to snap under pressure. You want a high-density, low-compression underlayment. Anything too squishy allows the joints to move too much. In a herringbone, that movement is amplified. The mechanical locks are not designed for the multi-directional forces that occur when someone pivots their weight on a 45-degree joint.
- Verify subfloor flatness with a 10-foot straightedge before starting.
- Acclimate all wood products to the bathroom environment for at least 72 hours.
- Use a laser level to establish the primary axis of the herringbone spine.
- Seal all concrete substrates to prevent vapor emissions from reaching the adhesive.
- Install a waterproof membrane like Schluter-Ditra over wood subfloors for tile.
“Wood is a hygroscopic material; it never stops moving in response to its environment.” – NWFA Technical Guidelines
The humidity trap in modern bathrooms
Modern bathrooms often lack the ventilation necessary to protect complex flooring patterns from the destructive effects of stagnant moisture. Without a high-CFM fan, the humidity levels remain elevated long after a shower, causing constant expansion and contraction cycles. These cycles are the death of any floor held together by friction or adhesive. In a herringbone layout, the joints are the weakest point. If you are installing hardwood floors, you must ensure the HVAC system is operational and the room is kept between 30 and 50 percent humidity year-round. In regions like Houston or Florida, this is a full-time battle. Solid wood is a death wish in these climates for a bathroom. You need the dimensional stability of a high-quality engineered core. Even then, you must seal the edges of every cut with a wax-based sealant to prevent edge-swell. If the core of the plank absorbs water, it will expand, and the top wear layer will delaminate. This is not a manufacturer defect. This is an installation failure. You cannot treat a bathroom floor like a bedroom floor. The chemistry of the environment demands a more rigorous approach to material selection and installation technique. If you ignore the science, the floor will fail. It is that simple. There are no shortcuts when you are fighting the physics of water and the geometry of a small space.{“@context”:”https://schema.org”,”@type”:”Article”,”headline”:”Why Herringbone Patterns Fail in Small Bathrooms”,”author”:{“@type”:”Person”,”name”:”Master Flooring Architect”},”publisher”:{“@type”:”Organization”,”name”:”Flooring Specialist”},”mainEntityOfPage”:{“@type”:”WebPage”,”@id”:”https://example.com/herringbone-bathroom-failure”},”articleSection”:”Flooring Engineering”}{“@context”:”https://schema.org”,”@type”:”HowTo”,”name”:”How to Prep a Subfloor for Herringbone”,”step”:[{“@type”:”HowToStep”,”text”:”Grind all high spots on the concrete slab using a diamond cup wheel.”},{“@type”:”HowToStep”,”text”:”Apply a primer and pour high-flow self-leveling compound to eliminate low spots.”},{“@type”:”HowToStep”,”text”:”Establish a center spine line using a laser level and chalk line.”},{“@type”:”HowToStep”,”text”:”Dry-fit the first three rows to ensure pattern alignment and calculate waste cuts.”}]}