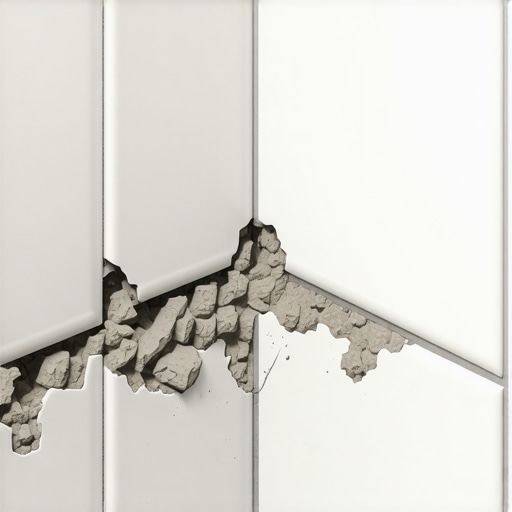
Why Your Bathroom Grout is Crumbling into Sand
Most guys skip the leveling compound. They think the underlayment will hide the dip. It won’t. I spent three days grinding concrete on a job last month just so the floor wouldn’t click like a castanet. I have seen countless homeowners stare at their shower floors with a look of pure betrayal as they watch their expensive grout turn into a fine gray dust that washes down the drain. This is not a cosmetic failure. This is a structural and chemical breakdown that usually starts long before the first tile is ever set. When grout fails, it is a symptom of a much deeper pathology in the subfloor or the mixing process itself. My hands are permanently stained with thin-set and I have spent more hours than I can count recalibrating moisture meters. I know the sound of a hollow tile just by walking past it. If your grout is crumbling, your floor is talking to you. It is telling you that something is moving, something is wet, or something was chemically compromised during the installation window. We are going to look at the physics of deflection and the chemistry of hydration to understand exactly why your bathroom is falling apart.
The silent vibration that destroys tile joints
Subfloor deflection and joist spacing are the primary causes of grout failure in modern residential bathrooms. When a floor system has too much vertical movement, the rigid grout joints cannot withstand the shear stress. This leads to micro-fractures that eventually pulverize the cementitious bond into a sandy residue.
A floor is not a static object. It is a dynamic structural assembly that reacts to every pound of pressure you apply. In the flooring world, we live and die by a measurement called L/360. This is the industry standard for deflection set by the Tile Council of North America. It means that under a live load, the floor should not bend more than the length of the span divided by 360. If you are using natural stone like marble or slate, that requirement jumps to L/720. Most builders today use the absolute minimum requirements. They use 2×10 joists spaced at 16 inches on center with a single layer of 23/32 inch OSB. For a carpeted bedroom, that is fine. For a tiled shower, it is a disaster waiting to happen. Every time you step into that shower, the wood beneath you gives just a fraction of a millimeter. Tile is ceramic or stone. It is brittle. It does not bend. Grout is the weakest link in that chain. When the tile moves, the grout is squeezed or stretched. Since cement has almost no tensile strength, it simply crushes itself into powder.
“A floor is only as good as the subfloor beneath it; deflection is the enemy of every joint.” – Master Flooring Axiom
I have walked onto jobs where the homeowner was convinced they just needed a better sealer. I told them to stand in the middle of the room while I jumped near the wall. They could feel the vibration in their teeth. No sealer in the world can stop the laws of physics. If your subfloor is bouncing, your grout is doomed. You can scrape it out and replace it every six months, but you are just putting a band-aid on a compound fracture. To fix this, you have to stiffen the structure. This often means adding a second layer of exterior grade plywood with a specific offset pattern or installing a dedicated uncoupling membrane. These membranes act as a buffer zone, allowing the subfloor to move independently from the tile. Without that break, the energy of the movement goes straight into your grout lines.
The chemistry of a failed cure
Improper hydration and excessive water during the mixing phase will ruin the molecular lattice of Portland cement grout. If an installer adds too much water to make the grout easier to spread, they are effectively diluting the polymer chains and creating a porous structure that lacks compressive strength.
Grout is a precise chemical mixture. It is not just mud. When you mix water with cement, you start a process called hydration. Crystals begin to grow and interlock at a microscopic level. These crystals are what give the grout its strength. If you add too much water, those crystals are spaced too far apart. As the excess water evaporates, it leaves behind a network of voids. Think of it like a bridge made of toothpicks. If you have a thousand toothpicks, the bridge is strong. If you use the same number of toothpicks but try to build a bridge twice as big, the gaps are too large and the whole thing collapses under the slightest touch. This is exactly what happens when grout is mixed too thin. It looks fine for a few weeks, but as it fully dries, the structural integrity vanishes. You are left with a soft, chalky mess that you can scrape out with a fingernail.
Then there is the issue of the cleanup. This is where most rookie installers kill the job. They spread the grout and then they come back with a soaking wet sponge to wipe off the haze. That extra water on the surface of the joint gets sucked into the grout. It washes out the pigment and the binder. You end up with a joint that is hard at the bottom but soft and sandy at the top. You can tell this happened if your grout is splotchy or has white salt deposits known as efflorescence. Professional grout should be mixed with a margin trowel by hand or a slow speed drill to avoid whipping air into the mix. If you see an installer using a high-speed paddle like they are mixing cake batter, they are ruining your floor. Those air bubbles become tiny craters that weaken the entire joint.
| Grout Type | Flexibility Rating | Moisture Resistance | Best Use Case |
|---|---|---|---|
| Sanded Cement | Low | Moderate | Joints wider than 1/8 inch |
| Unsanded Cement | Very Low | Moderate | Narrow joints and polished stone |
| High Performance | Medium | High | High traffic and wet areas |
| Epoxy Grout | High | Maximum | Showers and steam rooms |
The moisture trap behind the wall
Water infiltration behind the tile substrate causes mold growth and efflorescence, which physically pushes the grout out of the joint. When moisture vapor is trapped between a waterproof membrane and the tile, it creates hydrostatic pressure that degrades the cement bond over time.
We see this constantly in showers that were built with old school methods. The old timers used to put up a plastic vapor barrier, then cement board, then tile. The problem is that once water gets behind the grout, it gets trapped in the cement board. It can’t go back through the plastic, and it can’t easily evaporate through the tile. It sits there and creates a swamp. This constant saturation keeps the grout soft. Cement needs to dry to stay strong. If it stays perpetually damp, it begins to undergo a process of slow degradation. The minerals in the water react with the minerals in the grout, causing it to swell and crumble. This is why modern shower systems use topical waterproofing. We apply the membrane directly behind the tile so that the substrate never gets wet in the first place.
If your bathroom smells like a wet basement, your grout is likely crumbling because the walls are rotting from the inside out. I have pulled down tiles where the grout looked like wet sand, only to find the wall studs were black with mold. No amount of regrouting will fix a leak. You have to ensure that the shower pan was sloped correctly. If water pools in the corners because the installer didn’t create a true 1/4 inch per foot slope to the drain, that standing water will eventually eat the grout. Gravity is the most consistent tool in my kit. If you don’t account for it, you will lose every time.
“Saturation is the silent killer of the cementitious matrix; once the binder is compromised, the aggregate returns to the earth.” – Tile Council of North America Guidelines
The mistake of using laminate or hardwood nearby
Hardwood floors and laminate planks are hygroscopic materials that should never be integrated into high-moisture shower zones without complex transitions. The expansion and contraction of these wood-based products can exert lateral pressure on adjacent tile installations, causing grout lines to crack at the threshold.
I get homeowners all the time asking if they can run their engineered hardwood right up to the edge of the shower. I tell them they can, but they will be calling me in two years to fix the mess. Wood moves. It breathes. It expands when the humidity hits 60 percent and shrinks when the heater kicks on in the winter. Tile is a stone product. It stays the same size. If you don’t leave a proper expansion gap between your wood floors and your tile, the wood will literally push the tile. That pressure has to go somewhere. Usually, it causes the grout at the doorway to pop out in chunks. Or worse, it puts so much stress on the tile that the bond to the thin-set fails. You need a transition strip, usually a T-molding or a marble sill, that allows for that movement. Trying to make it look seamless by grouting the gap between wood and tile is a rookie move that fails 100 percent of the time. The grout will crack within weeks. In those areas, you need a 100 percent silicone caulk that matches the grout color. Silicone can stretch and compress. Grout cannot.
The 1/8 inch that ruins everything
Joint width must be matched to the aggregate size of the grout mixture to prevent shrinkage cracks. Using unsanded grout in a joint larger than 1/8 inch will result in massive volume loss as the material cures, leading to concave joints that eventually flake away.
Think of grout like concrete. In concrete, you have large rocks, sand, and cement. The rocks and sand provide the skeleton. The cement is the glue. If you have a wide gap to fill, you need bigger rocks to bridge the space. In the world of grout, we use sand. Sanded grout is required for anything over an eighth of an inch. The sand particles act like tiny pillars that hold the joint open as the water evaporates. If you use unsanded grout in a wide joint, there is no internal structure. As it dries, it shrinks significantly. This creates a gap between the grout and the edge of the tile. Once that bond is broken, the grout is just sitting there loose. It will eventually vibrate out or get sucked up by a vacuum cleaner. Conversely, if you try to shove sanded grout into a tiny 1/16 inch joint, the sand grains will get stuck at the top, leaving the bottom of the joint empty. This creates a hollow shell that will collapse the first time someone steps on it with a high heel.
Critical Installation Checklist
- Check subfloor deflection using a digital level and a weighted load.
- Verify that the joist span meets L/360 or L/720 requirements.
- Ensure the grout is within its expiration date to avoid weak polymers.
- Mix the grout with a margin trowel to a peanut butter consistency.
- Wait the full manufacturer-recommended time before performing the first wash.
- Use a damp, not dripping, sponge for the cleaning phase.
- Maintain a consistent room temperature of 65 to 80 degrees during the cure.
- Apply a high-quality penetrating sealer 72 hours after installation.
The final word on stable joints
Repairing sandy grout requires a systematic approach. You cannot simply smear new grout over the old stuff. It will not stick. You have to use a grout saw or an oscillating tool to remove at least two-thirds of the depth of the joint. You need to create a clean, square channel for the new material to bite into. Before you put new grout in, you must address the underlying cause. If the floor is bouncy, you need to add blocking between the joists from the basement or crawlspace. If the issue was too much water in the mix, you need to be disciplined with your measuring cups. I use a graduated cylinder on my job sites. I don’t eyeball anything. If the manufacturer says two quarts of water, I give it exactly two quarts. The physics of your bathroom do not care about your feelings or your schedule. They only care about the chemistry of the bond and the stability of the wood. Fix the structure, respect the water ratio, and your grout will remain solid for a generation. If you ignore the fundamentals, you are just making sand.