
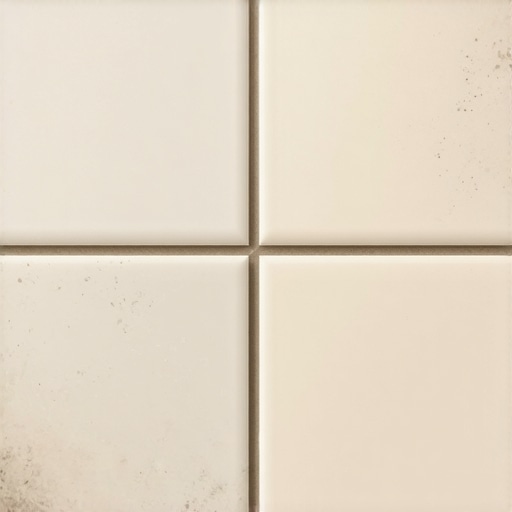
I spent three days grinding concrete on a job last month just so the floor wouldn’t click like a castanet. That is the reality of this trade. Most guys skip the leveling compound. They think the underlayment will hide the dip. It won’t. I see it every week. Homeowners call me because their brand new bathroom looks like a disaster. They see light grey grout in one corner and charcoal in the other. They think the manufacturer sent them two different batches. They are usually wrong. It is almost always an installation failure. My hands smell like WD-40 and oak dust even after a shower. I have spent 25 years on my knees. I know why your grout is failing. It is a structural engineering challenge. Grout is not just filler. It is a chemical bond that must cure under specific conditions. If those conditions change, the color changes. Most installers treat it like cake frosting. It is more like concrete chemistry. If you do not respect the physics of moisture, you get a patchy mess.
The science of the pigment ghost
Grout discoloration often stems from inconsistent water to powder ratios during mixing or improper cleaning techniques during the installation phase. When you mix a bag of Portland cement-based grout, you are starting a chemical reaction. This reaction is called hydration. Every molecule of cement needs a specific amount of water to create a stable crystal structure. If you add too much water, you create microscopic voids. When that extra water evaporates, it leaves behind air. These tiny air pockets change how light hits the surface. This creates a lighter shade. It is an optical illusion caused by structural weakness. If you use a high-speed drill to mix your grout, you pull air into the bucket. This creates a foam. That foam dries lighter. Use a slow speed paddle. It is the only way to keep the pigment uniform. I have seen guys use a garden hose to add water. They just eyeball it. That is how you ruin a ten thousand dollar tile job. Precision is the only path to a single color.
How excess water kills your color
Excessive moisture during the cleanup process is the primary cause of shade variation across a tiled surface. After the grout is spread, you have to wipe it down. This is where most installers fail. They use a soaking wet sponge. That water sits on the surface of the grout joint. It dilutes the pigment. It pulls the color out of the top layer. This is why your grout looks darker inside the joint but lighter on top. If you wipe the floor three times with a wet sponge, you are washing the color away. I use a damp sponge. Not a wet one. It should be rung out until no drops fall. You are cleaning the tile, not washing the floor. If you see a puddle in the grout joint, you have already lost the battle. The chemical bond is now compromised. The surface will be soft. It will eventually crumble. I tell my apprentices to treat the sponge like a surgical tool. One pass. Flip it. One pass. Done. If you keep rubbing it, you are just moving pigment around like a watercolor painting. It looks terrible once it dries.
[image_placeholder_1]
The subfloor secret that changes everything
Substrate porosity and moisture levels dictate how quickly grout dries and how the final pigment appears. Most guys ignore what is under the tile. If you are tiling over a dry concrete slab, that concrete is thirsty. It will suck the water out of the grout from the bottom. This causes the grout to dry too fast. It leaves the pigment sitting on top in a concentrated layer. If one part of your floor is concrete and another part is plywood, the grout will dry at two different speeds. This results in two different colors. You have to seal the substrate. I spend hours prepping the floor with a primer. It stops the substrate from stealing moisture. If the moisture leaves the grout too quickly, the crystals cannot form. The grout becomes brittle. It turns into a dusty mess that you can scratch with a fingernail. A floor is only as good as the subfloor beneath it. Deflection is the enemy of every joint. If that subfloor moves, the grout cracks. If the moisture is uneven, the color is uneven. It is a simple law of physics that most people ignore to save time.
“A floor is only as good as the subfloor beneath it; deflection is the enemy of every joint.” – Master Flooring Axiom
The chemistry of evaporation and shade
Atmospheric conditions like humidity and airflow significantly impact the curing process and final color of cementitious grout. If you have an AC vent blowing on one part of the floor, that area will dry faster. Faster drying means a lighter color. If the bathroom is humid, the grout stays wet longer. This leads to a darker shade. I have seen jobs where the sunlight hitting the floor through a window changed the grout color in a perfect square. The heat from the sun accelerated the evaporation. It is not a product defect. It is environmental interference. You have to control the site. Close the windows. Turn off the HVAC until the grout is set. You want a slow, even cure. This is why I prefer epoxy grout for high-stakes jobs. It does not rely on water evaporation. It is a two part chemical reaction. It is harder to work with but the color is locked in. However, most residential jobs use standard grout. You have to be a master of the room climate. If you do not respect the air, the air will ruin your work. I have seen $15,000 wide-plank walnut floors cup because of humidity. Grout is no different. It reacts to the world around it.
The physics of the wash bucket
Dirty wash water introduces minerals and contaminants that can stain grout during the final wipe down. If you are using the same bucket of water for the whole room, you are failing. By the time you reach the second half of the floor, that water is full of suspended solids. You are basically wiping dirty mud back into the joints. This creates a dingy, dark appearance. I change my water every 50 square feet. It is a pain. It takes time. But it is the only way to ensure the color stays true. I also look at the water source. If the house has high iron content in the well water, that iron will turn your white grout orange. If there is heavy chlorine, it can bleach the pigment. I sometimes bring my own water to a job site. It sounds crazy to a homeowner. It sounds like common sense to a professional. You cannot mix high-end chemicals with trash water and expect a gallery finish. It is about the purity of the bond.
Technical specifications and material comparison
Understanding the technical differences between grout types is necessary for selecting the right material for specific environments. Not all grout is created equal. High-performance grouts use different aggregates. They have different absorption rates. If you are doing a shower, you need a grout with low porosity. If you use a cheap builder-grade grout in a shower, it will absorb water every time you bathe. This makes it look dark and blotchy. It never truly dries out. Then mold starts to grow in the pores. I only use high-density grouts. They are packed with polymers. These polymers seal the voids. They keep the color consistent. They make the surface waterproof. You get what you pay for in this industry. If you buy the cheapest bag at the big-box store, you are buying a headache. I have spent years testing these products. I know which ones hold their pigment and which ones fade after a month.
| Grout Type | Primary Binder | Water Resistance | Color Consistency |
|---|---|---|---|
| Sanded Grout | Portland Cement | Low | Moderate |
| Unsanded Grout | Portland Cement | Low | Moderate |
| High-Performance | Polymer Modified | High | Excellent |
| Epoxy Grout | Resin/Hardener | Waterproof | Superior |
Precision steps for a uniform finish
Following a strict protocol during the installation phase prevents the most common causes of grout shading issues. You have to have a system. You cannot wing it. I follow the same steps on every job. I check the moisture of the subfloor. I check the temperature of the room. I mix the grout to a peanut butter consistency. I let it slake for ten minutes. This allows the chemicals to fully hydrate. Then I mix it again by hand. No more water. Never add water after the grout has started to set. This is called retempering. It is a sin in the flooring world. It destroys the color. It destroys the strength. If the grout gets stiff in the bucket, throw it away. Start over. A twenty dollar bag of grout is not worth ruining a five thousand dollar tile installation. Here is my professional checklist for a perfect job.
- Verify subfloor moisture levels before starting
- Ensure all thin-set is removed from the joints
- Mix with a slow-speed drill to avoid air entrainment
- Allow grout to slake for exactly ten minutes
- Use a microfiber cloth for the final haze removal
- Control the room temperature and airflow for 24 hours
Hardwood floors and the laminate exception
While grout is specific to tile, the principles of moisture and expansion apply to hardwood and laminate surfaces as well. People ask me if they can grout the gap between their tile and their hardwood floors. The answer is no. Never. Hardwood floors move. They expand and contract with the seasons. Grout is rigid. It does not move. If you put grout against wood, the wood will crush the grout or the grout will cause the wood to buckle. You need a flexible sealant. A color-matched caulk is the only solution. The same goes for laminate. Laminate is a floating floor. It needs to breathe. If you lock it in with grout, the locking mechanisms will snap under pressure. I have seen entire floors ruined because someone wanted a “seamless” look. There is no such thing as a seamless transition between two different materials. You need expansion gaps. You need the right transitions. I prefer low-profile metal strips. They look clean. They allow for movement. They don’t look like the bulky T-moldings you see in cheap apartments. It is about engineering the movement of the house.
Efflorescence and the salts that ruin shades
Efflorescence is the migration of soluble salts to the surface of a cementitious material, creating a white, powdery film. This is the ghost of the concrete world. It happens when water moves through the substrate and picks up minerals. As the water evaporates at the grout joint, it leaves the salt behind. This makes your dark grout look white or ashy. It is not a pigment issue. It is a drainage or moisture issue. If you have a leak under your shower pan, you will see efflorescence in the grout. It is a warning sign. You cannot just wash it off. It will come back. You have to stop the source of the water. I have seen people try to paint over it. That is a waste of time. The salt will just push the paint off. You have to acid wash it and then seal it. But if the moisture is still there, you are just fighting a losing battle. It is another reason why subfloor prep is the most important part of the job. Most guys don’t want to hear that. They want to get in and get out. I want the floor to last thirty years.
“Hydration is not just drying; it is a molecular transformation that requires thermal stability.” – TCNA Standards Handbook
Final site notes
The 1/8 inch that ruins everything is usually the depth of your mistake. If your grout is two different colors, look at how you mixed it. Look at how you cleaned it. Look at the water you used. This isn’t magic. It is science. If you want a floor that looks like the showroom, you have to work like a scientist. You have to measure your water. You have to time your slaking. You have to control your environment. If you do those things, your grout will be perfect. If you don’t, you will be calling someone like me to tear it out and start over. And I don’t work cheap. I value my knees and my time. A floor is a performance surface. Treat it with respect. Stop looking for shortcuts. There are no shortcuts in a proper installation. Only the long road leads to a floor that stays beautiful for a lifetime. Pay attention to the chemistry. Pay attention to the subfloor. Everything else is just decoration.