
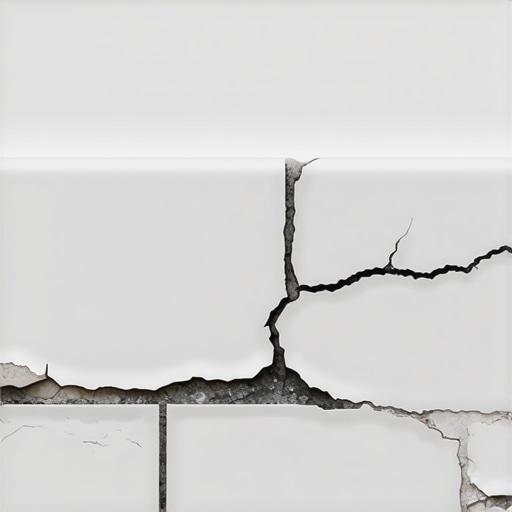
The sight of a hairline fracture snaking along the bottom of your wall is enough to make any homeowner lose sleep. You spent thousands on a premium installation. You picked the perfect tile. You even upgraded the grout color. Now, three months later, it looks like a geological fault line is opening up. Most installers will tell you it is just settling. They are wrong. It is a fundamental failure of structural engineering at the most sensitive transition point in your home. Grout is a rigid, mineral based substance designed to fill the static voids between tiles. It was never meant to be an adhesive or a bridge for shifting planes. When you force a brittle material to act as an anchor between two different surfaces, physics will win every time.
Most guys skip the leveling compound. They think the underlayment will hide the dip. It won’t. I spent three days grinding concrete on a job last month just so the floor wouldn’t click like a castanet. That job was for a guy who insisted on grouting his tile all the way to the baseboard. I warned him. I told him that the slab would move differently than the studs in his walls. He wanted that clean look he saw on a home renovation show. Within six weeks, he called me back. The grout had turned to powder. The reason is simple. Your house is a living, breathing machine. Wood shrinks. Concrete expands. Gravity pulls. If you do not account for these forces, your floor will literally tear itself apart at the edges.
The 1/8 inch that ruins everything
Grout cracks at the baseboard because of vertical and horizontal plane movement that exceeds the tensile strength of the cementitious material. To prevent this, you must use a flexible 100 percent silicone sealant at the change of plane. This creates a movement joint that absorbs structural shifts without fracturing.
When we talk about the chemistry of grout, we are talking about a Portland cement base mixed with sand and water. During the hydration process, the calcium silicates form a crystalline structure. This structure is incredibly strong in compression. You can walk on it for a hundred years without a problem. However, it is remarkably weak in tension and shear. If the floor drops by even 1/32 of an inch due to a heavy furniture load or seasonal joist shrinkage, the grout cannot stretch. It snaps. This is why the Tile Council of North America is so adamant about movement joints. A rigid joint at a wall transition is a ticking time bomb.
Why your subfloor is lying to you
Subfloor deflection is the most common hidden cause of grout failure at the perimeter of a room. If your subfloor does not meet the L/360 standard for ceramic tile or L/720 for natural stone, the vertical bounce will pulverize the grout joints every time someone walks by.
Deflection is the amount of bend in your floor system. If you have 2 by 10 joists spaced at 16 inches on center, they might feel solid. But add the weight of a thick mortar bed, large format tile, and a kitchen island. Suddenly, those joists are straining. Every time you walk across the room, the subfloor bows slightly in the middle. This creates a lever effect. The edge of the tile near the baseboard lifts or drops. Because the baseboard is nailed to the wall studs, it stays put. The grout is caught in the middle of this tug of war. It is a mechanical impossibility for a rigid grout joint to survive this environment. You can use the most expensive modified grout on the market, but if the subfloor is not stiff enough, the bond will break. This is especially true when transitioning from hardwood floors to tile. Hardwood expands across its grain with humidity, while tile remains relatively stable. The clash of these two materials creates immense lateral pressure.
“A floor is only as good as the subfloor beneath it; deflection is the enemy of every joint.” – Master Flooring Axiom
To truly understand why the grout fails, we have to look at the moisture content of the wood. If you are in the humid Northeast during the summer, your joists might have a moisture content of 12 percent. When the heater kicks on in January, that drops to 6 percent. The wood cells shrink. The entire floor assembly drops. If you have grouted the gap between the floor and the wall, that grout is now supporting the weight of the wall or being crushed by it. Neither scenario ends well. This is why we leave expansion gaps. A proper gap is not a sign of a lazy installer. It is the hallmark of a professional who understands thermodynamics.
The chemistry of a failed bond
Standard grout lacks the polymer density required to adhere to non-porous surfaces like finished baseboards or shower pans. When moisture enters the crack, it further weakens the bond, leading to total detachment. Using color matched caulk is the only way to ensure a lasting water resistant seal.
In wet areas like showers, the problem is even more severe. Water gets behind the cracked grout and begins to rot the bottom of the drywall or the baseboard. This is why we never, ever grout the corner where the wall meets the floor in a shower. The thermal expansion of the shower pan is different from the wall tile. If you use grout, the heat from the water will cause the pan to expand, crushing the grout. When the pan cools, it shrinks, leaving a gap. This gap is a highway for mold. We use 100 percent silicone because it has a high elongation percentage. It can stretch to double its size and return to its original shape without losing its bond. This is the difference between a floor that lasts five years and one that lasts fifty.
| Material Property | Standard Grout | Acrylic Caulk | 100% Silicone |
|---|---|---|---|
| Flexibility | None | Moderate | Extreme |
| Adhesion to Wood | Poor | Good | Excellent |
| Water Resistance | Porous | Water Resistant | Waterproof |
| Longevity | High (Static) | Medium | High (Dynamic) |
The ghost in the expansion gap
Laminate and hardwood floors require a minimum 1/4 inch expansion gap at all vertical obstructions to prevent buckling. If you fill this gap with grout or hard wood filler, the floor will eventually peak and the joints will fail as the material seeks room to expand.
People love the look of a tight fit. They see a gap and they want to fill it. Do not do it. I have seen laminate floors that were installed too tight in the summer. When winter came and the humidity dropped, the planks shrank so much that the gaps opened up in the middle of the room. Conversely, if you install a floor in the dry winter and leave no gap at the baseboard, the floor will buckle like a mountain range when the summer humidity hits. The baseboard should sit on top of the floor, not be wedged against it. The joint between the floor and the baseboard should be left open or filled with a flexible sealant. If you are worried about the look, use a shoe molding or a quarter round. This allows the floor to slide underneath the wall while hiding the necessary expansion gap from view.
“A movement joint must be installed where tilework abuts restraining surfaces such as perimeter walls, curbs, columns, and pipes.” – TCNA Handbook EJ171
Pre-Installation Checklist for a Crack-Free Perimeter
- Verify subfloor stiffness exceeds L/360 for ceramic and L/720 for stone.
- Ensure all concrete slabs are fully cured for at least 28 days to allow for initial shrinkage.
- Leave a minimum 1/8 inch gap between the last tile and the wall.
- Vacuum all debris out of the expansion gap before applying sealant.
- Use 100 percent silicone that matches your grout color for all changes of plane.
- Never nail baseboards into the flooring itself; nail only into the wall studs.
The final verdict is that grout is not a substitute for movement joints. If your installer tries to grout the baseboard, stop them. If your grout is already cracking, do not just put more grout over the top. You have to scrape it out, clean the joint, and apply a high quality silicone. This is the only way to stop the cycle of cracking and repair. It takes more time and the materials cost more, but it is the only way to build a floor that survives the reality of a moving house.