
Most guys skip the leveling compound. They think the underlayment will hide the dip. It won’t. I spent three days grinding concrete on a job last month just so the floor wouldn’t click like a castanet. When it comes to a shower, that level of obsession is the only thing standing between you and a mold colony. If your shower floor is sluggish, it means the water is losing its battle with gravity. This is not a plumbing issue in the traditional sense, but a failure of structural geometry and surface tension. A sluggish floor is usually the result of a shallow pitch or a drain that sits just a hair too high for the surrounding tile. This prevents the natural evacuation of greywater, leading to stagnant puddles that eat away at your grout and invite bacterial growth. You are dealing with a microscopic landscape where a fraction of an inch determines the life of your subfloor.
The physics of a standing puddle
A sluggish shower floor is caused by insufficient slope or surface friction that prevents water from reaching the drain. To function correctly, a shower pan requires a quarter inch of vertical drop for every horizontal foot of distance toward the drain. When this geometry fails, the surface tension of the water overcomes the pull of gravity, creating persistent standing water on the tile and grout lines. This issue is often compounded by large format tiles that cannot follow the complex curves of a drain basin, leading to flat spots where water pools. I have seen million dollar homes where the master suite had a shower that felt like a swamp because the installer prioritized aesthetics over the basic laws of fluid dynamics. They wanted those huge marble slabs, but they didn’t want to do the math to make them drain. In my experience, if you do not have that 1/4 inch per foot pitch, you might as well be showering in a bucket. Water is patient. It will find the smallest pinhole in your grout and sit there until your plywood subfloor is the consistency of wet oatmeal. This is especially true in humid environments like Seattle or Portland, where the air is so heavy the water barely wants to evaporate at all. You need that mechanical movement to get the moisture out of the room before the spores take hold.
“A floor is only as good as the subfloor beneath it; deflection is the enemy of every joint.” – Master Flooring Axiom
The ghost in the expansion gap
Expansion gaps are the silent protectors of any flooring system, including showers and hardwood floors. While we think of tile as a rigid material, the entire house is a living, breathing organism that expands and contracts with changes in humidity. In a shower, the perimeter joints must be filled with 100 percent silicone sealant rather than cementitious grout to allow for this inevitable movement. Without these flexible breaks, the pressure from the walls will push against the tile, causing it to tent or crack, which eventually disrupts the slope of the floor and leads to drainage failure. I have seen beautiful hardwood floors in the adjacent bedroom buckle because the shower leaked into the subfloor, traveling through the joist cavities like a highway. The moisture doesn’t stay in the bathroom. It migrates. If you do not have a proper capillary break at the door, your expensive white oak is going to cup and curl. I always tell homeowners that the floor is a system. You cannot fix the shower without looking at how it meets the laminate or the hardwood in the hallway. If that transition isn’t sealed, you are just waiting for a disaster. The physics of wood and the physics of tile are constantly at war, and the expansion gap is the only peace treaty that works.
The drain height and tile thickness trap
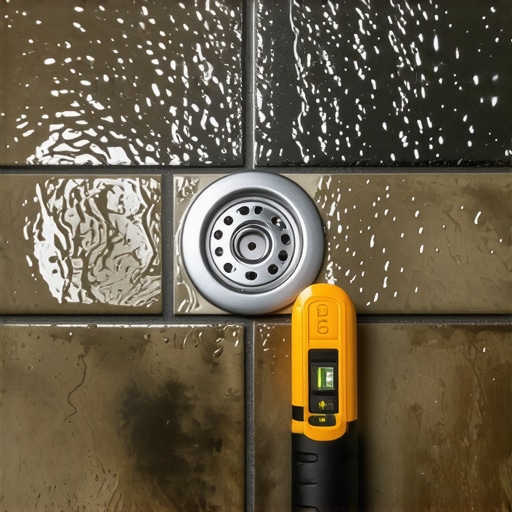
A drain sitting higher than the surrounding tile creates a physical dam that traps water indefinitely. This alignment error happens when the installer fails to account for the thickness of the thin-set mortar and the tile itself during the rough-in phase. The result is a recessed drain flange that sits at a higher elevation than the lowest point of the floor slope, forcing water to sit in a ring around the metal grate. This is the most common reason for a sluggish drain. People think it is a clog, but they can snake it all day and the water will still sit there. You have to understand the chemistry of the bond. If you are using a modified thin-set, you are adding polymers that make the bed stronger but also slightly thicker. If you don’t calculate that mil thickness before you set the drain, you are finished. I have had to go into jobs and literally grind down the underside of tiles around a drain just to get them to sit flush. It is a miserable, dusty task that could have been avoided with a simple level and a bit of foresight. You are looking for a flush transition where the water can fall into the throat of the drain without meeting a single ridge or bump.
| Material Type | Minimum Pitch Requirement | Surface Friction Rating | Acclimation Time |
|---|---|---|---|
| Porcelain Tile | 1/4 inch per foot | Low | 24 Hours |
| Natural Pebble | 3/8 inch per foot | Extreme | 48 Hours |
| Solid Hardwood | Not Applicable | Medium | 7 to 14 Days |
| Laminate Planks | Not Applicable | Low | 48 Hours |
The chemistry of the modified thin-set bond
Modified thin-set uses liquid latex or powdered polymers to increase bond strength and flexibility in wet environments. These additives allow the mortar to resist the shear forces caused by the weight of the water and the person standing in the shower. For a floor to drain well, the mortar bed must be perfectly smooth, as any ridges or valleys in the adhesive will be mirrored in the finished tile surface, creating micro-puddles. When I’m working with a high-end installation, I use ANSI A118.15 standards. This is the professional grade stuff. It isn’t the cheap bag from the big box store. It has the polymer load necessary to handle the vibration of a house. Most people don’t realize that a shower floor is constantly vibrating. Every time the wind blows or a truck drives by, the house moves. If your thin-set is brittle, it snaps. Once it snaps, the tile loses its bond, the slope changes, and suddenly you have a sluggish floor. It is all connected. You cannot have good drainage without a rock-solid chemical bond to the substrate. I spend more time mixing my mud than some guys spend laying the whole floor. You want the consistency of peanut butter, not soup. If it is too wet, it shrinks as it cures, and there goes your perfect 1/4 inch slope. It becomes a 1/8 inch slope, and now you have a birdbath in the corner.
“Slope is not a suggestion but a requirement for the evacuation of greywater.” – TCNA Handbook Reference
The checklist for a perfect shower floor evacuation
- Confirm the subfloor deflection meets L/360 standards for ceramic and L/720 for stone.
- Apply a continuous waterproof membrane like RedGard or Hydro Ban over the pre-slope.
- Verify the drain flange is set at the absolute lowest point of the structural framing.
- Use a spirit level to ensure a consistent quarter-inch drop per linear foot.
- Select a grout with high water-resistance, such as epoxy or high-performance cementitious grout.
- Clear all weep holes in the drain assembly to prevent sub-surface water buildup.
- Seal all perimeter transitions with 100 percent silicone to manage expansion and contraction.
The contrarian truth about underlayments
While most people want the thickest underlayment, too much cushion actually causes the locking mechanisms on LVP to snap under pressure. The same logic applies to shower pans. If you use a foam pre-sloped pan that is too soft or doesn’t have the right compressive strength, the tiles will flex under your feet. That flex breaks the grout. Once the grout breaks, water gets under the tile and sits on the membrane. This creates a sluggish feeling because the water is trapped in the setting bed itself. It is a swamp under your feet even if the top of the tile looks dry. You need a substrate that is as stiff as a morgue slab. I prefer a traditional mortar bed, hand-packed and screeded to perfection. It takes longer. It is harder on the knees. But it doesn’t move. You can dance on it and that slope will stay exactly where I put it. Modern kits are great for speed, but they often sacrifice the rigidity that a truly permanent floor requires. If you want a floor that drains for fifty years, you build it out of sand and cement. You don’t buy it in a box. You have to respect the materials. You have to respect the gravity. If you don’t, the water will win every single time. It is the most persistent force in the universe, and it is trying to rot your house from the inside out.
The drain alignment fix for existing floors
Fixing a sluggish drain without ripping out the entire floor requires precision height adjustments to the drain grate. Many modern drain systems allow for a threaded riser that can be lowered or raised independently of the flange. By grinding down the underside of the grate or adjusting the threads, you can often drop the intake point just enough to allow the water to clear the tile edge. This is a surgical procedure. You are working with millimeters. If you go too far, you create a trip hazard. If you don’t go far enough, the puddle remains. I have used diamond hand pads to gently slope the edges of the surrounding tiles toward the drain throat. It is slow work. It requires a steady hand and a lot of water to keep the dust down. But it can save a homeowner ten thousand dollars in demolition costs. You have to be careful not to polish the tile too much or it will become a skating rink when it is wet. The goal is to create a subtle funnel that the eye cannot see but the water can feel. Water always follows the path of least resistance. Your job is to make that path lead straight down the pipe. It is about fine-tuning the interface between the ceramic and the metal. When you get it right, the water disappears instantly. No swirling. No sitting. Just gone. That is the mark of a master installer.