The hidden engineering behind the pink slime in your shower
I spent three days grinding concrete on a job last month just so the floor wouldn’t click like a castanet. Most guys skip the leveling compound. They think the underlayment will hide the dip. It won’t. While I was on my knees, I noticed the adjacent master bath had grout lines that looked like they were bleeding. The homeowner thought it was rust from the water. It wasn’t rust. It was a structural failure of the maintenance cycle and a biological invasion. That pink hue is a sign that your shower has become a laboratory for Serratia marcescens. This bacteria thrives on the fatty acids found in your soap and the phosphorus in your shampoo. It is not a stain. It is a biofilm. If you see it, your grout has likely lost its hydrophobic properties. The seal has failed. Water is no longer sitting on top of the surface. It is penetrating the cementitious matrix of the grout. This is how subfloor rot begins. In my 25 years of flooring, I have seen this pink ghost travel from the shower floor, under the transition strip, and right into the subfloor of a hardwood hallway. Once that moisture hits the plywood, your expensive oak starts to cup. It is a chain reaction of structural neglect.
The biological truth of the pink bathroom stain
Serratia marcescens is a Gram-negative bacteria that appears as a pink or orange film in showers and grout lines. It feeds on soap scum and moisture. To kill the bacteria, you must use oxygenated bleach or isopropyl alcohol to disrupt the biofilm matrix and prevent regrowth.
This organism is opportunistic. It does not just sit on the surface. It builds a microscopic fortress. The pink color comes from a pigment called prodigiosin. It is produced when the bacteria reaches a specific density. When you see pink, you are looking at a colony of millions. This is not just an aesthetic issue. It is a health concern for anyone with a compromised immune system. More importantly for the structure of your home, it indicates that your grout is holding onto organic matter. Grout is essentially a mixture of sand and cement. Under a microscope, it looks like a mountain range of jagged peaks and deep valleys. Those valleys trap skin cells and soap oils. If you used a cheap, porous grout without a high-quality sealer, you have essentially built a coral reef for bacteria. You can scrub the surface with a brush, but you are only decapitating the colony. The roots remain deep within the pores of the grout. This is why the pink returns every two weeks. You need a chemical intervention that changes the PH of the environment or physically destroys the cell walls of the bacteria.
“A floor is only as good as the subfloor beneath it; deflection is the enemy of every joint.” – Master Flooring Axiom
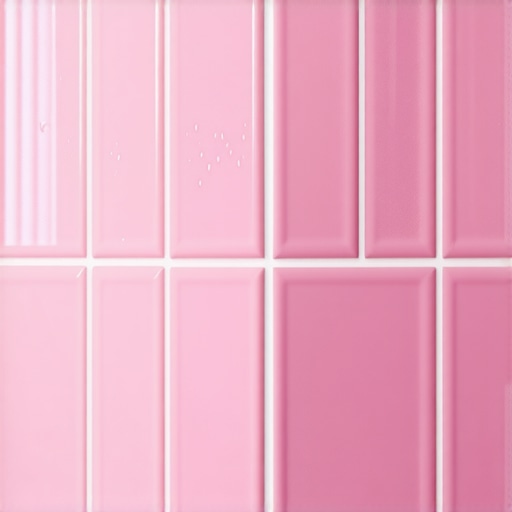
The physics of grout porosity and moisture retention
Grout porosity measures the capillary action of water absorption in cementitious materials. High porosity in shower grout allows bacteria to penetrate the subsurface, leading to structural dampness and mold growth. Sealing grout with a penetrating sealer reduces this absorption rate significantly.
Standard sanded grout is a thirsty material. It is a hydraulic cement product. When you mix it with water, a chemical reaction occurs that creates a solid mass, but that mass is full of microscopic voids. These voids are the result of the water evaporating during the curing process. If the water-to-powder ratio was too high during installation, those voids are even larger. This is why I always tell my apprentices to use the minimum amount of water possible. A sloppy mix is a weak mix. When you shower, the water uses these voids as highways. This is called capillary action. The water travels deep into the grout joint. If there is a breach in the waterproofing membrane behind the tile, that water hits the backer board. If the installer used greenboard instead of a true cement board or a topical membrane like Kerdi, you are in trouble. The pink bacteria is often just the warning light on the dashboard. It tells you that the environment is wet enough for life to flourish. If you have hardwood floors in the bedroom connected to the bath, that moisture is traveling through the joist space. Wood is hygroscopic. It will pull that moisture out of the air and the subfloor. I have seen solid 3/4 inch white oak floors crown because a shower three feet away was leaking through the grout.
[IMAGE_PLACEHOLDER]
The chemistry of destroying biofilm without ruining the tile
Cleaning pink grout requires a disinfectant like hydrogen peroxide or diluted bleach to kill Serratia marcescens. Avoid acidic cleaners on natural stone because they cause etching. Steam cleaning at 200 degrees is the most effective non-chemical way to sanitize grout lines.
Most people reach for the harshest chemicals they can find. They pour straight bleach on the floor. This is a mistake. Bleach is a powerful oxidizer, but it also has a high surface tension. It often cannot penetrate deep into the pores where the bacteria lives. Furthermore, bleach can weaken the structure of the grout over time by eating away at the lime content in the cement. It makes the grout even more porous. You are creating a bigger problem for the future. I recommend a two-stage attack. First, use a dedicated alkaline cleaner to strip away the soap scum. This removes the food source. Scrub it with a stiff nylon brush. Do not use metal bristles. You will scratch the glaze on your ceramic tile. Once the food is gone, apply a 3% hydrogen peroxide solution. Let it sit for fifteen minutes. It will bubble. That is the oxygen physically lifting the bacteria out of the pores. For the absolute best results, use a vapor steamer. The heat alone will kill the bacteria at a cellular level without the need for toxic fumes. Once the grout is clean and bone dry, you must seal it. If you don’t seal it, you are just leaving the door open for the next colony to move in. A high-quality solvent-based sealer is the only way to go. It penetrates deeper than water-based alternatives.
The threat to nearby hardwood and laminate installations
Moisture migration from a leaking shower will cause hardwood floors to cup or laminate to peak at the seams. The Relative Humidity (RH) in a bathroom should be controlled with a properly rated exhaust fan to prevent floor failure in adjacent rooms.
People think their floors are isolated. They are not. The house is a system. When you have a constant source of moisture in the shower, the vapor pressure increases. This vapor moves toward areas of lower pressure, usually the conditioned air of the hallway or bedroom. If you have laminate flooring, this is a death sentence. Laminate is basically a high-density fiberboard (HDF) core with a picture of wood on top. That HDF is essentially a sponge made of sawdust and glue. When the humidity spikes because of a bacterial-laden, wet shower, the edges of the laminate planks will swell. This is called peaking. Once it happens, it is irreversible. You cannot sand laminate. You have to tear it out. Hardwood is a bit more resilient but more expensive. Solid wood will expand across its grain. If you didn’t leave a proper expansion gap at the perimeter, the floor will hit the wall and have nowhere to go but up. I have seen floors lift two inches off the subfloor because of a slow leak in a shower pan. The pink bacteria is your early warning system. If you see it, check the moisture levels in the surrounding rooms. Use a pinless moisture meter. If you are seeing readings above 12% in your hardwood, you have a serious problem behind those tiles.
“Porosity is the silent killer of tile installations; if water can get in, the structure will eventually fail.” – Master Flooring Axiom
Selecting the right grout for a permanent solution
Epoxy grout is non-porous and waterproof, making it the best choice for preventing pink bacteria. Sanded grout is best for wide joints, while unsanded grout is used for thin lines under 1/8 inch to prevent shrinkage cracks.
If you are tired of scrubbing, you need to upgrade the material. Traditional cement grout is 19th-century technology. We have better options now. Epoxy grout is a two-part resin system. It is completely waterproof. It does not need to be sealed. Bacteria cannot grow inside it because there are no pores. It is a nightmare to install for a DIYer because it gets sticky and hardens fast. You have to wash the tile with an acid wash during the install to get the haze off. But once it is in, it is there for a century. Another option is high-performance cement grout like Mapei Ultracolor Plus FA. It uses a different chemistry that lacks the calcium hydroxide that feeds some types of mold. It also cures much harder and faster than standard grout. If you are sticking with standard grout, make sure it is fortified with a polymer additive instead of just water. This reduces the size of the internal voids. It makes the floor a performance surface rather than a liability. While most people want the thickest underlayment, too much cushion actually causes the locking mechanisms on LVP to snap under pressure. The same logic applies to grout. You want the right density, not just more material.
Grout Performance Comparison Table
| Grout Type | Porosity Level | Stain Resistance | Installation Difficulty | Lifespan |
|---|---|---|---|---|
| Standard Cementitious | Very High | Low | Easy | 10-15 Years |
| Polymer Modified | Medium | Moderate | Moderate | 15-20 Years |
| Epoxy Resin | Zero | Excellent | Very High | 50+ Years |
| Urethane Premixed | Low | High | Moderate | 20-25 Years |
The Shower Maintenance Checklist
- Clean the shower floor weekly with a PH-neutral cleaner to remove skin oils.
- Run the exhaust fan for at least 30 minutes after every shower to drop the humidity.
- Inspect grout lines monthly for any signs of cracking or pinholes.
- Squeegee the walls after every use to reduce the amount of standing water.
- Test the grout seal by dropping water on it; if it stays in a bead, the seal is good.
- If the water soaks in and darkens the grout, it is time to reseal.
- Scrub the corners with a soft brush and hydrogen peroxide at the first sign of pink.
- Replace any silicone caulking that has pulled away from the tile surface.
- Ensure the shower door sweep is intact to prevent water from hitting the floor outside.
- Check the crawlspace or basement below the shower for any signs of water staining.
The ghost in the expansion gap
One of the most common mistakes I see is grout being used in the corners where two walls meet. This is a technical violation of TCNA standards. Those corners are change-of-plane joints. Houses move. They breathe. When the house shifts, that rigid grout will crack. Those cracks are like a red carpet for pink bacteria. They provide a direct path into the wall cavity. You should always use a 100% silicone sealant in the corners. It is flexible. It moves with the house. Most grout manufacturers make a color-matched caulk that looks just like the grout but stays flexible. If you have grout in your corners, chip it out. It is a failure point. I have seen entire subfloors rotted out because of a hairline crack in a corner joint. The water seeps in, travels down the stud, and pools on the subfloor. By the time you notice the smell, the structural integrity of the floor is gone. The pink slime is just the tip of the iceberg. It is the visible manifestation of a system that is taking on water.
Why your subfloor is lying to you
A subfloor can look dry on top while being saturated underneath. This is especially true if you have a moisture barrier that was installed incorrectly. If you have tile over a plywood subfloor without a decoupling membrane like Ditra, the grout will crack as the wood expands and contracts. Those cracks then let in the moisture that grows the bacteria. It is a vicious cycle. The bacteria loves the dark, damp space between the tile and the wood. When I pull up old bathroom floors, I often find a layer of black mold and pink slime right on top of the plywood. The homeowner had no idea. They just thought the grout looked a little dirty. In reality, the floor was structurally compromised. If you are planning a renovation, do not settle for the bare minimum. Use a waterproof membrane. Use a high-quality grout. And for heaven’s sake, keep it clean. The 1/8 inch of grout between your tiles is the only thing protecting your home’s skeleton from the water you use to keep yourself clean. Treat it with respect. It is a structural component, not a decorative afterthought.