I remember a job in a drafty Victorian where a $20,000 laminate installation looked like a child’s puzzle after three months. The homeowner insisted on tight joints without any trim. I told them that laminate is a living, breathing thing, even if it is mostly resin and sawdust. Three months later, the center of the room rose up like a mountain ridge. The floor had nowhere to go, so it went up. This is the reality of the floating floor. If you do not respect the expansion gap, the floor will destroy itself from the inside out. Understanding the 1/4 inch gap is the difference between a professional finish and a failure that clicks with every step.
The expansion gap is a structural requirement
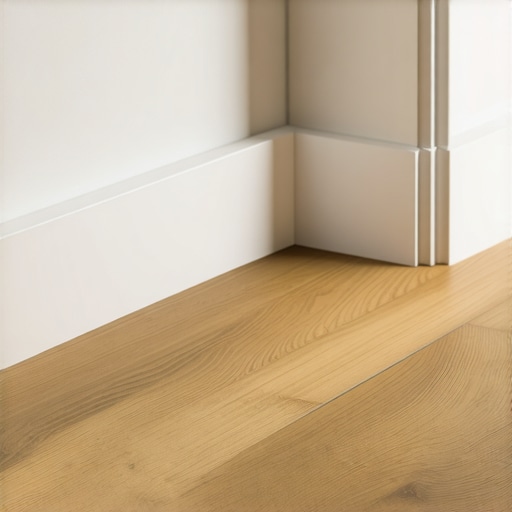
Expansion gaps for laminate flooring are essential perimeter spaces that allow for the natural movement of the fiberboard core during humidity cycles. These gaps typically measure between 1/4 inch and 3/8 inch depending on the specific manufacturer specifications. Without these voids, the planks will buckle, peak, or separate during seasonal transitions. Laminate flooring is essentially a High-Density Fiberboard (HDF) core wrapped in a decorative layer. This HDF core is hygroscopic, meaning it absorbs moisture from the air. When the humidity in the room rises, the wood fibers expand. If the floor is locked tight against a wall or a heavy baseboard, the force of that expansion has to go somewhere. Usually, it results in the locking mechanisms snapping or the floor lifting off the subfloor. This is why you see wide gaps at the baseboard. The installer followed the rules, but the aesthetics suffered. Hiding these gaps requires a deep understanding of trim carpentry and floor physics.
“A floor is only as good as the subfloor beneath it; deflection is the enemy of every joint.” – Master Flooring Axiom
Why floors move like living things
Laminate movement mechanics involve the coefficient of linear expansion, which dictates how much the material grows per foot of width. In a twenty-foot room, a standard laminate might expand by nearly an eighth of an inch total. This movement is not uniform and depends heavily on the ambient relative humidity. I have seen floors shrink so much in the winter that they pull right out from under the baseboard, leaving a gaping hole that looks like a mistake. The key to managing this is acclimation. You cannot just bring the boxes in from the truck and start clicking. The planks need at least 48 hours to reach an equilibrium with the room’s moisture levels. If the floor was installed at its maximum expansion point, it will only shrink from there. If it was installed bone-dry, it will only grow. Most homeowners do not realize that the subfloor itself also contributes to the visual gap. A dip in the concrete or plywood of only 1/8 inch can cause the laminate to sit lower, making the gap under the baseboard look twice as large as it actually is.
The shoe molding solution for wide gaps
Shoe molding installation is the most effective way to cover an expansion gap that has exceeded the width of the baseboard. Shoe molding is thinner and more flexible than quarter round, allowing it to follow the contours of a slightly uneven floor. When you are dealing with a 1/2 inch gap but your baseboard is only 9/16 inch thick, you are playing a dangerous game. One small shift and the gap is visible. Adding a piece of shoe molding provides an extra 1/2 to 3/4 inch of coverage. The trick is in the nailing. You must never nail the shoe molding into the floor. This would lock the floor in place, defeating the purpose of the expansion gap. Instead, you nail the trim into the baseboard at a 45-degree angle. This creates a sliding joint. The floor can move back and forth under the trim while the trim remains fixed to the wall. I prefer using 18-gauge brad nails, as they leave a smaller footprint and are less likely to split the thin wood of the molding. If you are working with MDF trim, pre-drilling is not necessary, but for solid oak or maple, it is a must to prevent a blowout at the heel of the molding.
The math of the shoe molding solution
| Trim Type | Profile Height | Standard Width | Best Use Case |
|---|---|---|---|
| Quarter Round | 3/4 inch | 3/4 inch | Traditional homes with large gaps |
| Shoe Molding | 3/4 inch | 1/2 inch | Modern profiles and subtle coverage |
| Base Shoe | 1/2 inch | 3/8 inch | Minimalist designs with small gaps |
| Cove Molding | 5/8 inch | 5/8 inch | Inside corners or decorative transitions |
Quarter round is the old reliable fix
Quarter round trim offers a 3/4 inch by 3/4 inch profile that can hide even the most egregious installation errors. While some architects find it bulky, it is the savior of the DIY installer. When the subfloor is so unlevel that the laminate is bouncing, a standard baseboard will never sit flush. The quarter round can be pushed down slightly to meet the floor while the baseboard stays level. This creates a visual illusion of a flat floor. However, you have to be careful with the miter cuts. A 45-degree miter on a quarter round is prone to opening up if the house settles. I always use a tiny dab of wood glue on the miter joints before pinning them together. This ensures that even as the wood expands and contracts, the corner stays tight. If you have a gap that is wider than 3/4 of an inch, you have a bigger problem. At that point, you are looking at either a complete re-installation or a custom-milled wider trim piece. I’ve seen guys try to stack two pieces of trim to hide a massive gap. It looks terrible. It looks like you are trying to hide a crime. Do it right the first time and keep your gaps within the limits of standard trim profiles.
“Floating floor systems require a perimeter gap to allow for the natural expansion and contraction of the core material.” – Flooring Standards Handbook
Why caulk fails at the floor line
Caulking laminate gaps is a common mistake made by painters who do not understand floor movement. While caulk is great for the top of the baseboard where it meets the wall, it is a disaster at the bottom where the baseboard meets the floor. Laminate floors move horizontally. Caulk is flexible, but it is not that flexible. Over one or two seasons, the caulk will pull away from either the floor or the wood, leaving a ragged, dirty line of dried silicone or acrylic. It attracts pet hair and dust, making the gap look even more prominent. The only time caulk is acceptable is in very small, non-moving gaps, such as around a door jamb that has been undercut. Even then, you should use a 100% silicone sealant that matches the color of the floor. Silicone has a much higher Shore A hardness and better elongation than standard painter’s caulk. But for a gap at the baseboard, avoid the tube. Use wood. Wood is structural. Wood is permanent. Caulk is just a temporary bandage for a deep wound.
The 1/8 inch that ruins everything
Subfloor flatness standards are the most ignored part of flooring. The NWFA states that a subfloor should be flat within 1/8 inch over a 6-foot radius. Most houses are nowhere near this. When the subfloor has a valley, the laminate bridges over it. When you walk on that spot, the floor deflects downward. This movement causes the gap at the baseboard to grow and shrink every time someone walks by. It also puts immense stress on the click-lock joints. If you are seeing wide gaps, check for vertical movement. If the floor is bouncing, no amount of trim will hide the problem forever. You will eventually see the trim pulling away from the wall. This is why I spend three days grinding concrete or pouring self-leveling compound before a single plank hits the ground. You are building a foundation. If the foundation is wavy, the finish will be wavy. To fix a gap caused by a dip after the fact, you can sometimes inject a low-expansion foam or a specialized floor shim under the plank, but it is a surgical procedure that requires a lot of patience and a steady hand.
Professional tool checklist for hiding gaps
- 18-gauge pneumatic brad nailer with 1.5-inch nails.
- Compound miter saw with a high-tooth count finishing blade.
- Digital moisture meter to check HDF core and subfloor.
- Color-matched wood filler for nail holes and miter joints.
- Stainless steel pry bar for removing old baseboards.
- Pneumatic compressor set to 90 PSI for consistent nail depth.
- Titebond II wood glue for all trim returns and corners.
The trick with plinth blocks and transitions
Plinth blocks and transitions are the secret weapons of the master installer. Sometimes the gap isn’t just along the wall. It is at the intersection of a door casing and the baseboard. This is the hardest place to hide a wide gap because you have multiple angles meeting in one spot. A plinth block allows you to terminate the baseboard and the door casing into a thicker, decorative block. This eliminates the need for complex miters and provides a solid surface to hide the floor gap. Transition strips, or T-moldings, are also necessary for any run longer than 30 feet. Without a transition strip in the middle of a large room, the cumulative expansion will be so great that the perimeter gaps will never be large enough to accommodate the movement. You have to break the floor into smaller sections. This is a hard pill for homeowners to swallow because they want a continuous look. But I tell them they can have a small transition strip now or a buckled floor in July. Most choose the strip.
Final checks before signing off
Before you pack up the saw, you need to do a walk-through. Check every corner. Use a flashlight to look for shadows under the trim. If you see a shadow, you have a gap. Fill nail holes with a wax-based putty that doesn’t shrink. Wipe down the trim with a tack cloth. A floor is a performance surface. It has to handle footsteps, furniture, and the changing of the seasons. By using the right shoe molding and respecting the expansion physics of the HDF core, you turn a potential eyesore into a clean, architectural detail. Do not cut corners. Do not skip the glue. And for the love of the craft, do not nail into the floor. Your reputation is built on the details that nobody notices until they go wrong. A perfect baseboard transition is the silent proof of a master installer’s hand.