Most guys skip the leveling compound. They think the underlayment will hide the dip. It won’t. I spent three days grinding concrete on a job last month just so the floor wouldn’t click like a castanet. That clicking is the sound of a locking mechanism dying a slow death. I have spent twenty-five years on my knees with a moisture meter and a level, and I can tell you that a floor is not a decoration. It is a performance surface. When you see a gap at your threshold, it is not just an eyesore. It is a structural failure in progress. Most homeowners run to the big box store and buy a whole new transition piece, but you can fix a rattling, gapping T-molding for less than ten dollars if you understand the physics of the subfloor. I smell like oak dust and WD-40 most days because I do the work that others find too tedious. In this guide, we are going to look at why your laminate is moving and how to lock it down without ripping up the planks. Stop treating your house like a temporary tent and start treating it like the engineered structure it is.
The physics of the moving floor
Thermal expansion and hygroscopic movement are the primary reasons why laminate flooring gaps at thresholds. These floating floors require a perimeter expansion gap to function. When the ambient humidity fluctuates, the HDF core of the laminate expands or contracts, often pulling away from the T-molding track. Laminate is essentially a high-density fiberboard product topped with a photographic layer and a melamine wear layer. Because it is not nailed or glued to the subfloor, the entire floor moves as a single monolithic slab. If your installer did not leave enough room at the walls, or if they pinned the floor down with heavy cabinetry, the expansion forces will seek the path of least resistance. Usually, that is the doorway. The T-molding is designed to bridge the gap between two different floors, allowing each side to breathe. When that molding starts to lift or the floor pulls out from under it, you have a mechanical failure. The fix involves regaining control of the floor’s movement without restricting its natural cycle. If you pin it too tight, you will see peaking at the seams. If you leave it too loose, you get the gap. The sweet spot is a matter of millimeters and the right adhesive chemistry.
Why your subfloor is lying to you
A concrete subfloor or plywood deck must be flat within 3/16 inch over a 10-foot radius to prevent laminate deflection. If your subfloor is uneven, the locking mechanisms will flex every time you walk over them, eventually causing gapping at the T-molding. Most installers assume the foam underlayment will compensate for a valley in the concrete. It will not. Underlayment is for sound dampening and minor moisture protection, not structural leveling. When you step on a floor that has a void beneath it, the air is pushed out and the plank sinks. This vertical movement pulls the edge of the plank out from the lip of the T-molding. Over time, the friction wears down the tongue and groove. I have seen guys try to fill these gaps with wood filler or caulk. That is a amateur move. The filler will crack within a week because it has no structural elasticity. You need to address the height difference or the lack of grip in the molding track. Grinding concrete is a dusty, miserable job, but it is the only way to ensure the floor stays flat. If you are already at the point where the floor is installed and gapping, you have to use a mechanical fix to bridge that elevation change. You are fighting the laws of physics, and the subfloor always wins eventually if you do not respect the level.
“A floor is only as good as the subfloor beneath it; deflection is the enemy of every joint.” – Master Flooring Axiom
The gap that swallows your peace of mind
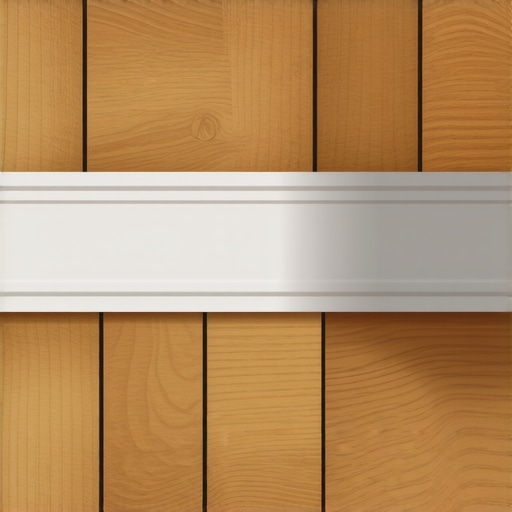
The gap between the floor and the transition is often caused by loose metal tracks or stripped screw holes in the wood subfloor. To fix this, you need a T-molding shim or a construction-grade adhesive with a high tensile strength. Most $10 fixes involve reinforcing the existing molding rather than replacing it. You can use a thin strip of matching laminate or a wood shim to build up the underside of the T-molding so it reaches the floor’s new, lower position. However, the real secret is the bond. I use a specific polyurethane adhesive that remains flexible after curing. This allows the molding to hold the floor down while still permitting the microscopic movement required for expansion. If you use a rigid glue like a standard wood glue, the bond will snap as soon as the weather changes. You also need to check the track. If the metal track is bent, the molding will never sit flush. Take a pair of pliers and straighten the track or, better yet, throw the track away and use the adhesive method with a heavy weight. I have seen guys spend hundreds on custom transitions when a simple bead of the right chemistry and some 24-hour clamping would have solved the problem for the cost of a cup of coffee.
The chemistry of a permanent bond
A polyurethane adhesive or a cyanoacrylate glue with an activator spray provides the mechanical bond necessary to stop laminate threshold gaps. The surface energy of the melamine wear layer is low, meaning most glues will not stick to it. You have to understand that laminate is non-porous. If you are trying to glue a transition to a laminate surface, you are essentially trying to glue two pieces of plastic together. This is where the $10 fix comes in. By using a CA glue (super glue) with a chemical activator, you can get an instant bond that holds the molding in place while the structural adhesive underneath sets up. This is a trick from the furniture making world. You apply beads of heavy-duty construction adhesive every four inches, and in the spaces between, you use a drop of CA glue and a quick spray of activator. You press the molding down, and the CA glue holds it perfectly still for the 60 seconds it takes to grab. This eliminates the need for unsightly nails in the top of your molding. Nails in a T-molding are a sign of a hack. They look terrible and they eventually pop up, creating a tripping hazard. A chemical bond is cleaner, stronger, and much more professional.
The difference between floating and failing
A floating floor must never be pinched by baseboards or heavy transitions, as this causes stress at the joints and gapping at the doorways. The National Wood Flooring Association states that expansion space is mandatory. If you fix your T-molding too tightly to the floor, the floor cannot move. If the floor cannot move, it will buckle in the center of the room. This is why the T-molding fix is a delicate balance. You want to hold the floor down so there is no gap, but you cannot glue the floor to the molding. You glue the molding to the subfloor. This creates a bridge. The floor should slide freely under the lip of the T-molding like a piston in a cylinder. If your gap is caused by the floor sliding too far out, it means your expansion gap on the opposite wall is too large or the floor is shifting as a whole unit. In many cases, you can use a suction cup tool to pull the entire floor back toward the doorway, then secure the T-molding so it acts as a stop. This is a common issue in hallways where the long run of laminate creates a lot of momentum during seasonal shifts. You have to be the architect of the movement. Control the slide, or the slide will control your floor.
| Material Type | Expansion Rate | Janka Hardness | Best Fix Method |
|---|---|---|---|
| Laminate (HDF) | High | N/A | Floating T-Molding |
| Solid White Oak | Moderate | 1360 | Mechanical Fasteners |
| Engineered Wood | Low | 1200-1400 | Glue-Assist |
| Vinyl (SPC) | Very Low | N/A | Pressure Sensitive Adhesive |
Hardwood vs Laminate in humid environments
Hardwood floors react differently than laminate when exposed to moisture from showers or high humidity in regions like the Gulf Coast. While solid wood will cup or crown, laminate will swell at the edges. This swelling is permanent. Once the moisture enters the HDF core, the fibers expand and will never return to their original size. This creates a height mismatch at the threshold. If you have a laminate floor meeting a tile bathroom, the grout line is the first place you will see trouble. Moisture wicks from the tile into the end grain of the laminate. You must seal these edges with a 100 percent silicone sealant. Silicone is the only thing that will keep the water out while allowing the floor to move. If you use a standard caulk, it will shrink and pull away. I always tell people that waterproof laminate is a marketing term. The surface is waterproof, but the joints are not. If you leave a wet towel on a laminate threshold, that $10 fix is going to become a $2,000 replacement job very quickly. Treat every transition near a bathroom like a dam. You are trying to keep the water from the shower from reaching the vulnerable core of your living room floor.
“Proper acclimation is not a suggestion; it is a thermal requirement for structural integrity.” – NWFA Technical Manual
The moisture barrier mandate
A 6-mil poly film is the standard moisture barrier required over concrete slabs to prevent laminate floor failure. Without this barrier, alkaline salts and vapor emissions will attack the adhesive holding your T-molding and the integrity of the laminate core. Most of the gapping I see is actually a symptom of subfloor moisture. The moisture causes the laminate to grow, it hits the wall, and then it has nowhere to go but up. This lifts the T-molding out of its track. You can check this by pulling up a piece of trim. If you see white powder on the underside of the floor, that is efflorescence. It means your slab is wet. No amount of glue or expensive molding will fix a wet slab. You have to address the source, whether it is a drainage issue outside or a lack of a vapor barrier. For the $10 fix to work, the environment must be stable. I use a Tramex meter to check every slab. If it is over 4 percent, I don’t even start the job. You have to be disciplined. You have to be the one who says no when the homeowner wants to rush the process. A floor is a long-term investment, not a weekend craft project.
Tools for the structural flooring architect
To execute a professional threshold repair, you need a precise toolkit that addresses mechanical fastening and chemical bonding. Do not rely on a hammer and a prayer. You need to be calculated in your approach to the repair. The following list covers the essentials for the $10 fix:
- Cyanoacrylate glue and activator: For instant positioning and holding power.
- Polyurethane construction adhesive: For the long-term structural bond to the subfloor.
- Blue painter’s tape: To hold the molding in place and protect the finish from squeeze-out.
- Rubber mallet: For seating the molding without marring the melamine wear layer.
- Alcohol wipes: To clean the bonding surfaces of any oils or dust.
- Utility knife: To trim back any expanded foam or old adhesive in the track.
Once you have these tools, you are ready to fix the gap. Start by cleaning the area thoroughly. Any dust will kill your bond. Apply your adhesives, seat the molding, and weight it down with something heavy, like a stack of tile or a few toolboxes. Leave it for twenty-four hours. Do not let the kids or the dog run over it. Patience is the most important tool in the box.
The 1/8 inch that ruins everything
Precision cutting of the T-molding is the difference between a seamless transition and a tripping hazard. If the molding is cut 1/8 inch too long, it will bind against the door casing and lift off the floor. This creates a gap that no adhesive can hold. You have to understand that houses are not square. Your door jamb might be leaning, or the floor might have a slight slope. I always back-cut my transitions at a slight angle to ensure the top surface fits tight while the underside has room to breathe. This is the kind of detail that separates a master from a handyman. When you are fitting that $10 fix, take the time to scribe the molding to the casing. Use a sharp chisel to clear out any debris from the track. If you have to force it, it is not right. It should drop in with a firm click. If it doesn’t, find out why. Is there a rogue nail? Is the underlayment bunched up? The 1/8 inch gap is a symptom of a larger lack of focus. Fix the fit, and the bond will follow. Architecture is the art of the small things working together to support the big things.
{“@context”: “https://schema.org”, “@type”: “Article”, “headline”: “The $10 T-Molding Fix for Gapping Laminate Thresholds”, “author”: {“@type”: “Person”, “name”: “Master Floor Installer”}, “description”: “Expert guide on fixing laminate floor gaps at thresholds using professional adhesive techniques and subfloor preparation.”, “publisher”: {“@type”: “Organization”, “name”: “Flooring Excellence”}, “mainEntityOfPage”: {“@type”: “WebPage”, “@id”: “https://example.com/t-molding-fix”}}