Most guys skip the leveling compound. They think the underlayment will hide the dip. It won’t. I spent three days grinding concrete on a job last month just so the floor wouldn’t click like a castanet. When you are dealing with a tiny shower footprint, the margin for error disappears. I recently walked onto a job site where the homeowner wanted forty-eight inch porcelain slabs in a thirty-six inch stall. The previous installer tried to force the pitch. He ended up with lippage so sharp it could slice a toe open. I had to tear it all out. You cannot cheat the physics of a slope when your tile is larger than the drain radius. If you do not understand the geometry of the envelope cut, you have no business touching a trowel in a bathroom. This is not about aesthetics. This is about structural integrity and moisture management. We are building a machine that moves water. If the machine is calibrated wrong, the house rots. Period.
The hidden truth of subfloor flatness
Installing large format tiles on a tiny shower floor requires a subfloor deviation of no more than one eighth of an inch over ten feet. You must use a self-leveling underlayment or a mechanical grinder to achieve this precision before the waterproofing membrane is ever applied to the concrete or backer board. The physics of large format tiles, often defined as any tile with one side longer than fifteen inches, dictates that the substrate must be virtually perfect. When you lay a small mosaic, the numerous grout joints allow the tile to follow a slight contour. A large slab has no such flexibility. If there is a high spot in the center of your shower, the tile will teeter like a seesaw. This creates a void in the thin-set. Voids are where water collects and where mold colonies begin their life cycle. I see guys trying to build up the mortar to compensate for a dip. This is a violation of industry standards. Mortar is a bond agent, not a structural filler. When the mortar shrinks during the curing process, it will pull the tile down and create lippage. You must start with a flat plane.
“A floor is only as good as the subfloor beneath it; deflection is the enemy of every joint.” – Master Flooring Axiom
The geometry of the envelope cut
An envelope cut is the process of cutting large format tiles diagonally from the corners of the shower toward the drain to create a functional four way slope. This technique allows a single massive piece of porcelain to follow the pitch required by the International Residential Code without cracking or creating dangerous edges. In a tiny shower, you do not have the luxury of a long run to hide the transition. The pitch must be a minimum of one quarter inch per foot. When you use a tile that is twenty-four inches wide, that tile has to drop a half inch from one side to the other. You cannot bend porcelain. The only way to make it work is the envelope cut. You mark your lines from the drain center to the outer corners of the stall. These cuts allow the tile to ‘fold’ into the drain. It requires a wet saw with a high-quality diamond blade. If your cuts are off by even a millimeter, the grout line will look like a jagged mountain range. Precision is the only way to avoid a trip hazard.
[IMAGE_PLACEHOLDER]
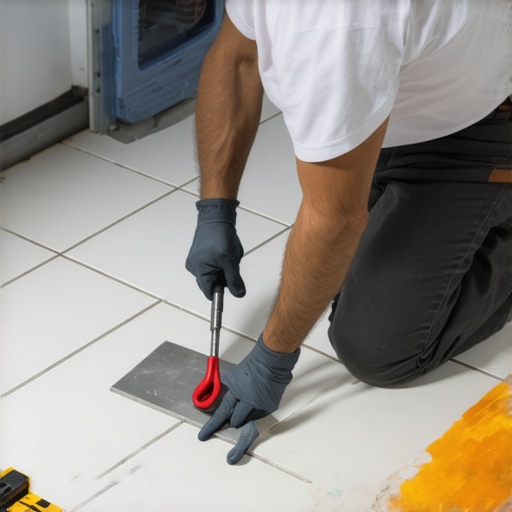
Adhesive chemistry and the bond strength requirement
Large format tiles require polymer modified thin-set mortars classified as LHT or Large and Heavy Tile mortar to prevent slump and ensure a chemical bond. These adhesives are engineered with a specific viscosity that supports the weight of the slab while maintaining the necessary height to achieve ninety-five percent coverage in wet areas. When you are working in a shower, you are fighting gravity and hydraulic pressure. Standard thin-set is too watery. If you put a heavy slab on it, the slab will sink into the mud and squeeze the adhesive out of the joints. LHT mortar uses long-chain polymers to create a suction-like grip. I always back-butter the tile. This means applying a thin layer of mortar to the back of the porcelain slab with the flat side of the trowel before setting it into the notched bed on the floor. This collapses the air ridges and ensures that there are no gaps. A gap in a shower floor is a reservoir for stagnant water. It will eventually lead to the failure of the bond and the inevitable growth of black mold.
Why hardwood floors and laminate fail in wet zones
Hardwood floors and laminate materials are fundamentally incompatible with shower environments due to their hygroscopic nature and high rate of thermal expansion. While a porcelain tile is nearly impervious to water, organic materials like oak or compressed wood fibers will swell, warp, and rot when exposed to the high humidity levels found in a bathroom. Even the best waterproof laminate relies on a click-lock system that cannot withstand standing water. The joints are the weak point. Once moisture bypasses the wear layer, the core of the laminate will expand like a sponge. Hardwood floors face the same issue with cupping. If the humidity in the room spikes, the bottom of the board stays dry while the top absorbs moisture, or vice versa. This tension causes the wood to curl. In a shower, the only choice is a non-porous ceramic or porcelain. I have seen people try to ‘seal’ wood for a shower. It is a fool’s errand. The expansion and contraction cycles will eventually break any topical sealer, and the wood will turn into a mushy mess within two years.
| Material Type | Moisture Resistance | Janka Hardness | Recommended for Showers |
|---|---|---|---|
| Porcelain Tile | 99.9% | N/A (Crockery) | Yes |
| Natural Stone | 85-90% | Varies | Yes (Sealed) |
| Hardwood Floors | Low | 1290 (Oak) | No |
| Laminate | Moderate | N/A | No |
The 1/8 inch that ruins everything
The standard for shower drainage requires a consistent slope of one quarter inch per vertical foot toward the drain assembly to prevent pooling. If your slope deviates by more than one eighth of an inch, you will experience standing water which leads to mineral buildup and slippery biofilm growth on the tile surface. This is where the level becomes your best friend. I check the pitch at every stage. I check the mud bed. I check the waterproofing. I check the tile as it is being set. If you lose that pitch, the large format tile will hold water in the center of the slab. Unlike small tiles where the grout lines act as micro-channels for water, a large slab is a vast, flat desert. If it is not tilted correctly, the water just sits there. You also have to consider the drain height. The drain should be set so the tile sits slightly above the flange. If the tile is flush or lower than the drain, you have created a dam. Water will back up into the mortar bed and eventually saturate the entire assembly.
“In a wet environment, the smallest oversight in slope or seal becomes a catastrophic failure point over time.” – TCNA Handbook Principle
The structural checklist for shower success
- Verify the subfloor is stiff enough to meet L/360 deflection standards for ceramic tile.
- Apply a liquid-applied or sheet-bonded waterproofing membrane over the entire shower pan.
- Use a laser level to mark the high point of the slope on the wall studs or backer board.
- Dry-lay the large format tiles to plan the envelope cuts before mixing any mortar.
- Ensure 95 percent mortar coverage by back-buttering every single piece of porcelain.
- Select a high-performance epoxy or high-quality polymer-modified grout to resist staining.
- Maintain a movement joint at the perimeter where the floor meets the wall to allow for expansion.
Why your grout choice determines structural longevity
Selecting a high-performance grout with low absorption rates is vital for large format tile installations because the reduced number of joints concentrates stress on fewer points. In a tiny shower with massive tiles, the grout lines are few and far between, which means each joint must handle more movement and more water volume than a traditional mosaic floor. I prefer epoxy grout for these applications. It is chemically inert and completely waterproof. Traditional cementitious grout is porous. It breathes. While that is fine for a backsplash, on a shower floor, it allows water to seep into the setting bed. Over time, that water can degrade the bond. Epoxy grout acts as a structural bridge between the tiles. It is harder to work with and it requires a fast hand, but it will outlast the house. If you use cheap grout on a high-end porcelain install, you are putting a lawnmower engine in a Ferrari. It might run for a mile, but it will not handle the long haul.