
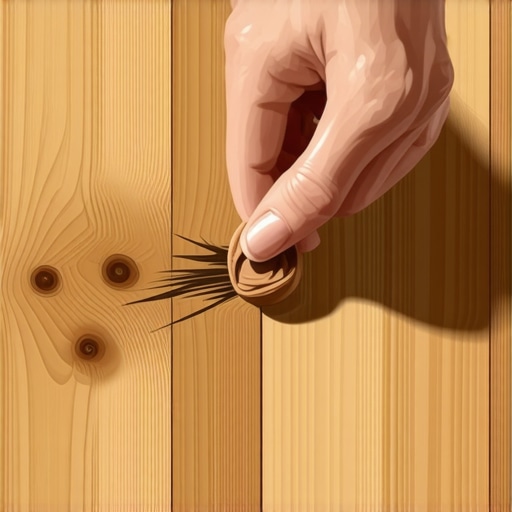
The mechanics of the walnut repair trick
Hardwood floor repair using a walnut involves rubbing the raw nut meat into a scratch to release natural oils and tannins that darken the exposed wood fibers and fill the void. This method relies on the high oil content of the Juglans regia, which mimics the natural resins found in oak and maple. It is an effective temporary fix for surface-level abrasions. However, a deep gouge that penetrates the wear layer and reaches the core of the plank requires a more structural approach. I have spent twenty five years on my knees with a moisture meter. I have seen every shortcut in the book. I once walked into a house where a $15,000 wide-plank walnut floor was cupping so bad it looked like a potato chip because the installer didn’t check the crawlspace humidity. That experience taught me that the surface is just a symptom of the environment below. If your floor is scratching easily, you might be dealing with an embrittled finish caused by low indoor humidity or a subfloor that is flexing too much. Before you grab a snack from the pantry to fix your floor, you need to understand the physics of what is happening to your hardwood. Wood is not a static object. It is a bundle of cellular tubes that once transported water. When a chair leg or a pet claw drags across it, those tubes are crushed. The walnut does not magically heal the wood; it simply provides a refractive oil that masks the damage by saturating the crushed fibers.
Why wood fibers collapse under pressure
Wood fibers collapse under pressure when the force applied exceeds the Janka hardness rating of the specific species, leading to a permanent deformation of the lignin. The Janka scale measures the resistance of a wood sample to denting and wear. For instance, white oak sits around 1,360 pounds-force, while a softer laminate might fail much sooner under point-load stress. When a scratch occurs, the light reflects off the jagged edges of the broken wood cells, making the mark look white or grey. This is why a walnut works. The oil fills the microscopic gaps, changing how light hits the scratch. It is physics, not magic. You are altering the refractive index of the damaged area to match the surrounding finished wood. If you are dealing with showers of sparks during a sanding phase, you know the wood is hard. If your floor feels soft like cork, it is likely a cheap laminate or a low-density engineered product. Most homeowners think waterproof LVP is the answer to everything, but LVP has no cellular structure to absorb oil, so the walnut trick will not work on plastic floors. You need real cellulose for this chemical bond to occur. The walnut contains polyunsaturated fats that penetrate the wood grain and harden slightly upon exposure to oxygen, providing a rudimentary seal against moisture.
“A floor is only as good as the subfloor beneath it; deflection is the enemy of every joint.” – Master Flooring Axiom
The chemical synergy of nut oils and lignin
The chemical synergy between walnut oils and wood lignin occurs because the unsaturated fatty acids in the nut penetrate the porous cell walls of the timber. Lignin is the organic polymer that binds cellulose fibers together. When wood is scratched, the lignin is exposed and begins to oxidize. The walnut meat contains roughly 65 percent oil by weight. As you rub the nut against the wood, friction generates heat. This heat lowers the viscosity of the walnut oil, allowing it to wick into the grain. I always tell my apprentices that a floor is a living thing. It breathes. It moves. If you use a synthetic wax, you are just sitting a plug on top of the hole. If you use a walnut, you are actually feeding the wood. This is particularly effective on site-finished oak where the grain is still somewhat receptive to top-coats. On pre-finished aluminum oxide floors, the walnut has a harder time because the finish is essentially a layer of liquid sandpaper that resists any penetration. You have to rub harder to get the oil past that ceramic shield. I remember a job in a high-rise where the architect insisted on a zero-threshold transition between the hardwood and the tile grout. The floor was moving so much due to the HVAC system that every scratch looked like a canyon. We used walnuts to touch up the edges because commercial fillers were cracking out within a week.
Step by step execution of the friction method
Executing the walnut repair method requires cleaning the scratch, rubbing the nut at a forty five degree angle, and buffing the residue with a microfiber cloth. First, ensure the area is free of dust and floor wax. If there is grout dust or debris from a nearby bathroom renovation, the oil will just turn into a muddy paste. Take a raw walnut and remove the shell. Do not use roasted or salted nuts, as the salt will draw moisture out of the wood and cause further damage. Rub the nut meat vigorously across the scratch. You want to see the nut wearing down as it fills the groove. Let the oil sit for several minutes. This allows the wood to drink. Finally, take a clean cloth and buff the area in a circular motion. This blends the edges of the repair into the surrounding finish. It is a simple fix for a complex problem. But remember, if the scratch is deep enough to catch your fingernail, you are looking at a structural failure of the wear layer. No amount of walnuts will fix a floor that was installed over a wet concrete slab. The moisture will eventually push the repair out from the bottom.
| Repair Method | Depth Capacity | Durability Rating | Color Accuracy |
|---|---|---|---|
| Raw Walnut | 1/32 inch | Low | High |
| Hard Wax Stick | 1/8 inch | Medium | Moderate |
| Wood Epoxy | 1/2 inch | High | Low |
| Shellac Melt | 1/4 inch | High | High |
Why moisture meters matter more than aesthetics
Moisture meters matter more than aesthetics because the internal water content of the wood determines the longevity of any repair and the stability of the entire installation. Most guys skip the leveling compound. They think the underlayment will hide the dip. It won’t. I spent three days grinding concrete on a job last month just so the floor wouldn’t click like a castanet. If your subfloor has a high moisture emission rate, the wood planks will expand and contract excessively. This movement stresses the finish, making it brittle and prone to scratching. If you are trying to fix a scratch in a room adjacent to poorly sealed showers, your walnut repair will fail. The humidity from the bathroom will cause the wood to swell, pushing the oil out of the fibers. You need to maintain a consistent relative humidity between thirty and fifty percent for hardwood to stay happy. In the winter, the air gets dry and the wood shrinks. That is when you see the gaps. In the summer, it swells. A floor is a dynamic system of forces. The scratch you see is just the surface expression of those forces. I have seen $20,000 floors ruined because the homeowner turned off the AC while on vacation in July. The floor buckled, the finish cracked, and suddenly they had a thousand scratches that no walnut could fix.
“Wood is hygroscopic, meaning its moisture content changes in response to the relative humidity of the surrounding air.” – NWFA Technical Manual
Identifying the depth of the damage
Identifying the depth of hardwood damage is essential for determining if a topical oil repair like a walnut is sufficient or if a full board replacement is required. Scratches generally fall into three categories. Surface scratches only affect the clear coat. These are easily fixed with a walnut or a touch-up pen. Intermediate scratches penetrate the stain layer but do not gouge the wood. These require a bit of pigment. Deep gouges actually remove wood material. This is where the walnut falls short. While most people want the thickest underlayment, too much cushion actually causes the locking mechanisms on LVP or engineered wood to snap under pressure. This same principle applies to repairs. If you fill a deep hole with something soft like walnut oil, it will eventually compress and look like a divot again. For deep gouges, you need a hardening filler. Use a polyester resin or a specialized wood epoxy. I prefer to mix sawdust from the original installation with a bit of wood glue for a perfect match. But that requires you to have saved the sawdust. Most installers just throw it in the trash. That is the difference between a mechanic and a laborer. A mechanic thinks about the repair that will happen ten years from now. A laborer just wants to get paid today.
Protecting the wear layer from future trauma
Protecting the hardwood wear layer involves maintaining proper humidity, using felt pads on furniture, and applying a high quality polyurethane or oil finish. Prevention is better than a walnut. Keep your pet’s nails trimmed. Put rugs in high traffic areas. Do not use steam mops. Steam mops are the devil. They force moisture into the joints and delaminate the finish. I have seen more floors ruined by steam mops than by big dogs. If you have laminate floors, be even more careful. Laminate is just a picture of wood glued to a hunk of sawdust and glue. Once you scratch through the melamine top layer, it is gone. You cannot sand it. You cannot fix it with a walnut. You just have to replace the plank. For real hardwood, consider a matte finish. Glossy finishes show every single micro-scratch. A matte or satin finish hides a lot of sins. It scatters the light rather than reflecting it. This means the minor abrasions from daily life do not stand out. If you treat your floor like a structural component of your home rather than a rug, it will last a century. It starts with the subfloor and ends with the finish. Everything in between is just maintenance.
- Clean the damaged area with a damp cloth to remove grit.
- Select a fresh walnut meat for the highest oil concentration.
- Apply pressure while rubbing to generate the necessary heat.
- Allow the natural oils to cure for at least twenty minutes.
- Buff the surface with a lint free cloth to remove excess fat.
- Monitor the repair over the next week to see if it needs a second application.