
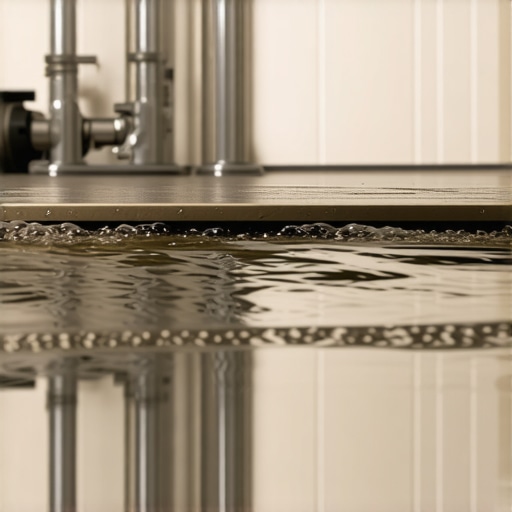
I spent three days grinding concrete on a job last month just so the floor wouldn’t click like a castanet, only to find that the real problem wasn’t the subfloor levelness, but a slow weep from the master shower. The homeowner thought the hardwood floors were cupping because of humidity. They were wrong. The moisture was migrating through the subfloor, traveling twenty feet from the shower valve like a subterranean river. I have spent twenty-five years on my knees with a moisture meter and a level. I have seen the damage that a pinhole leak in a copper pipe or a hairline fracture in a shower pan can do to a million-dollar home. You do not just fix a floor, you manage water. If you ignore the physics of hydrostatic pressure and the chemical bond of your waterproofing membrane, you are not an installer, you are a ticking time bomb. This guide will break down the precise diagnostics required to differentiate between a structural pan failure and a pressurized plumbing leak.
The telltale signs of a saturated subfloor
Shower leaks manifest in the subfloor through discoloration of hardwood floors, delamination of laminate, and efflorescence in grout lines. When water escapes the containment of a shower, it follows the path of least resistance, often soaking into the plywood or OSB subfloor and spreading through capillary action. This moisture creates a dark, damp environment that rots the structural integrity of the home. Most guys skip the leveling compound and ignore the damp smell. They think the underlayment will hide the dip. It won’t. If you see your baseboards swelling or notice a musty odor that won’t go away, your subfloor is already compromised. I have seen 3/4 inch oak planks curl into U-shapes because a shower pan was installed without a pre-slope, allowing water to sit and rot the liner. You have to understand that water is patient. It will find the one spot where your thin-set is thin or your waterproofing tape has a wrinkle. If your flooring feels soft or you hear a crunching sound when you walk near the bathroom, the wood fibers have already lost their lignin bond due to constant saturation. This is not a cosmetic issue. It is a structural engineering failure that requires immediate intervention before the mold takes over the entire joist system.
“A floor is only as good as the subfloor beneath it; deflection is the enemy of every joint.” – Master Flooring Axiom
Why the static water test is your best friend
The static water test is the most reliable method to diagnose a leaking shower pan by isolating the floor from the supply pipes. To perform this, you must plug the shower drain completely, usually with a 2-inch expandable rubber test plug. Fill the shower base with water until it reaches about an inch below the curb and mark the water level with a piece of tape. Wait twenty-four hours. If the water level drops but there is no water on the bathroom floor, the leak is in the pan or the liner. This is basic physics. If the water stays put, your pan is watertight and the problem lies elsewhere. While most people want the thickest underlayment, too much cushion actually causes the locking mechanisms on LVP to snap under pressure, and similarly, too much faith in a visual inspection of a shower floor will lead to failure. You cannot see a microscopic crack in the PVC liner through two inches of mortar and tile. You have to use the water itself as your diagnostic tool. I once saw a guy try to find a leak by spraying the walls with a hose. All he did was create a mess. The static test is the only way to be sure. If the water level drops, you are looking at a full tear-out. There is no magic sealant that you can pour down the drain to fix a shredded liner or a poorly clamped drain flange. You are dealing with the TCNA standards here, and they do not allow for shortcuts when it comes to the integrated bonding flange.
The plumbing signs that point to the pipe
Pressurized pipe leaks are identified by constant water flow regardless of shower usage and often involve leaking valves or corroded copper lines. If you see water dripping from a ceiling below the bathroom even when the shower has not been used for days, you are dealing with a supply line issue. The physics of a pressurized system mean that a tiny hole will spray water continuously, unlike a pan leak which only occurs when someone is actually showering. Check your water meter. Turn off every faucet in the house and watch the little red triangle or the digital readout. If it is moving, you have a pressurized leak. This is often the culprit when homeowners complain about their laminate floors buckling in the hallway. The water travels along the pipe, drips onto the subfloor, and then migrates. It does not care about your floor plan. I have seen leaks travel thirty feet along a joist before finally dripping onto a dining room table. You have to be a detective. Pull the escutcheon plate off the shower handle and look inside with a flashlight. Is it damp? Is there green corrosion on the copper? If so, your pipe is the ghost in the machine. Do not blame the tile guy for a plumber’s mistake. The chemistry of hard water can eat through thin-walled copper over twenty years, creating pinholes that are nearly impossible to find without opening the wall. This is why I always advocate for PEX in modern remodels, it handles the expansion and contraction of temperature shifts much better than rigid pipe.
| Symptom | Probable Source | Primary Action |
|---|---|---|
| Wet ceiling, shower off | Supply Pipe | Check water meter |
| Wet ceiling, shower on | Shower Pan | Static water test |
| Mold at floor transition | Subfloor saturation | Moisture mapping |
| Cracked grout lines | Subfloor deflection | Check joist spacing |
The chemistry of grout failure and moisture migration
Grout is not waterproof and acts as a porous filter that allows moisture to reach the mortar bed and the underlying waterproofing membrane. Many people think that because they have tile, their floor is a tank. This is a dangerous lie. Grout is a cementitious product. It has pores. When you shower, water goes through the grout, into the mud bed, and sits on the liner. If that liner is not sloped toward the weep holes in the drain, the water just stays there. It becomes a stagnant, anaerobic swamp. This is why your grout turns black and smells like a locker room. It is the chemistry of decay. If the weep holes are clogged with thin-set, the water has nowhere to go. It builds up until it finds a way over the top of the liner or through a staple hole. I tell my clients that the tile is just the skin, the membrane is the internal organs. If the organs fail, the skin doesn’t matter. I have seen beautiful marble showers that had to be demolished after six months because the installer didn’t use crushed stone around the weep holes. The moisture migrated out into the hardwood floors in the bedroom, causing five thousand dollars in damage. You have to understand capillary action. Water can move uphill if the space is tight enough. It will suck itself into the end grain of your oak floors and destroy them from the inside out. This is why the 1/8 inch gap at the perimeter of your flooring is so important. It is not just for expansion, it is a break in the capillary path.
A checklist for systematic leak detection
- Perform a visual inspection of the shower arm and shower head for thread leaks.
- Remove the handle plate to check for valve body drips or damp insulation.
- Plug the drain and fill the base to test the pan integrity over 24 hours.
- Check the grout joints in the corners for cracks that suggest structural movement.
- Use a moisture meter on the drywall on the opposite side of the shower wall.
- Inspect the toilet seal nearby, as a leaking wax ring often mimics a shower leak.
The final verdict on repair versus replacement
Determining the repair scope requires an accurate diagnosis of whether the shower pan liner or a vertical plumbing stack has failed. If the pipe is leaking, you can often fix it by opening a small patch of drywall. It is a surgical strike. If the pan is leaking, you are looking at a full amputation. You cannot patch a liner. You cannot just put a new layer of tile over the old one. That is the hallmark of a hack. Adding weight to a failing subfloor just increases the deflection and accelerates the failure. I have walked into houses where the floor was so heavy from multiple layers of tile that the joists were bowing. This is a structural engineering challenge. If your subfloor is wet, you must dry it out completely before laying new flooring. If you trap that moisture under new LVP or hardwood, you are just building a mold factory. I use industrial fans and dehumidifiers for days until my meter reads below 10 percent. Only then do I start the reconstruction. You have to respect the materials. Hardwood floors are a living thing, they breathe and move. If you give them a wet environment, they will fight back. The TCNA Handbook is very clear about the requirements for a waterproof assembly. Follow it to the letter, or do not do the job at all. A floor is a performance surface. It should last fifty years, not five. When you find the leak, fix the source, dry the structure, and then build it back with the knowledge that water is always trying to get back to the earth.
{“@context”:”https://schema.org”,”@type”:”HowTo”,”name”:”How to Tell if Your Shower Leak is the Pan or the Pipe”,”step”:[{“@type”:”HowToStep”,”text”:”Perform a visual inspection of the shower valve by removing the escutcheon plate.”},{“@type”:”HowToStep”,”text”:”Conduct a static water test by plugging the drain and filling the shower base.”},{“@type”:”HowToStep”,”text”:”Monitor the water level for 24 hours to check for pan failures.”},{“@type”:”HowToStep”,”text”:”Check the water meter to identify pressurized supply line leaks.”}],”totalTime”:”PT24H”}