
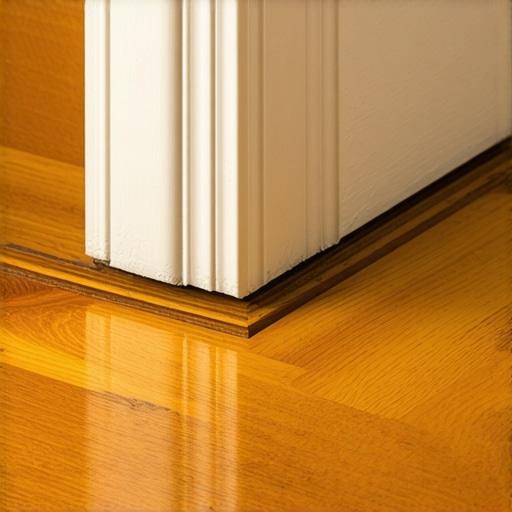
I once walked into a house where a $15,000 wide-plank walnut floor was cupping so bad it looked like a potato chip because the installer didn’t check the crawlspace humidity. It is a haunting sight. That job taught me that moisture is the only thing that matters. People focus on the color of the wood. I focus on the vapor pressure underneath it. When you are staring at a botched cut in a corner, it is easy to panic. You think you need to rip out the whole row. You do not. Most mistakes happen because of dull saw blades or incorrect angles on a miter saw. Wood is a living material. It is composed of cellulose fibers held together by lignin. When you crush those fibers with a bad cut, you are not just making an ugly gap, you are compromising the cell structure of the plank. I have spent twenty five years fixing these gaps with chemistry and mechanical trickery. You can hide a bad cut if you understand the physics of wood expansion and the refractive index of binders. This is not about being a hack. It is about architectural salvage and structural integrity.
The anatomy of a ruined corner
To hide a botched cut on a hardwood corner, you can use a custom-blended wood flour paste made from site-collected sawdust and a resin binder. For larger gaps, structural epoxy with color-matched pigments provides a durable bridge. Alternatively, adjusting the shoe molding or using a decorative transition can conceal the error.
The first thing to understand is why the cut failed. In most hardwood floors, the corner is the place where the expansion gap is most critical. If you cut a plank too short, you leave a gap that is too wide for the baseboard to cover. This is a common issue with wide plank installations. The wood expands and contracts across its width. If the subfloor is not perfectly level, the plank will also move vertically. This movement puts stress on whatever filler you use. You cannot just shove some cheap wood putty in there and hope for the best. Cheap putty is for trim, not for performance surfaces. On a floor, putty will crack and fall out within six months because it lacks the tensile strength to handle the deflection of the boards. You need to create a bond that is as strong as the wood itself. This involves looking at the Janka hardness of the species you are working with. A soft wood like pine will behave differently than a dense wood like Ipe. The density determines how much glue the wood will absorb and how the filler will reflect light.
“A floor is only as good as the subfloor beneath it; deflection is the enemy of every joint.” – Master Flooring Axiom
The physics of the wood flour slurry
A wood flour slurry is a mixture of fine sawdust and a clear binder used to fill gaps in hardwood floors. The best sawdust comes from the actual planks being installed to ensure a perfect color match. This mixture creates a high-density filler that mimics the grain and texture of the wood.
When I have a gap that is less than an eighth of an inch, I reach for the sawdust. But not just any sawdust. I take the bag off my random orbital sander and sift it through a fine mesh. You want the flour, not the chunks. The chemistry here is vital. If you use a water-based binder, the wood fibers will swell. This can be good for a tight fit, but bad if the wood is already at its moisture limit. A solvent-based binder is usually better for a permanent fix in hardwood floors. It evaporates quickly and leaves the resin behind to lock the fibers in place. You mix the flour and the binder until it has the consistency of peanut butter. You must overfill the gap slightly. As the solvent evaporates, the mass will shrink. If you underfill, you will end up with a dip that catches dust and hair. This is much like how grout in showers is applied, but with much tighter tolerances and a focus on cellular adhesion. Once it is dry, you hand-sand it with the grain. If you sand across the grain, you leave microscopic scratches that will show up like a sore thumb once the finish is applied.
Mechanical concealment using shoe molding and baseboards
Mechanical concealment involves adjusting the trim, such as baseboards or shoe molding, to cover a cut that was too short. By pulling the baseboard slightly away from the wall or using a thicker profile of shoe molding, you can hide gaps up to half an inch without replacing planks.
Sometimes the cut is so bad that no amount of sawdust will save it. This is where you have to think like an architect, not just a carpenter. If the gap is at the perimeter, you have some wiggle room. Most homeowners do not realize that walls are rarely straight. They have bows and dips. You can use this to your advantage. If a cut is short by a quarter of an inch, you can shim the baseboard out from the bottom. You are essentially tilting the baseboard to cover the mistake. Then, you install a shoe molding or a quarter round on top of that. This creates a layered look that is common in high-end millwork. It also provides a larger shadow line which hides the fact that the floor does not actually reach the wall. It is a classic move that saves thousands of dollars in material. However, you must ensure that you are not pinning the floor down. Hardwood floors need to breathe. If you nail the shoe molding into the floor instead of the baseboard, you will cause the floor to buckle. I have seen it happen a hundred times. The floor expands, hits the nail, and has nowhere to go but up.
| Wood Species | Janka Rating (lbf) | Expansion Coefficient | Filler Compatibility |
|---|---|---|---|
| White Oak | 1,360 | Medium | High |
| Black Walnut | 1,010 | Low | Very High |
| Brazilian Cherry | 2,350 | High | Moderate |
| Hard Maple | 1,450 | High | Low |
The ghost in the expansion gap
The expansion gap is the space left around the perimeter of a room to allow the hardwood floors to expand and contract with changes in humidity. If a cut is botched and the gap is too small, the floor will peak. If it is too large, the gap will be visible.
People always ask me why their laminate or hardwood is clicking. It is usually because they did not leave enough of an expansion gap, or they left too much and the locking mechanism is stressed. When you botch a corner cut, you are messing with this delicate balance. If you cut the plank too long and wedge it into the corner, you have created a ticking time bomb. The first time the humidity hits sixty percent, that corner is going to lift. You need a minimum of a quarter inch for small rooms and up to a half inch for larger areas. If you botched the cut by making it too long, get a sharp chisel and a hammer. You can carefully notch out the drywall or the base of the wall to give the wood somewhere to go. This is a pro secret. You are not fixing the wood; you are moving the wall. This keeps the structural integrity of the floor intact while hiding the botched length. If the cut is too short and you see the subfloor, you are looking at a different problem. You are looking at the potential for moisture to enter the end grain of the wood.
The 1/8 inch that ruins everything
Small errors in cutting, even as small as an eighth of an inch, can become glaring defects due to the way light hits the floor. Corners are particularly susceptible because they often serve as the focal point where different grain patterns meet. Using a color-matched wax stick can fill these tiny voids.
If you have a tiny splinter at the corner, do not sand it down immediately. You will just make the spot bigger. Instead, use a burn-in stick. These are hard waxes used by furniture makers. You melt the wax into the chip with a specialized iron. The wax is much more stable than putty. It stays flexible enough to move with the wood but hard enough to resist foot traffic. You can even layer different colors of wax to mimic the grain lines of the oak or walnut. This is an art form. I have spent hours on my knees with a magnifying glass and three different colors of wax just to make a corner look perfect. It is about the way the light reflects. If the repair has the same sheen as the rest of the floor, it disappears. If the sheen is off, it will glow like a neon sign. This is why you always test your finish on a scrap piece of wood before you touch the repair.
“Wood moves in three directions, but it only breaks in one: the joint.” – Master Flooring Axiom
Chemical bonds and epoxy bridges
For structural gaps in corners, a two-part epoxy resin is the best solution. Epoxy does not shrink like traditional fillers and can be sanded and stained to match the surrounding hardwood floors. It provides a chemical bond that holds the planks together while allowing for slight movement.
When a corner cut is truly botched, like a chunk missing from the tongue or groove, you need something stronger than wax. I use a slow-cure epoxy. I mix it with a bit of the wood flour I mentioned earlier. The epoxy penetrates the open cells of the wood, creating a mechanical lock. This is especially useful if the botched cut is near a high-traffic area or a transition to a tile floor. In bathrooms or near showers, moisture is a constant threat. A standard wood filler will fail in months. Epoxy is waterproof. It seals the end grain of the hardwood and prevents it from sucking up moisture like a straw. This is the same logic we use when setting stone in a wet environment. You want a bond that is impervious to the environment. Once the epoxy is cured, it is harder than the wood itself. You can sand it, drill it, or even rout it. It is the ultimate insurance policy for a bad cut.
A checklist for hiding the botch
- Identify the gap size and determine if it is a cosmetic or structural issue.
- Collect fine sawdust from the same wood species for a color-matched slurry.
- Check the moisture content of the wood using a pin-type meter to ensure stability.
- Apply a solvent-based binder for better adhesion and less wood swelling.
- Overfill the gap to account for shrinkage during the drying process.
- Use a burn-in wax stick for minor chips and splinters.
- Adjust baseboards or shoe molding as a mechanical cover for large gaps.
- Verify that the expansion gap is still functional and not blocked by the repair.
When the subfloor betrays your cuts
A subfloor that is not level will cause hardwood planks to dip or rise, making even a perfect cut look botched at the corner. Addressing subfloor deflection is a prerequisite for any successful floor repair. If the subfloor moves, the corner joint will eventually open up regardless of the filler used.
I have seen guys spend all day perfecting a mitered corner only to have it open up the moment someone walks on it. Why? Because the subfloor had a dip. When you step on the plank, it pushes down into the void. The corner, which is the weakest point of the installation, pulls apart. You can fill that gap a thousand times and it will still crack. If you have a botched cut and a moving subfloor, you have to fix the movement first. Sometimes you can inject a low-expansion foam or a specialized subfloor adhesive through a small hole to fill the void. This stops the vertical movement. Once the plank is stable, you can apply your wood flour or epoxy. This is the difference between a handyman and a master installer. A handyman looks at the gap. A master looks at what is causing the gap. It is the same reason why we use backer board under tile in showers. You need a rigid base. Without it, everything else is just lipstick on a pig. Wood is no different. It requires a solid foundation to perform its architectural duties.
In the world of professional flooring, there is a saying that there are no mistakes, only opportunities for trim. While that is a bit of a joke, it contains a grain of truth. You do not need to be perfect every time you pull the trigger on your miter saw. You do, however, need to understand the materials you are working with. You need to know how the cellulose and lignin will react to your binders. You need to understand the Janka scale and how it affects the density of your wood flour slurry. Most importantly, you need to respect the moisture. If you keep your head, use the right chemistry, and understand the mechanical limits of your trim, you can make a botched cut look like it was an intentional part of the design. That is the mark of a true craftsman. You are not just laying wood on a floor. You are building a structural surface that will last for generations. Do not let a quarter inch of missing walnut stand in the way of a perfect finish.