
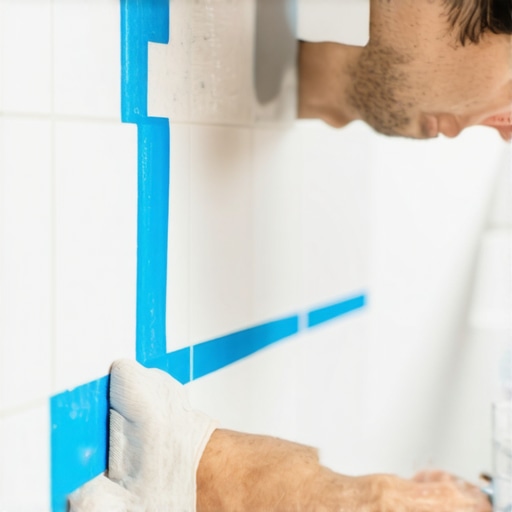
The Blue Tape Secret for Getting Razor-Sharp Grout Lines in Your Shower
I smell like oak dust and the sharp tang of a wet saw today. My knees have the permanent calluses of a man who has spent twenty five years chasing the ghost of a perfectly level surface. Most people look at a shower and see a place to get clean. I look at a shower and see a hydro dynamic pressure vessel that is trying to fail at every single joint. Most guys skip the leveling compound. They think the underlayment will hide the dip. It won’t. I spent three days grinding concrete on a job last month just so the floor wouldn’t click like a castanet. That job was a nightmare because the slab was pitched like a skate park and the client wanted large format tiles. If the subfloor is off by even an eighth of an inch over ten feet, your grout lines will tell the story of your failure within six months. I have seen fifteen thousand dollar wide plank walnut floors cup like potato chips because of humidity, and I have seen shower tile pop like popcorn because the installer didn’t respect the physics of the bond. To get a razor sharp line, you have to stop thinking about grout as a filler and start thinking about it as a precision engineered seal.
The ghost in the expansion gap
Grout expansion gaps must be maintained at every change of plane to prevent tile tenting and grout cracking. In a shower, the junction where the wall meets the floor is a critical movement joint. If you fill this with rigid grout instead of a high grade siliconized caulk, the house will breathe and the grout will crumble. This is the microscopic reality of structural movement. Every material has a coefficient of thermal expansion. Ceramic tile moves differently than the plywood or concrete beneath it. When you lock a floor tight against a wall, you are creating a ticking time bomb. The grout lines will eventually shear, allowing water to migrate into the substrate where it will rot the studs or mold the subfloor. I always leave a quarter inch gap at the perimeter. This is not a suggestion, it is a structural necessity that most DIYers ignore in favor of a clean look that lasts about three weeks. You need to use spacers that are rated for the weight of the tile to ensure that the gap remains consistent as the mortar sets. If your spacers crush, your lines will look like a mountain range instead of a surgical incision.
“A floor is only as good as the subfloor beneath it; deflection is the enemy of every joint.” – Master Flooring Axiom
The blue tape method for surgical precision
Blue painter tape creates a physical barrier on the tile face to prevent grout haze and ensure perfectly flush joints. This secret is the difference between a contractor grade finish and a high end architectural result. You apply the tape to the very edge of the tile, leaving only the grout channel exposed. This is tedious work. It takes hours. But it prevents the pigment in the grout from staining the microscopic pores of the tile surface. When you pull that tape at the exact moment the grout has reached its initial set, the edges are crisp and the cleanup is minimal. This is especially vital when using high contrast grout, like black grout with white subway tile. Without the tape, you will spend days scrubbing a gray haze that never truly disappears. The tape also allows you to pack the grout tighter into the joint without worrying about the mess. You use a rubber float at a forty five degree angle, forcing the material into the void until it can no longer be compressed. The density of the grout determines its longevity. A loosely packed joint is a porous joint, and a porous joint is a highway for mildew and water damage.
The chemistry of the bond and grout selection
Choosing between sanded, unsanded, and epoxy grout depends on the joint width and the porosity of the tile. Sanded grout contains fine silica that acts as a bridging agent for joints wider than an eighth of an inch. Without the sand, the grout would shrink and crack as the water evaporates during the hydration process. For narrow joints, unsanded grout is the standard because the particles are small enough to flow into the tight space. Then there is epoxy. Epoxy grout is a different beast entirely. It does not use water to cure, it is a chemical reaction between a resin and a hardener. It is waterproof, stain proof, and nearly indestructible. It is also a nightmare to work with because it has a short pot life. If you are not fast, it will harden into a plastic rock on your tile. I only recommend epoxy for showers where the homeowner is obsessed with hygiene or for floors that will see heavy moisture. It is the gold standard for performance, but it requires the hands of a surgeon to apply correctly.
| Grout Type | Joint Width | Best Use Environment | Chemical Base |
|---|---|---|---|
| Sanded Grout | 1/8 inch to 1/2 inch | Floor tiles and large joints | Portland Cement |
| Unsanded Grout | Less than 1/8 inch | Polished marble and walls | Portland Cement |
| Epoxy Grout | 1/16 inch to 1/2 inch | High moisture showers | Resin and Hardener |
Why your subfloor is lying to you
A subfloor may look flat to the naked eye but still possess waves that will cause tile lippage and grout failure. I use a ten foot straightedge on every single job. If I see a gap larger than the thickness of a nickel, the floor gets ground down or filled with self leveling underlayment. The physics of a large format tile do not allow for any deviation. If you try to bridge a dip with extra thin set, the mortar will shrink at different rates as it cures. This pulls the tile down and creates lippage, where one edge is higher than the other. Lippage is the death of a good grout line. It creates shadows that make even the straightest line look crooked. In showers, this is even more dangerous because it prevents proper drainage to the weep holes in the drain assembly. Water will sit in those tiny pools, eventually eating through the sealer and softening the grout. You cannot fix a bad subfloor with grout. You fix the subfloor first, or you don’t lay the tile at all.
“Moisture vapor transmission through a concrete slab can exceed three pounds per thousand square feet; without a barrier, your floor is a sponge.” – Tile Council of North America Standard
The one eighth inch that ruins everything
Inconsistent spacing of even one eighth of an inch will derail the entire visual alignment of a shower wall. When you start your first row of tile, you are setting the foundation for every piece above it. If that first row is not perfectly level, the error will compound. By the time you reach the ceiling, you will be trying to hide a gap that is twice as wide as your grout joint. This is why I use laser levels that are calibrated every month. I don’t trust bubble levels for high end shower work. Gravity is constant, but human error is inevitable. You must also account for the tile itself. No tile is perfectly square. Even expensive Italian porcelain can have a variance of a sixteenth of an inch. You have to ‘walk the tile’ as you install, adjusting your grout lines slightly to account for these manufacturing defects. This is where the blue tape comes in handy again. It allows you to visualize the line before the grout is even mixed. If the line looks wrong with the tape, it will look worse with the grout.
- Check subfloor deflection to ensure it meets L/360 standards for ceramic tile.
- Acclimate all materials to the room temperature for 48 hours before installation.
- Mix grout with a low speed drill to avoid introducing air bubbles into the mix.
- Clean tile edges thoroughly with a damp sponge before applying blue masking tape.
- Pull masking tape at a 45 degree angle once the grout has reached its initial set.
- Wait 72 hours before applying a high quality penetrating sealer to the grout lines.
Hardwood dreams and laminate nightmares
Hardwood floors and laminate products should never be installed in wet areas like showers despite modern marketing claims of being waterproof. I have seen too many people try to run luxury vinyl plank or laminate right up to a shower curb. These materials are floating floors. They need to move. When you lock them down with transitions or expose them to the high humidity of a bathroom, the locking mechanisms will fail. The moisture gets under the wear layer and causes the core to swell. Even if the top is waterproof, the underside is not. If you want the look of wood in a shower, you use wood look porcelain tile. It gives you the aesthetic of oak or walnut without the inevitable rot. I have replaced entire laminate floors that were only two years old because the homeowner thought ‘water resistant’ meant they could leave puddles after a shower. In my world, water always wins. You either build to deflect it, or you prepare to replace the floor.
The microscopic reality of Portland cement
Portland cement grout is a porous crystalline structure that requires chemical sealing to prevent liquid absorption and bacterial growth. When grout cures, the water leaves behind millions of microscopic voids. These voids are the perfect size for water molecules and soap scum to hide. This is why grout turns black over time. It is not just dirt on the surface, it is organic matter growing inside the joint. Using a penetrating sealer is the only way to fill those voids and create a hydrophobic surface. I tell my clients that a shower is a living thing. It needs maintenance. You should re-seal your grout every year. If you skip this, the water will eventually find its way to the thin set. Once the thin set is saturated, the bond to the tile weakens. You might not notice it for years, but one day you will tap a tile and it will sound hollow. That is the sound of a failing system. The blue tape method ensures that your sealer stays on the grout where it belongs and not on the tile surface where it can create a slippery film. Precision is not just about looks. It is about building something that will outlast the mortgage. Always check your moisture levels before you start. If that concrete slab is still off gassing moisture, your grout will fail before it even dries. You use a calcium chloride test or a pinless moisture meter. If the numbers are high, you wait. Patience is the most important tool in a floor architect’s kit.