
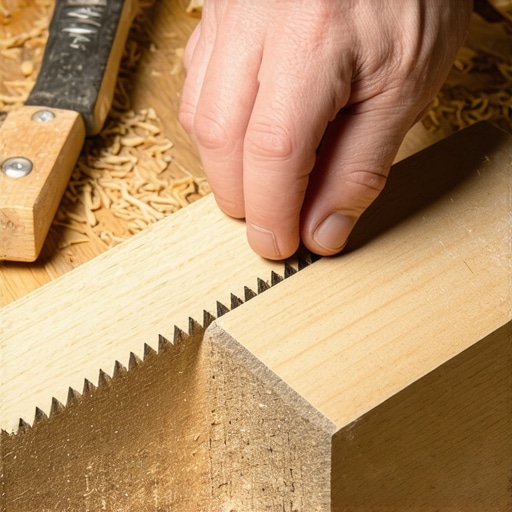
The reason wood fibers splinter during a cut
Wood fibers splinter because the upward rotation of a circular saw blade exerts vertical force that exceeds the lignin bond strength of the wood cells. Applying masking tape reinforces these cells, providing a sacrificial surface that holds the tracheids in place until the blade has finished its pass through the board. I smell like oak dust and WD-40 most days. I have spent twenty five years on my knees with a moisture meter and a level. I once walked into a house where a 15,000 dollar wide-plank walnut floor was cupping so bad it looked like a potato chip because the installer did not check the crawlspace humidity. That kind of heartbreak happens when you ignore the physics of the material. Flooring is not a decoration, it is a structural engineering challenge. If you do not respect the wood, the wood will find a way to humiliate you. When we talk about cutting hardwood floors, we are talking about managing the brittle nature of dried cellulose. Most guys just slam a blade through the wood and wonder why the edges look like they were chewed by a beaver. The masking tape trick is not just a hack, it is a stabilization method that changes how the blade interacts with the grain at a molecular level.
The physics of surface tension and grain blowout
Surface tension and grain blowout occur when the saw teeth exit the wood, pulling the fibers upward away from the board structure. By applying a high-tack blue tape, you create a temporary bond that resists this upward shear force. This is especially important when dealing with expensive hardwoods like walnut or cherry where the grain is prone to splintering. The adhesive on the tape penetrates the microscopic valleys of the wood surface. This creates a composite layer that has a higher tensile strength than the wood fibers alone. When the blade strikes, it must break through the tape before it can lift the wood. This milliseconds-long delay is enough to keep the edge crisp. I have seen guys ruin entire pallets of high-end white oak because they were too lazy to tape their lines. They think a sharp blade is enough. It is not. You have to account for the vibration of the saw and the specific gravity of the wood species you are working with.
“A floor is only as good as the subfloor beneath it; deflection is the enemy of every joint.” – Master Flooring Axiom
Blade geometry and the mechanics of the kerf
Blade geometry and the mechanics of the kerf determine the width of the cut and the amount of heat generated during the process. A higher tooth count, such as a 60 or 80 tooth carbide blade, reduces the size of the individual chips removed, which minimizes the stress on the surrounding wood fibers. You need to understand the hook angle of your saw blade. A negative hook angle is often better for fine finish work because it has a less aggressive bite, which reduces the chance of the blade grabbing the wood and tearing it. The kerf, or the thickness of the blade itself, also plays a role. A thin-kerf blade removes less material but can vibrate more. Vibration is the primary cause of micro-splintering. When you combine a high-quality blade with the masking tape method, you are essentially creating a zero-clearance environment for the cut. This is the difference between a floor that looks like it was installed by a pro and one that looks like a DIY disaster from a big-box store.
The impact of Janka hardness on cutting precision
The Janka hardness rating of a wood species dictates the density of the fibers and how much resistance the blade will encounter. Harder woods like Brazilian Cherry or Ipe require more heat-resistant blades and slower feed rates to prevent burning the lignin and causing the tape adhesive to melt. If the wood is too hard, the blade can wander, creating a cut that is not square. This leads to gaps in your hardwood floors that no amount of wood filler can truly hide. You have to listen to the saw. If the motor is straining, you are moving too fast. If the wood is smoking, your blade is dull or your feed rate is too slow. I always keep a wax stick in my pocket to lubricate the blade between cuts. It reduces friction and helps keep the temperature down, which preserves the integrity of the wood cells at the cut site.
| Wood Material | Janka Rating | Recommended Blade TPI |
|---|---|---|
| White Oak | 1360 | 60 to 80 |
| Brazilian Cherry | 2350 | 80 plus |
| Maple | 1450 | 60 to 80 |
| Laminate Core | N/A | 90 plus Carbide |
Why your subfloor is lying to you
Your subfloor is lying to you if it appears flat but has microscopic dips that cause the planks to flex when the saw weight passes over them. This movement during the cut is a secret killer of precision, often leading to jagged edges even when using the tape method. I spent three days grinding concrete on a job last month just so the floor would not click like a castanet. If the subfloor is not within 1/8 inch over 10 feet, your finish floor is doomed before you even open the boxes. For laminate, the issue is even worse. Laminate is basically high-density fiberboard with a picture of wood on top. If that subfloor flexes, the locking mechanisms will snap under pressure. When you are making your cuts, you must ensure the piece is fully supported on a stable, level surface. Never cut a board that is hanging off the edge of a shaky sawhorse. The vibration will travel through the board and cause the tape to lose its grip, resulting in the very splinters you are trying to avoid.
The expansion gap where hardwood meets tile grout
The expansion gap where hardwood meets tile grout is a critical junction that requires a 1/4 inch space to allow for seasonal movement. Most people think grout is a solid barrier, but it is actually porous and can transfer moisture from the shower area into the end grain of your hardwood. When hardwood floors are installed near showers, the humidity levels fluctuate wildly. If you do not leave that gap, the wood will expand and crush the grout, or worse, it will buckle the entire floor. You should use a color-matched 100 percent silicone caulk in these transitions rather than rigid grout. Silicone allows the wood to breathe and move without cracking. This is where the structural zooming really matters. You have to think about the moisture content of the air and how it interacts with the cellular structure of the wood. A dry house in Phoenix will shrink those boards until the gaps look like canyons, while a humid house in Miami will swell them until they pop off the subfloor.
“Wood is a hygroscopic material; it never stops moving even after it is nailed down.” – NWFA Technical Guidelines
The protocol for a splinter free cut
- Clean the surface of the wood with a microfiber cloth to remove all sawdust and oils.
- Apply a high-quality blue painters tape firmly over the intended cut line.
- Mark your measurement directly onto the tape with a fine-point mechanical pencil.
- Set your saw blade depth to 1/8 inch deeper than the thickness of the board.
- Score the cut line lightly with a utility knife before bringing the saw blade to the wood.
- Maintain a consistent and slow feed rate without stopping mid-cut.
- Peel the tape away from the cut edge at a 45 degree angle to avoid lifting any loose fibers.
The chemical bond of modified thin set and subfloor prep
The chemical bond of modified thin set is what keeps your transition tiles in place when they are butted up against a hardwood floor. If you are installing a shower threshold next to your oak floors, you need a thin-set that contains polymers to handle the slight movement of the subfloor. Standard grout will crack at the wood line every single time. I have seen it a thousand times. A homeowner wants a flush transition with no T-molding. I tell them it is possible, but it requires a perfectly level subfloor and a flexible sealant. You also have to consider the moisture barrier. If you are putting hardwood over a concrete slab, you need a 6 mil poly film or a liquid-applied moisture vapor gold shield. Without it, the moisture from the concrete will migrate into the wood, causing it to cup and ruin those beautiful, splinter-free cuts you worked so hard to achieve. It is about the chemistry of the adhesives and the physics of the water vapor pressure. Don’t let a 20 dollar roll of tape go to waste because you forgot the 100 dollar moisture barrier.
How moisture levels dictate the clean cut
Moisture levels dictate the clean cut by altering the elasticity of the wood fibers and their resistance to the saw teeth. When wood has a high moisture content, the fibers are more pliable and are more likely to “fuzz” rather than snap cleanly. This creates a ragged edge that masking tape cannot fully prevent. You need to acclimate your flooring to the environment for at least 72 hours, but I prefer a full week. I use a pinless moisture meter to check the planks and the subfloor. There should be no more than a 2 percent difference between the two. If the wood is too dry, it becomes brittle like glass, and the risk of catastrophic splintering increases. This is why the masking tape secret is so vital in low-humidity environments. It provides that extra bit of structural integrity to the surface layer of the wood, allowing the blade to exit without shattering the brittle cellulose walls.