
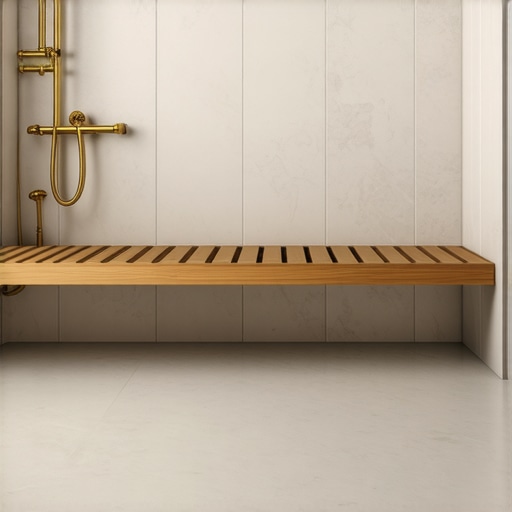
Most guys skip the leveling compound. They think the underlayment will hide the dip. It won’t. I spent three days grinding concrete on a job last month just so the floor wouldn’t click like a castanet. That same disregard for the fundamentals is exactly why shower benches fail. People treat a bench like a piece of furniture you just toss into a wet area. It is not furniture. It is a structural extension of your home’s waterproofing system. When a bench leaks, it does not just ruin the tile. It rots the rim joist, feeds mold in the crawlspace, and eventually causes the hardwood floors in the hallway to buckle from the migrating moisture. If you want a bench that lasts thirty years, you stop thinking about the tile and start thinking about the physics of the subfloor.
The invisible rot in your subfloor
A leaking shower bench destroys subfloors by allowing water to bypass the primary drainage system and saturate the wooden framing through capillary action. This moisture moves through the fasteners and into the plywood or OSB, where it sits until the wood fibers break down. Once the subfloor loses structural integrity, the tile above it begins to crack. You might see a small hairline crack in the grout, but by then, the damage beneath is likely extensive. The goal is to create a monolithic barrier that is entirely independent of the decorative finish. You are building a submarine, not a garden wall. Every screw hole in that bench frame is a potential point of ingress if your membrane is not perfectly integrated.
“A floor is only as good as the subfloor beneath it; deflection is the enemy of every joint.” – Master Flooring Axiom
The myth of the waterproof grout joint
Grout is a porous cementitious material that naturally absorbs water and allows it to pass through to the substrate via osmotic pressure. Many homeowners mistakenly believe that sealing their grout makes it waterproof. It does not. Sealing only slows down the absorption rate and helps with staining. In a high-moisture environment like a shower, water will find its way behind the tile. If your bench is not waterproofed underneath the tile, that water will sit on the wood frame. This is why you must use a topical waterproofing membrane. Whether you choose a liquid-applied system or a fleece-bonded sheet, the membrane must be continuous from the floor, up the face of the bench, over the top, and up the wall.
Why your shower bench is a ticking time bomb
Structural failure in shower benches usually occurs because the installer failed to account for the slope or used the wrong framing materials. A flat bench top is a dead bench. Water will pool on the surface, find a pinhole in the grout, and stay there until it penetrates the wood. You need a minimum slope of one quarter inch per foot toward the drain. I have seen guys build benches out of standard 2x4s and green board. That is a recipe for disaster. You need pressure-treated lumber at a minimum, though many modern pros prefer high-density foam blocks that cannot rot. If you use wood, you must wrap it in a cement backer board and then apply a waterproofing layer that can handle the expansion and contraction of the house framing.
| Material Type | Permeability Rating | Best Use Case | Risk Level |
|---|---|---|---|
| Cement Board | High | Substrate only | High without membrane |
| Liquid Membrane | Low | Complex geometries | Medium (needs even coats) |
| Fleece Sheet | Zero | Standard benches | Low (factory controlled) |
| High Density Foam | Zero | Modern builds | Very Low |
The chemical bond of thinset membranes
The success of a waterproofing system depends on the chemical bond between the thinset and the membrane at a molecular level. You cannot just use any bag of mud from the local big box store. You need a polymer-modified thinset that meets ANSI A118.4 or A118.15 standards. These polymers allow the mortar to remain flexible. Houses move. They breathe. If your thinset is too brittle, the movement of the shower bench under the weight of a person will cause micro-fractures in the bond. Once that bond breaks, the membrane can delaminate. I always tell people to check the mil-thickness of their liquid membrane with a wet-film gauge. If it is too thin, it will pinhole. If it is too thick, it can skin over and trap moisture inside, preventing a full cure.
Protecting the adjacent hardwood floors
Moisture from a leaking shower bench often travels horizontally along the subfloor, eventually reaching and destroying hardwood floors in adjacent rooms. I have walked into jobs where the laminate in the bedroom was peaking and the homeowner had no idea the shower bench three rooms away was the culprit. This is called moisture migration. The water hits the subfloor and follows the path of least resistance, which is often the seam between plywood sheets. By the time you see the hardwood floors cupping, you are looking at a ten thousand dollar repair. You must ensure the shower pan liner or the topical membrane is integrated with a proper transition strip that prevents moisture from wicking into the dry zones of the house.
The physics of the drainage slope
Gravity is the only reliable way to move water, and a shower bench must be engineered with a precise pitch to ensure drainage. If the top of the bench is level, you have failed before you started. When I build a bench, I use a digital level to ensure I have exactly two degrees of slope. This ensures that even if a heavy person sits on the edge and causes a microscopic amount of deflection, the water still runs toward the drain. You also need to consider the birdcage. This is the area where the bench meets the wall and the floor. This three-way corner is the most common leak point. You must use pre-formed corner seals. Trying to fold a flat sheet into a three-way corner is a fool’s errand. It will bunch up, create a hump, and the tile will never sit flat.
- Use stainless steel screws to prevent rust streaks from bleeding through grout.
- Apply at least two coats of liquid membrane, alternating the direction of your brush strokes.
- Perform a twenty four hour flood test before laying a single piece of tile.
- Ensure the bench frame is blocked into the wall studs, not just the floor.
- Always use a mesh tape on the corners of the cement board before waterproofing.
How to handle the transition to laminate
Transitioning from a wet area to laminate requires a rigid moisture barrier at the subfloor level to prevent edge swelling. Laminate is essentially compressed sawdust and glue. If a shower bench leaks and the water reaches the edge of a laminate plank, the floor is finished. It will soak up that water like a sponge and expand. You cannot fix it. You have to replace it. This is why I always install a high-quality silicone bead under the transition molding. It acts as a secondary dam. If the bench fails, that silicone might buy you enough time to notice the leak before the entire floor is ruined. But the best defense is a bench that never lets water reach the subfloor in the first place.
“Water is the most patient architect; it will find every mistake you made in the dark.” – Master Flooring Axiom
The 1/8 inch rule for expansion
Every shower bench installation must include a 1/8 inch expansion gap at the perimeter to account for the thermal expansion of the building materials. If you tile tight to the wall, the expansion of the bench frame will eventually crack the grout or the tile itself. This gap should be filled with 100 percent silicone sealant, never grout. Grout is rigid. Silicone is flexible. As the temperature in the shower changes from cold to hot, the materials expand at different rates. If there is no room for that movement, the stress will tear the waterproofing membrane. It is a small detail, but it is the difference between a five-year shower and a fifty-year shower. I have seen entire benches shear away from the wall because the installer didn’t leave a gap for the house to move.