
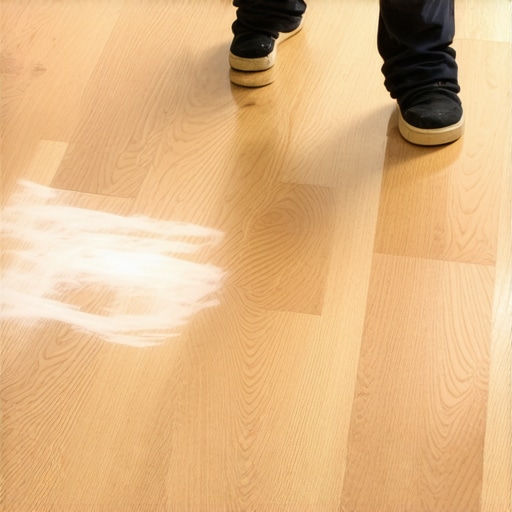
Why Your Hardwood Refinish Looks Cloudy and How to Clear It
I once walked into a house where a $15,000 wide-plank walnut floor was cupping so bad it looked like a potato chip because the installer didn’t check the crawlspace humidity before laying the first board. The owner was devastated. They had spent a fortune on premium lumber only to have it ruined by a lack of basic physics. I see the same thing with finishes. People spend days sanding their lives away only to apply a topcoat that looks like a foggy morning in London. It is heart-breaking to see someone pour their soul into a renovation only for the final layer to fail because of a chemical mismatch or a rushed timeline. As an architect who has spent three decades staring at floor levels and moisture meters, I can tell you that a floor is not a decoration. It is a structural engineering challenge that happens to look pretty. When that finish turns milky, it is a signal that the chemistry has gone wrong beneath the surface.
The phantom haze in the grain
Cloudiness in hardwood floor finishes is caused by trapped moisture, improper sanding techniques, or applying subsequent coats of polyurethane before the previous layer has fully off-gassed. This visual defect occurs when light reflects off microscopic particles or bubbles within the finish rather than passing through to the wood grain. To fix a cloudy finish, you must determine if the haze is on the surface or buried deep within the film of the poly. If it is on the surface, a screen and recoat might save it. If it is trapped underneath, a full sand back to raw wood is often the only path to clarity.
The science of wood finishing relies on the refractive index of the solids within the liquid. When you apply a finish, you are essentially laying down a liquid plastic that must level out and clear its solvents. If the environment is too humid, the water or oil solvents cannot escape into the air. They get pinned against the wood fiber by the hardening top skin. This creates a microscopic layer of fog. I have seen guys try to use a hair dryer to fix it, but that only makes it worse by skinning the top even faster. You have to respect the evaporation rate of the specific product you are using. Different brands have different chemical chains. A high-solids oil-based finish will behave very differently than a fast-drying waterborne finish. You cannot treat them the same way just because they both come in a gallon bucket.
Molecular bond failures and trapped solvents
Trapped solvents occur when the top layer of a finish dries faster than the bottom layer, creating a sealed environment where gas cannot escape. This is common in high-humidity regions where the air is already saturated. The gas remains as tiny bubbles that scatter light, resulting in a milky or white appearance. Most homeowners rush the process, but the National Wood Flooring Association is very clear about the physics of the dry time. You must monitor the ambient conditions of the room including the temperature and the relative humidity levels to ensure the chemical reaction completes as intended by the manufacturer.
“A floor is only as good as the subfloor beneath it; deflection is the enemy of every joint.” – Master Flooring Axiom
The chemistry of the polyurethane itself is often the culprit. Modern water-based finishes use diisocyanates as cross-linkers to create a hard surface. If these are not mixed perfectly or if the wood is too cold, the cross-linking fails. You end up with a soft, hazy mess that will never reach full Janka hardness. I have seen people try to install hardwood in areas near showers where the constant steam creates a localized microclimate of 90 percent humidity. That moisture migrates into the wood cells, and when the finish is applied, it has nowhere to go. It sits there, clouding the view of that beautiful white oak or cherry wood you paid so much for.
The physics of light and wood grain
The visual clarity of a hardwood floor depends on the smoothness of the sanding grit sequence and the absence of contaminants on the raw wood. If you skip a grit, such as jumping from 60 straight to 100, you leave deep scratches in the wood fiber. The finish fills these scratches but the light hits the edges of those microscopic canyons and refracts. This creates a dull, hazy look that people often mistake for a bad batch of polyurethane. It is not the poly, it is the mechanical preparation of the substrate that failed.
| Sanding Phase | Grit Level | Purpose | Clarity Impact |
|---|---|---|---|
| Initial Cut | 36 – 40 Grit | Remove old finish and level boards | Low |
| Intermediate | 60 – 80 Grit | Remove scratches from initial cut | Medium |
| Final Pass | 100 – 120 Grit | Smooth fiber for finish absorption | High |
| Screening | 150 – 220 Grit | Buffing between coats for adhesion | Critical |
We need to talk about the Janka scale. A harder wood like Brazilian Cherry is much denser and has smaller pores than a soft wood like Pine. The way these woods take a finish is radically different. On a dense wood, the finish sits on top more than it penetrates. If you apply a thick coat to a dense wood, it is more likely to cloud because the bond is purely mechanical on the surface. On a porous wood, the finish dives deep into the tracheids and vessels. This is why acclimation is the most important word in my vocabulary. If the wood is not at equilibrium moisture content with the room, it will move. That movement during the drying process of the finish can cause the film to stretch and cloud as it loses its structural integrity.
Why your subfloor is lying to you
Subfloor moisture is the leading cause of finish failure because it pushes vapor through the wood from the bottom up. Even if your floor looks dry on top, the concrete slab underneath could be emitting pounds of moisture per thousand square feet every single day. This vapor pressure hits the underside of your polyurethane and causes it to delaminate or turn white. Many installers think a thin underlayment will solve this, but vapor is persistent. It will find every pinhole in your barrier. I spent three days grinding concrete on a job last month just so the floor wouldn’t click like a castanet and the finish wouldn’t peel off like a sunburn. It is tedious work but it is the difference between a floor that lasts fifty years and one that fails in five.
While most people want the thickest underlayment possible, too much cushion actually causes the locking mechanisms on laminate or LVP to snap under pressure. This same logic applies to hardwood finishes. You do not want a thick, gummy layer of finish. You want multiple thin, hard layers. The thicker the film, the more light must travel through it, and the more likely you are to see imperfections and cloudiness. It is about the quality of the build, not the quantity of the liquid poured onto the planks.
The grit sequence that destroys clarity
Improper sanding is a mechanical error that results in a visual haze known as scratch ghosting. If the floor is not sanded to a perfectly flat plane, the finish will pool in the low spots. These pools are thicker than the surrounding areas and will dry at a different rate. This uneven drying creates tension in the film which leads to micro-cracks. These cracks are so small you can’t see them with the naked eye, but they catch the light and make the whole floor look like it has a layer of dust on it that you can’t wipe away.
- Check the ambient humidity and ensure it is between 35 and 50 percent.
- Vacuum the floor three times using a brush attachment to remove all dust.
- Wipe the floor with a tack cloth and the appropriate solvent for your finish.
- Ensure the wood temperature is within 10 degrees of the finish temperature.
- Use a high-quality applicator to avoid introducing air bubbles into the liquid.
When you are dealing with transitions near bathrooms or showers, the risk of clouding increases. Grout and tile work involve a lot of water. If the tile was recently installed, the moisture from the grout can migrate into the adjacent hardwood planks. I have seen beautiful transitions ruined because the installer didn’t wait for the grout to fully cure before finishing the wood. The wood acts like a sponge, drawing that moisture in and then trying to release it through the new finish. It is a recipe for a cloudy disaster. You have to look at the whole house as a single ecosystem of moisture.
“Wood is a hygroscopic material; it never stops reaching for a balance with the air around it.” – NWFA Technical Guidelines
The 1/8 inch that ruins everything
Expansion gaps are not suggestions; they are required for the floor to breathe and the finish to remain clear. If you pin a floor against the wall, the wood will swell with seasonal changes. This creates internal pressure that can actually fracture the bond of the polyurethane. When the bond breaks, air enters the space between the wood and the plastic. This air gap looks like a white, cloudy patch. It is not a chemical failure of the finish, it is a structural failure of the installation. I always tell my clients that if they don’t see a gap under their baseboards during the install, they are going to see a cloudy mess in the summer.
We must also consider the cleaning products used on the floor. Many products marketed as floor restorers or shine enhancers contain waxes or low-grade silicones. These products sit on top of the finish and create a cloudy build-up over time. People think their finish is failing when in reality they are just burying it under a layer of cheap wax. To clear this, you need a specialized chemical stripper that can remove the wax without eating the polyurethane. It is a delicate balance of chemistry. You have to know exactly what was put on that floor before you try to fix it. If you use the wrong cleaner, you could turn that cloudiness into a permanent white film that requires a drum sander to remove.
Solutions for a crystal clear finish
To fix a cloudy finish, you must first identify the depth of the issue by performing a small test scrape in an inconspicuous area. If the cloudiness is only in the top layer, you can use a fine-grit screen on a buffer to remove the surface imperfections and then apply a fresh, thin coat of high-quality polyurethane. If the haze remains after the top layer is removed, the moisture is trapped at the wood level. This requires a full sand down to the raw timber to allow the wood to dry out completely before attempting to refinish it again.
The chemical reality is that you cannot hide a bad finish with more finish. It is like trying to fix a blurry photo by taking another photo of it. You have to go back to the source. If the cloudiness is caused by moisture, you must address the source of that moisture. Is it a leaky pipe, a damp crawlspace, or a high-humidity HVAC setting? Fix the environment first, then fix the floor. My years of experience have taught me that the floor is always the messenger. If it looks cloudy, it is telling you that something is wrong with the air or the subfloor. Listen to the wood. It doesn’t lie. A clear, deep finish is the reward for patience and technical precision. It is the result of respecting the chemistry and the physics of the materials you are working with every single day.