
The truth about shaving cream on polished marble and why most floor hacks are dangerous
Most guys skip the leveling compound. They think the underlayment will hide the dip. It won’t. I spent three days grinding concrete on a job last month just so the floor wouldn’t click like a castanet. That is the reality of professional floor work. It is a grind. It is physical. It is about the science of the substrate. When I see people spreading shaving cream on a thousand dollar polished marble floor because they saw a video online, it makes my skin crawl. Marble is not just a stone. It is a metamorphic record of limestone subjected to heat and pressure. It is mostly calcium carbonate. If you treat it like a cheap kitchen counter, you are going to destroy it. I have been in the trade for twenty five years. I have seen every shortcut. I have seen the heartbreak of a floor that cost twenty thousand dollars failing in six months because someone used the wrong cleaner or ignored the subfloor. Shaving cream contains surfactants and often fragrance or alcohols that can etch the surface of the stone. It is not a cleaning hack. It is a slow motion chemistry experiment where your floor is the victim.
The ghost in the expansion gap
A floor expansion gap is a mandatory space left around the perimeter of a room to allow materials like hardwood floors or laminate to expand and contract with changes in humidity. Without this gap, the floor will buckle or peak at the seams because the material has nowhere to move. This gap is not a suggestion. It is a law of physics. I have walked into homes where the homeowner complained about their laminate floors sounding like they were cracking under every step. The problem was not the laminate. The problem was that the installer pushed the planks tight against the drywall. Wood and composite materials are hygroscopic. They absorb moisture from the air. In the summer when the humidity hits eighty percent, those cells swell. If they hit a wall, they have to go up. That is when you see the peaking. I always tell people to leave at least a half inch. You can hide it with baseboards and shoe molding. If you are working with solid hardwood floors, the stakes are even higher. I have seen floors rip the baseboards right off the wall because the installer did not account for the seasonal shift in the wood. It is a structural engineering challenge every single time.
“A floor is only as good as the subfloor beneath it; deflection is the enemy of every joint.” – Master Flooring Axiom
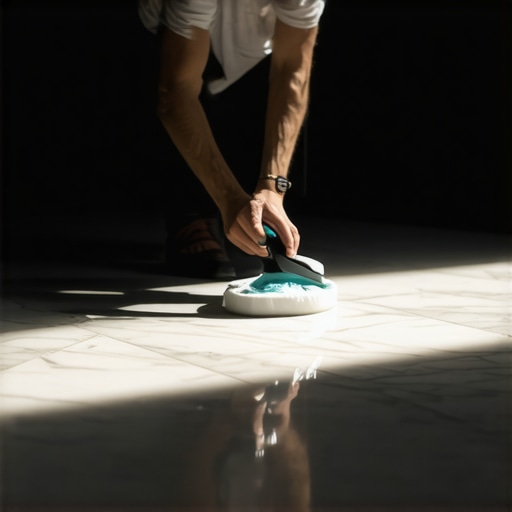
The image below shows the microscopic reality of a polished surface versus a porous substrate.
[image_placeholder]
Why your subfloor is lying to you
A subfloor is lying to you when it looks flat to the naked eye but contains dips or humps exceeding one eighth of an inch over ten feet. These imperfections cause vertical movement in the flooring which leads to joint failure and annoying clicking sounds. You have to get on your knees with a ten foot straight edge. You have to find the high spots and the low spots. If you are over a concrete slab, you have to worry about moisture vapor transmission. I have seen slabs that looked bone dry but were pumping out pounds of water vapor every twenty four hours. That moisture will delaminate the adhesive or cause your wood to cup. I once spent a week on a job just prepping the concrete. We had to grind down the high spots with a diamond cup wheel. The dust was everywhere, even with the vacuum attachments. Then we poured a self leveling underlayment. It is expensive. It is messy. But if you want a floor that lasts thirty years, you do not skip the prep. People want to jump straight to the pretty part, the marble or the oak. They ignore the foundation. That is why floors fail. It is not the wear layer. It is the deflection of the subfloor under the weight of the furniture and the people walking on it.
The 1/8 inch that ruins everything
A deviation of one eighth of an inch in a floor surface is the maximum tolerance allowed by most flooring manufacturers for the installation of large format tile or click-lock planks. Exceeding this tolerance puts stress on the locking mechanisms and leads to broken grout lines or snapped vinyl edges. Think about the physics of a click-lock joint. It is a thin piece of plastic or composite. It is designed to hold the planks together, not to support the weight of a person over a void. When you step on a plank that is bridge over a dip, the joint flexes. Do that a thousand times and the plastic fatigues. It snaps. Now you have a gap that collects dirt and moisture. You can see this happen in showers too. If the mud bed is not pitched correctly or the substrate is not rigid, the grout will crack. Grout is not a structural adhesive. It is a filler. If there is movement, the grout is the first thing to go. This is especially true with large format marble tiles. They have no flexibility. If the floor moves, the stone cracks or the grout turns to powder.
| Material Type | Typical pH Sensitivity | Expansion Potential | Cleaning Recommendation |
|---|---|---|---|
| Polished Marble | High | Low | pH Neutral Stone Soap |
| Hardwood Floors | Medium | High | Damp Mop Only |
| Laminate | Low | High | Microfiber Dusting |
| Porcelain Tile | Low | None | Neutral Detergent |
How to save your grout from the kitchen cabinets
Grout protection starts with ensuring the subfloor meets the L/360 deflection standard which means the floor should not bend more than the span divided by three hundred and sixty under a heavy load. This rigidity prevents the grout from cracking under the weight of heavy islands. People install these massive stone islands on top of floating floors. That is a recipe for disaster. You are essentially pinning the floor to the subfloor in one spot while the rest of the floor tries to move. This puts immense pressure on the grout lines near the island. I always recommend installing the cabinets first and then flooring around them, or at least being very careful about where you place heavy objects on a floating system. In showers, the grout is the weakest link. I see people use harsh chemicals to clean shower grout. They use acids that eat away at the Portland cement. Over time, the grout becomes porous. Water seeps behind the tile and hits the wall board. If you did not use a proper waterproof membrane, you now have a mold factory behind your beautiful marble shower. It is about the layers you do not see.
- Always check the moisture content of the subfloor using a pin or pinless meter.
- Use a high quality moisture barrier for all laminate and hardwood installations.
- Acclimate the flooring material in the room where it will be installed for at least 72 hours.
- Clean polished marble only with products specifically designed for natural stone.
- Never use a steam mop on laminate or hardwood floors as it forces moisture into the joints.
Laminate flooring does not like your steam mop
Steam mops are dangerous for laminate flooring because they use heat and pressure to force water vapor into the HDF core of the planks which causes irreversible swelling and edge peaking. This damage is not covered by warranties and usually requires total floor replacement. I have seen so many people ruin their floors with these machines. They think the steam is sanitizing. Maybe it is. But it is also destroying the structural integrity of the floor. Laminate is basically compressed sawdust and resin. When that core gets wet, it expands like a sponge. Once it expands, it never goes back down. The edges of the planks will start to curl up. You will see the brown core material peeking through. If you want your laminate to last, keep the water away from it. Use a barely damp microfiber mop. That is all you need. The same goes for hardwood floors. Water is the enemy. It gets into the grain. It causes staining. It causes the wood to rot from the inside out. I have pulled up floors that looked fine on top but were black with mold underneath because of over cleaning with water. Stick to the basics. Do not trust the marketing of steam mop companies.
“Deflection is the measurement of how much a floor system bends under a load. For natural stone, the requirements are twice as rigid as for ceramic tile.” – TCNA Handbook Standards
The chemistry of shaving cream on calcium carbonate
The chemical reaction between shaving cream and marble is unpredictable because many shaving creams contain stearic acid or triethanolamine which can react with the calcium carbonate in the stone to cause etching or dull spots. Marble is a base and reacts poorly to anything even slightly acidic. People think because it feels creamy and soft that it must be gentle. That is a mistake. Shaving cream is designed to soften hair and interact with human skin. It is not designed for geological formations. When you leave it on the stone to pull out a stain, the surfactants can penetrate the micro-pores of the marble. This can leave a permanent shadow or a ring. If the shaving cream has any citrus scent, it likely has citric acid. That will eat a hole right into the polish of your marble in seconds. You will be left with a dull white spot that requires professional diamond polishing to fix. I have spent hours at the end of a job explaining to clients that they should only use water and a tiny bit of stone soap. No vinegar. No bleach. No shaving cream. The polish on your marble is a physical state of the stone achieved through abrasion. It is not a coating. You cannot just wipe it back on. Once you etch it, the stone is physically changed. You have to grind it back down to get the shine. The bottom line is that your floor is a major investment. Treat it with the respect that a structural element deserves. Stop looking for hacks. Start looking at the chemistry and the physics of the materials in your home.