
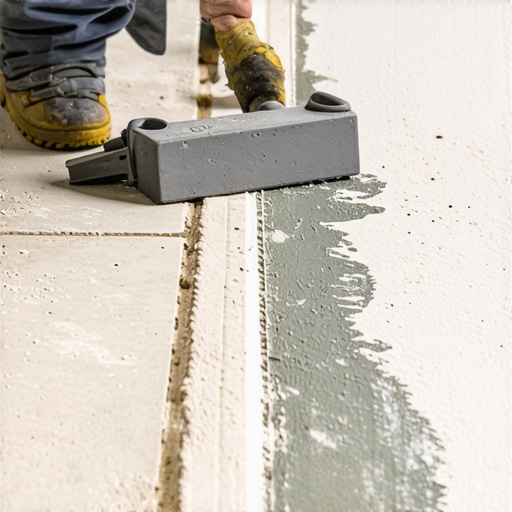
Why Professional Tile Installers Choose Rubber Floats Over Metal Tools for Grout Application
I spent three days grinding concrete on a job last month just so the floor would not click like a castanet. Most guys skip the leveling compound and think the underlayment will hide the dip. It will not. That same level of laziness usually leads people to grab the nearest tool in their bucket when it is time to grout. I once walked onto a job site where a junior apprentice was trying to push epoxy grout into a marble mosaic using a steel margin trowel. The sound was like nails on a chalkboard. By the time I stopped him, he had already left gray metal transfer streaks across two hundred dollars worth of stone. He thought a tool is just a tool. He was wrong. In the world of professional flooring, the physics of the tool dictates the longevity of the installation. If you use metal for grouting, you are not just risking the aesthetics. You are compromising the structural integrity of the grout joint itself.
The structural cost of using metal tools on tile surfaces
Metal tools like steel trowels or margin knives are designed for moving heavy mortars and setting beds rather than finishing delicate joints. Using metal for grout application leads to surface scratching, metal transfer, and inconsistent joint packing that eventually allows moisture to penetrate the assembly. A metal edge does not have the flex required to contour to the variations in tile heights. When you drag a rigid steel edge over a ceramic or stone surface, the pressure is concentrated on the highest points. This creates micro-fractures in the glaze of the tile. These fractures are the entry points for mold and mildew in showers. Once the glaze is compromised, the tile is no longer waterproof. It becomes a sponge. This is why the TCNA standards emphasize the use of non-marring tools for the final phase of the installation.
“A floor is only as good as the subfloor beneath it; deflection is the enemy of every joint.” – Master Flooring Axiom
The physics of compression and the rubber float advantage
Rubber floats are engineered with a specific Shore A hardness that allows the tool to compress grout into the full depth of the joint. This compression eliminates air pockets and creates a dense, water-resistant barrier that protects the subfloor and adjacent hardwood floors from rot. When you apply pressure with a rubber float, the material deforms slightly. This deformation forces the grout slurry into the microscopic voids between the tile edge and the thin-set. A metal tool simply skim-coats the top. It leaves a hollow space underneath. In a few months, that grout will crack and fall out because it has no structural support from below. The rubber float acts as a piston. It uses the viscosity of the grout against itself to pack the joint tight. This is especially critical in showers where the constant cycle of wet and dry causes materials to expand and contract. Without a full-depth pack, the joint will fail within the first year.
Why showers demand a perfect seal to protect the home
In wet environments like showers, the grout joint serves as the primary line of defense for the waterproofing membrane and the framing of the house. A rubber float ensures a flush finish that prevents standing water from pooling in the grout lines and causing erosion. If you use a metal tool, you often create a concave joint that is too deep. This creates a valley where soap scum and hard water minerals collect. Over time, these chemicals break down the cementitious bond of the grout. I have seen floors where the grout looked fine from a distance, but the moment you stepped on it, water squeezed out like a sponge. That is because the installer did not use a float to pack the joints correctly. The water had migrated under the tile and was rotting the subfloor. If that shower is on a second floor, you are looking at a collapsed ceiling in the kitchen within five years. The tool you choose at the end of the job determines if the house stays dry.
| Feature | Rubber Grout Float | Metal Margin Trowel | Impact on Grout Longevity |
|---|---|---|---|
| Surface Contact | Full compression | Point pressure | Rubber prevents voids |
| Flexibility | High (conforming) | Zero (rigid) | Rubber protects tile edges |
| Joint Depth | Uniform flush fill | Inconsistent gouging | Rubber ensures water runoff |
| Material Transfer | None | High (metal streaks) | Rubber maintains aesthetics |
The chemical bond and the risk of flash drying
Modern grouts contain polymers and chemical additives that require a specific moisture balance during the curing process to reach their rated PSI strength. Metal tools generate friction heat that can cause the grout to flash dry on the surface before the chemical bond is complete. Rubber is an insulator. It does not transfer heat from your hand or the friction of the stroke into the grout mixture. When grout flash dries, it becomes brittle and powdery. You can literally scratch it out with a fingernail. Professionals know that the workability of the grout is a narrow window. A rubber float allows you to work the material longer and more effectively. It also makes the cleanup process easier. Because the float leaves less residue on the face of the tile, you use less water during the sponging phase. Too much water during cleanup is the number one cause of efflorescence and color shading issues. Using the right tool reduces the need for excessive scrubbing later.
How grout failure impacts hardwood floors and laminate
Moisture migration from a poorly grouted tile floor is a leading cause of cupping and buckling in adjacent hardwood floors and laminate planks. A rubber float creates the airtight seal necessary to prevent lateral moisture travel across the subfloor transition. I have been called to inspect countless homes where the homeowner complained that their hardwood was swelling near the bathroom door. They thought the plumbing was leaking. In reality, the moisture from their daily shower was seeping through the porous grout joints in the bathroom. It was traveling along the plywood subfloor and soaking into the bottom of the oak planks. By the time the wood starts to cup, the damage is done. You cannot just dry it out. You have to rip it all up. This is why I treat every grout joint as a structural seal. If you do not use a rubber float to create that high-density pack, you are basically setting a time bomb for your wood floors.
Professional Grouting Protocol Checklist
- Verify that all thin-set has been cleaned out of the joints to at least two-thirds of the tile depth.
- Select a float with the correct rubber density for the grout type, such as a hard rubber for epoxy or a soft gum rubber for sanded grout.
- Hold the float at a 45 degree angle to the tile surface to force grout into the joints without digging it back out.
- Perform the final pass at a 90 degree angle to the joints to strip off the maximum amount of excess material.
- Wait for the grout to take a dull haze before beginning the initial wipe with a damp, not dripping, sponge.
- Check for any pinholes or low spots and fill them immediately while the grout is still plastic.
“The smallest gap in a grout line is an open door for a thousand gallons of water over the life of a shower.” – Tile Council of North America Principle
The 1/8 inch that ruins everything
Precision in the expansion gap at the perimeter is just as important as the grout joint itself to allow for the natural movement of the building. Metal tools often leave jagged edges at these critical junctions while a rubber float allows for a clean transition to the silicone caulk. People forget that houses breathe. They expand in the summer and shrink in the winter. If your grout is packed too hard against a wall or a tub with a rigid tool, it will eventually crack the tile when the house moves. We use the rubber float to fill the main field, but we leave the perimeter open for a flexible sealant. A metal trowel is too clumsy for this detail. It leaves chunks of grout where there should be space. That 1/8 inch gap is the difference between a floor that lasts fifty years and one that tent-peaks in three. Every detail matters. From the Shore hardness of the rubber to the angle of your wrist, the mechanics of installation are what separate a master from a handyman.