
The Master Strategy for Fitting Laminate Under a Door Jamb
Most guys skip the leveling compound. They think the underlayment will hide the dip. It won’t. I spent three days grinding concrete on a job last month just so the floor wouldn’t click like a castanet. That job taught me that the difference between a floor that lasts thirty years and a floor that fails in three is usually found at the door jamb. When you are staring down a piece of laminate and a complex casing, you are not just doing carpentry. You are managing the structural physics of a floating system. If you get it wrong, you end up with a gap that looks like a mistake or a floor that buckles because it has nowhere to go. This guide focuses on the technical precision required to ensure your floor moves, breathes, and looks like it grew right out of the wall. We are talking about the molecular reality of wood fibers and the mechanical tension of click-lock systems.
The secret to a silent floor
Laminate flooring requires a level subfloor with no more than 1/8 inch deviation over ten feet to prevent locking mechanism failure. When the subfloor has a dip, the plank flexes under foot, creating a clicking sound that signifies the HDF core is slowly disintegrating into sawdust. I have seen guys try to fill these voids with extra padding. That is a recipe for disaster. Too much cushion causes the tongue and groove to act like a lever, eventually snapping the joint under the pressure of daily traffic. You must grind the high spots and fill the low spots with a high-quality self-leveling compound before a single plank touches the ground. This is especially true near door jambs where the floor is often subjected to the highest concentration of foot traffic. If the subfloor is not dead flat, the plank will bounce against the undercut casing, eventually wearing down the finish or cracking the board entirely. You need to treat the subfloor like the foundation of a skyscraper. If the base is crooked, the top will never be straight.
“A floor is only as good as the subfloor beneath it; deflection is the enemy of every joint.” – Master Flooring Axiom
Why the door casing is your enemy
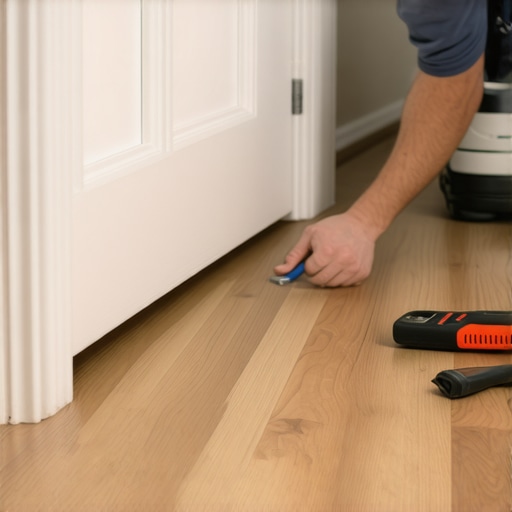
Undercutting a door jamb is the only professional way to hide an expansion gap while allowing the laminate floor to move freely. Many amateurs try to cut the flooring around the molding, leaving a messy caulk joint that looks like garbage. A professional uses a jamb saw or an oscillating tool to remove a slice of the casing and jamb, creating a pocket where the floor can hide. This pocket is essential because laminate is a floating floor. It is not nailed or glued down. It expands and contracts with the changing humidity levels in your home. If you pin the floor against the door frame, it will buckle in the middle of the room as soon as the summer humidity hits. You need to give the wood fibers room to breathe. I always use a scrap piece of the actual flooring and a piece of the underlayment as a height guide. You lay the scrap upside down against the jamb and rest your saw blade on top. This ensures the cut is at the exact height needed. No more, no less. It is a game of millimeters. One wrong move and you have a visible gap above the floor that requires a bunch of wood filler to hide. I hate wood filler. It is the mark of an installer who did not take the time to measure twice.
[IMAGE_PLACEHOLDER]
The physics of the horizontal slide
Sliding a laminate plank under an undercut jamb requires the removal of the plastic locking ridge to allow for a flat entry into the groove. Most click-lock floors are designed to be installed at an angle, but you cannot tilt a board when it is trapped under a door frame. This is where the chemistry of PVA wood glue becomes your best friend. You have to take a sharp chisel or a utility knife and shave down the small bump on the tongue of the previous row. This allows the new plank to slide in horizontally rather than being clicked in at a forty-five degree angle. Because you have removed the mechanical lock, you must apply a thin bead of glue to the joint to ensure it stays together. I prefer a high-viscosity waterproof glue that sets up in about thirty minutes. This gives you enough time to use a pull bar to snug the plank into place. You have to be careful here. If you hit the pull bar too hard, you will mushroom the edge of the plank. If you hit it too soft, the gap will stay open. It is about finesse. You are looking for a tight, microscopic seal that prevents water from reaching the HDF core. Water is the mortal enemy of laminate. Once it gets into the core, the fibers swell and the floor is ruined. This is why I always tell people that waterproof laminate is a bit of a myth. The surface might be waterproof, but the joints and the core are still vulnerable.
Tools that make the difference
Professional flooring tools like the tapping block and the heavy-duty pull bar are necessary to prevent edge damage during the installation process. You cannot just use a hammer on the edge of the laminate. The aluminum oxide wear layer is tough, but the tongue is fragile. I have seen so many DIY jobs where the edges are all chipped up because they tried to manhandle the boards. You need a block that is specifically designed to fit the profile of your floor. This distributes the force of the hammer blow across the entire length of the plank. When you are working under a door jamb, the pull bar is your only way to apply force. I use a professional-grade steel bar that has a wide foot to prevent it from marring the wall. You also need to keep a moisture meter in your pocket. I do not care if you are in a dry climate like Phoenix or a swamp like Houston. You need to know the moisture content of your subfloor. For concrete, you are looking for less than three pounds per one thousand square feet. For wood subfloors, you want it within two percent of the flooring material itself. If you ignore the moisture, you are gambling with your investment.
| Specification | Value | Impact |
|---|---|---|
| Core Density | 850 kg/m3 | Structural Stability |
| AC Rating | AC4 | Commercial Durability |
| Expansion Gap | 1/4 to 3/8 inch | Seasonal Movement |
| Wear Layer Thickness | 12 mils | Scratch Resistance |
The structural reality of the subfloor
Subfloor preparation involves checking for moisture and grinding down high spots to ensure a stable foundation for floating floors. If you are working over concrete, you must use a 6-mil poly film as a vapor barrier. This prevents the moisture in the slab from rising up and rotting your floor from the bottom up. I have seen $15,000 floors ruined in six months because someone forgot a twenty-dollar roll of plastic. It is a tragedy. When you are dealing with wood subfloors, you need to make sure the plywood or OSB is securely fastened to the joists. If there is a squeak in the subfloor, there will be a squeak in the laminate. I spend a lot of my time driving screws into the floor before I ever open a box of planks. You want to use structural screws that pull the subfloor tight to the framing. Nails are useless. They back out over time and start the squeaking all over again. Once the floor is solid, then you can worry about the aesthetic stuff. People get too caught up in the color and the texture. I am caught up in the engineering. If the engineering is sound, the beauty will follow.
“Laminate flooring must be installed as a floating system, allowing for dimensional changes across the entire surface.” – NWFA Technical Guidelines
- Check subfloor levelness with a 10-foot straight edge.
- Acclimate the flooring in the room for at least 48 hours.
- Undercut all door jambs and casings with a scrap piece as a guide.
- Maintain a consistent expansion gap around the entire perimeter.
- Remove the locking lip on planks that must be slid horizontally.
- Use a high-quality pull bar to close joints in tight spaces.
Maintaining the integrity of the wear layer
Aluminum oxide coatings provide the scratch resistance required for high-traffic areas, but they cannot protect against impact damage from heavy furniture. You have to be smart about how you live on these floors. Just because it says it is durable does not mean it is indestructible. I always recommend felt pads for every piece of furniture. No exceptions. If you drag a couch across a laminate floor, you are going to leave a mark. The wear layer is incredibly hard, which is why it is difficult to cut, but that hardness makes it brittle. It can chip if you drop a heavy tool on it. This is why I am so particular about the door jambs. If the floor is not tucked under the jamb correctly, it can snag on a shoe or a vacuum cleaner, and once that wear layer is compromised, the whole board needs to be replaced. There is no such thing as a simple repair for laminate. You either live with the scratch or you tear up the floor back to that spot. That is why the installation has to be perfect. You do not get a second chance once the baseboards are installed.
The final adjustment and transitions
Transition moldings are used to bridge the expansion gap between different flooring types or to allow for movement in large rooms. If your room is longer than thirty feet, you need a transition strip. I know people hate the look of them, but they are a technical necessity. Without them, the cumulative expansion of the planks will be too much for the perimeter gaps to handle. The floor will find the weakest point and pop up like a tent. I always try to place transitions under the door so they are less visible when the door is closed. When you are fitting the floor under the jamb, you have to coordinate this with your transition layout. Everything has to work together. It is like a giant puzzle where the pieces are constantly changing size. You have to anticipate where the floor will be in six months. If you install it in the middle of a dry winter, it is going to grow in the summer. If you do not leave that gap under the jamb and at the walls, you are going to have a bad time. Professional flooring is about respect. Respect for the material, respect for the tools, and respect for the physics of the house. If you follow these rules, you will have a floor that stays quiet and looks sharp for decades. Skip the prep and you will be calling me in a year to fix it, and I am expensive when I have to fix someone else’s mess.