
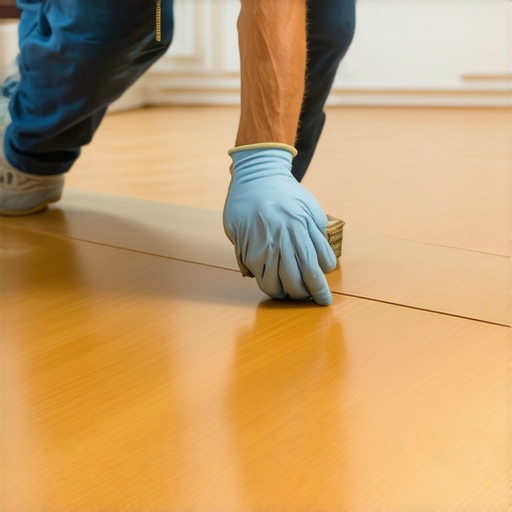
I have spent twenty five years on my knees with a moisture meter and a level. My hands smell like WD-40 and oak dust, and my joints ache when the barometric pressure drops. I have seen the dark side of the flooring industry, the side where big box retailers sell garbage and installers think a layer of underlayment fixes a wavy slab. I once walked into a house where a $15,000 wide-plank walnut floor was cupping so bad it looked like a potato chip because the installer did not check the crawlspace humidity. The homeowner was devastated, and the installer was long gone with the check. That is the reality of this trade. People treat hardwood floors like a cosmetic choice, but it is a structural engineering challenge. One of the most common ways I see beautiful finishes ruined is something as simple as marking a cut. Guys grab a roll of standard masking tape and slap it down on a fresh floor. When they pull it up, they take the top layer of polyurethane with it. This is why I developed a strict protocol for marking surfaces without causing a mechanical failure of the finish.
The mechanical failure of low tack adhesives
Low tack adhesives use acrylic polymers designed for temporary contact with polyurethane finishes. When applied to hardwood floors, these tapes create a van der Waals force bond. If left too long, the chemical migration of plasticizers can soften the finish, leading to permanent surface damage or peeling upon removal. You need to understand that the poly on your floor is a living, breathing polymer chain. It takes weeks for it to fully cross link. If you apply a pressure sensitive adhesive to it during that window, you are essentially welding the tape to the floor at a microscopic level. I have seen guys use green tape on a floor that was finished two days prior. They might as well have used a heat gun and a scraper. The secret is not just the tape itself, but the timing and the angle of removal. If you are marking for a transition near showers or where the wood meets the grout of a bathroom tile, you have to be even more careful because moisture in the air can activate the adhesive even further.
“A floor is only as good as the subfloor beneath it; deflection is the enemy of every joint.” – Master Flooring Axiom
The ghost in the expansion gap
The expansion gap is the intentional space left between the flooring material and the vertical walls to allow for natural hygroscopic movement. Marking this gap with tape requires a precision that does not compromise the vertical edges of the plank. Improper marking leads to tight fits that cause buckling. Most people think wood is static. It is not. It is a bundle of straws that sucks up moisture from the air. In a humid summer, those planks will expand. If you did not leave a proper gap because your layout lines were sloppy, the floor will lift off the subfloor. I have seen entire laminate floors hump up in the middle of a room like a burial mound. It happens because the installer did not respect the 1/4 inch gap. When I am marking my perimeters, I use a specific brand of delicate surface tape, but I only leave it on for the duration of the cut. I never leave it overnight. The moisture in the house changes at night, and that changes the way the tape grips the wood grain.
Why your subfloor is lying to you
Subfloor levelness is measured by the change in elevation over a ten foot radius, with a standard tolerance of 3/16 of an inch. If your subfloor has dips or humps, any tape you use for layout will be stretched or compressed, leading to inaccurate measurements and poor joint alignment. I spent three days grinding concrete on a job last month just so the floor would not click like a castanet. If you think the padding under your laminate is going to hide a dip, you are dreaming. That dip creates a void. Every time someone walks over that void, the locking mechanism on the plank flexes. Eventually, that tongue or groove is going to snap. It is a mechanical certainty. I use my marking tape to map out the high and low spots on the slab before I even bring the wood into the house. I use a 10 foot straight edge and a can of marking paint for the concrete, but once the wood goes down, the tape is the only thing I trust for my final finish lines.
| Tape Type | Adhesive Strength | Maximum Dwell Time | Best Application |
|---|---|---|---|
| Blue Painter’s Tape | Medium | 14 Days | Raw wood or fully cured poly |
| Delicate Surface Yellow | Low | 60 Days | Fresh finishes and laminate |
| Green Masking Tape | High | 3 Days | Subfloor layout only |
| Red Construction Tape | Extreme | 0 Days | Vapor barriers only |
The 1/8 inch that ruins everything
Precision in flooring is measured in increments of 1/8 of an inch, which is the standard threshold for allowable deviation in most professional installations. Small errors in layout marking can compound over a large surface area, resulting in crooked rows and failed transitions. When you are working around showers, you are dealing with moisture. If you are marking hardwood floors for a transition to tile, the grout line has to be perfectly parallel to the wood plank. If you are off by 1/8 of an inch at the start of a 20 foot hallway, you will be off by two inches by the time you reach the other end. That is the kind of mistake that gets you fired. I use a laser level for my primary lines, but I use tape to mark my physical stop points. I never use a pencil directly on the wood if I can avoid it. Pencils leave graphite in the grain that is a nightmare to get out without sanding. The tape is the barrier. You mark the tape, you cut the wood, you remove the tape. Simple.
Why your finish might not be cured yet
Polyurethane curing is a chemical process of cross-linking that can take anywhere from 7 to 30 days depending on humidity and temperature. A finish that is dry to the touch is not necessarily cured, and applying adhesive tape too early will cause a permanent imprint. I have seen homeowners walk on a floor in socks and think it is ready for furniture. It is not. The solvents need time to evaporate. If you trap those solvents under a piece of tape, you are creating a chemical reaction that will haze the finish. This is especially true with the high performance water based finishes we use today. They dry fast, but they cure slow. If I am installing laminate, I do not have to worry as much about curing, but I still worry about surface tension. Laminate has a wear layer made of aluminum oxide. It is tough as nails, but it is brittle. If you use a high tack tape, you can actually chip that wear layer when you pull the tape up.
“The Janka hardness test measures the force required to embed a 0.444-inch steel ball to half its diameter into wood, but this does not account for the brittleness of the top coat finish.” – Structural Wood Dynamics Handbook
The interaction between grout and hardwood
Grout is a porous cementitious material that holds moisture, which can migrate into adjacent hardwood planks if a proper silicone barrier is not established. Marking the transition zone requires tape that can withstand the alkaline nature of the grout. When I do a transition between a tile floor and hardwood, I am looking at two different worlds. The tile is rigid. The wood is flexible. If you grout right up to the wood, the wood will expand and crack the grout. Every single time. You need a color matched 100 percent silicone caulk in that joint. I use my tape to mask off both sides of the joint so I get a clean, professional bead. This is the difference between a pro job and a handyman special. If you leave the tape on while the silicone skins over, you get a perfect line. If you wait too long, you pull the silicone up with the tape. It is all about the dwell time.
The checklist for marking precision
- Vacuum the surface to remove all sawdust and micro debris before applying any adhesive.
- Select a tape with a tack rating specifically designed for the age of your finish.
- Use a plastic putty knife to burnish the edges of the tape for a sharp line.
- Mark your measurements with a fine tip mechanical pencil on the tape surface.
- Remove the tape at a 45 degree angle slowly to minimize surface tension.
- Never leave tape on a floor that is exposed to direct sunlight for more than four hours.
The truth about waterproof claims in showers
Waterproof flooring ratings usually apply only to the material itself and not to the installation as a whole. Moisture can still penetrate through the perimeter and cause subfloor rot or mold growth if the edges are not sealed. I hate the word waterproof. It makes people lazy. They think they can install LVP in a bathroom and not worry about the splash from the showers. If water gets under that floor, it is trapped. It cannot evaporate. It just sits there and rots your plywood subfloor. I have ripped up floors that were only two years old that smelled like a swamp. When you are marking your cuts around a tub or a shower, you have to ensure that your tape lines allow for a deep enough gap to be filled with high quality sealant. If you do not seal the perimeter, the waterproof rating of the plank is worthless. You have to think like a plumber, not just a carpenter.
Laminate layout secrets for high traffic zones
High traffic zones in residential settings require a layout that minimizes the number of small cut pieces at transitions. Strategic marking with tape allows for a dry fit that ensures structural integrity in doorways. I always tell my guys to start their layout at the most visible wall. But you also have to look at the doorways. If you end up with a one inch strip of laminate in a doorway, it is going to fail. There is not enough surface area for the locking mechanism to hold. I use tape to mark out my entire grid before I start clicking planks together. It takes an extra hour, but it saves me from a callback. A callback is lost money. I do not like losing money. I like doing the job once and never seeing that house again until the owner wants a new room done. That is how you build a reputation in this business. You use your head and you respect the physics of the materials. If you follow these rules, your floors will last a lifetime. If you cut corners, you will be the guy I am talking about when I walk into the next heartbreak job.