
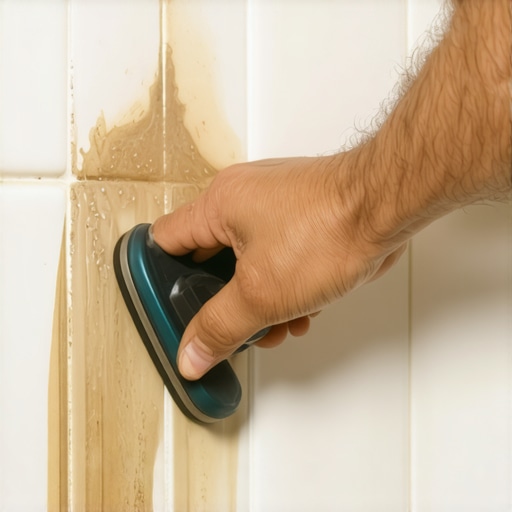
The moldy reality behind the seal
I spent three days digging out black mold behind a seal that the homeowner swore was waterproof. They thought a fresh bead of silicone would stop the leak. It did not work. The moisture was already deep in the cement board and the old silicone was peeling back like dead skin because it was applied over a dirty surface. I have spent twenty-five years on my knees fixing these mistakes. You cannot just smear more product on top of a failure. You have to understand the chemistry of the bond and the physics of the corner joint. Most guys skip the leveling compound or the proper cleaning steps. They think the underlayment or a bit of caulk will hide the dip. It won’t. I treat a shower corner with the same respect I give a high-end hardwood floor installation. If the prep is wrong, the whole system fails eventually. This is not about making things look pretty. It is about structural integrity and moisture management.
The physics of the corner joint
Shower corners are dynamic environments where two planes meet and move independently of one another. Silicone is chosen because it is an elastomer that can handle this movement, but its bond is purely mechanical and chemical at the surface layer. When that bond fails due to soap scum or hard water deposits, the silicone becomes a trap for bacteria rather than a shield against water. Most homeowners treat shower maintenance like a cosmetic chore, but it is actually a battle against the thermal expansion of the building materials. Just like hardwood floors need an expansion gap at the perimeter, shower tiles need a flexible joint in the corners. If you use grout in a corner, it will crack. If you use cheap silicone, it will peel. You need to understand the molecular structure of the sealant to remove it effectively. Modern silicone is a polydimethylsiloxane polymer that cures through an acetoxy or neutral cure process. Once those chains are formed, they are incredibly difficult to break without the right mechanical force and chemical intervention.
“A floor is only as good as the subfloor beneath it; deflection is the enemy of every joint.” – Master Flooring Axiom
The ghost in the expansion gap
The biggest mistake I see is people leaving behind a microscopic film of the old product. Silicone will not stick to old silicone. It is a fundamental law of the chemistry. If you leave even a thin residue, your new bead will fail within six months. I call this the ghost in the gap. It is an invisible layer that prevents the new polymer chains from anchoring to the tile or the tub surface. You have to get down to the bare substrate. This requires a level of aggression that most people are afraid of. You need to use a sharp blade, but you have to know the angle. If you go in too steep, you scratch the acrylic or the porcelain. If you go in too shallow, you just skate over the top. I use a plastic razor for the bulk of the work to protect the finish, but the final pass always requires a chemical solvent to dissolve the remaining oils. It is the same principle as prepping a subfloor for a glue-down laminate. If there is dust or oil, the adhesive fails. The shower is just a wetter, more high-stakes version of that same engineering challenge.
Why your subfloor is lying to you
In many cases, the reason the silicone in your shower is failing has nothing to do with the caulk itself. It has everything to do with the movement of the subfloor beneath the shower pan. If there is too much deflection in the joists, the pan will flex every time you step in it. This movement puts a massive amount of shear stress on the silicone bead in the corners. Over time, that stress causes the bond to snap. I have seen 15,000 dollar wide plank walnut floors cup like potato chips because the installer ignored the humidity in the crawlspace. Similarly, I have seen beautiful tile jobs ruined because the installer didn’t check the stiffness of the floor. You can buy the most expensive sealant in the world, but if your shower floor is moving more than a fraction of an inch, that seal is going to break. You need to stabilize the environment before you can expect a permanent seal. This is why I always check for movement before I even reach for my scraper.
The 1/8 inch that ruins everything
The width of your bead matters more than you think. A bead that is too thin will lack the elasticity to handle structural shifts. A bead that is too thick will become a dirt magnet and will be prone to tearing. You are looking for that perfect 1/8 inch to 1/4 inch interface. Anything else is a gamble. When removing the old stuff, you need to clear a path that allows for this ideal thickness. People often ask me about the difference between grout and silicone in these areas. Grout is rigid. It is a cementitious product that has zero flexibility. Corners are change-of-plane joints. By definition, they move. If you see grout in your shower corners, that is your first problem. You need to dig that grout out completely before you apply silicone. Silicone needs a clean, deep channel to sit in. It is not just a surface treatment. It needs to penetrate the gap slightly to create a plug that resists water pressure.
Technical Comparison of Sealant Removal Methods
| Method | Effectiveness | Risk of Damage | Time Investment |
|---|---|---|---|
| Mechanical Scrapping | High | High | Moderate |
| Chemical Dissolvers | Moderate | Low | High (Wait time) |
| Heat Application | High | Moderate | Low |
| Abrasive Scrubbing | Low | Very High | Very High |
The chemistry of softening the bond
Silicone is resistant to most common cleaners. You cannot just spray it with bleach and expect it to loosen. You need a specific solvent that can penetrate the polymer matrix. Mineral spirits can work on some older formulations, but professional-grade silicone removers use a blend of chemicals that actually swell the silicone and break its grip on the tile. I prefer to apply a thick layer of softener and let it sit for at least four hours. This turns the hardened plastic back into a jelly-like substance. Once it is softened, the mechanical removal becomes much easier. It is like sanding a floor. You start with the heavy grit to get the bulk off, and then you move to the finer steps. If you try to skip the softening phase, you will end up gouging your tiles or your tub. I have seen guys use screwdrivers and steak knives. That is a recipe for a renovation disaster. Use the chemistry to your advantage.
“The installation of a waterproof membrane is not a substitute for proper slope to drain or structural integrity.” – TCNA Handbook
The definitive removal checklist
- Inspect the corner for structural movement or loose tiles.
- Apply a dedicated silicone softening agent to the entire bead.
- Wait for the chemical to react according to the manufacturer specifications.
- Use a plastic scraper to remove the bulk of the softened material.
- Switch to a fresh utility blade at a 15-degree angle for the stubborn remnants.
- Vacuum out the expansion gap to remove all dry debris and dust.
- Scrub the area with denatured alcohol to remove any oily residues.
- Verify that no silicone film remains by wiping with a dark microfiber cloth.
- Ensure the area is bone dry before attempting to apply any new sealant.
- Test the stability of the joint by applying pressure to the adjacent surfaces.
[{“@context”:”https://schema.org”,”@type”:”HowTo”,”name”:”How to Remove Old Silicone from Shower Corners”,”step”:[{“@type”:”HowToStep”,”text”:”Apply a silicone softener to the old bead and wait for it to emulsify the polymer.”},{“@type”:”HowToStep”,”text”:”Scrape away the bulk material using a non-marring plastic tool.”},{“@type”:”HowToStep”,”text”:”Clean the remaining residue with a sharp blade and denatured alcohol to ensure a clean substrate.”}]}]