
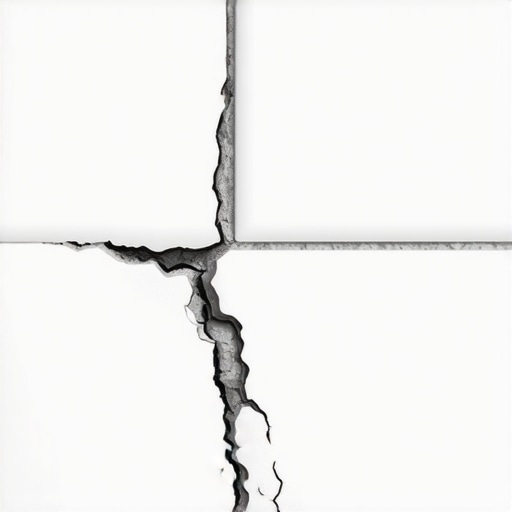
I spent three days grinding concrete on a job last month just so the floor wouldn’t click like a castanet. Most guys skip the leveling compound. They think the underlayment will hide the dip. It won’t. I walked into this particular bathroom where the owner complained of a crunchy sound every time they stepped near the drain. After pulling three tiles, I found a 1/4 inch void where the plumber had hacked out the subfloor to fit the P-trap. No support. No blocking. Just tile floating on a prayer. This is the reality of modern residential construction. Everyone wants the aesthetic of a five-star spa, but nobody wants to pay for the structural integrity required to hold up 80 gallons of water and a 200-pound human without moving a millimeter.
The structural lie under your tile
Grout cracks because of movement in the substrate. When you step into a bathtub or onto a tiled shower floor, you are applying point-load pressure to a rigid system. If the subfloor, the joists, or the wall studs flex even a fraction of an inch, the grout, which is essentially a brittle cementitious bridge, must either compress or stretch. Since grout has almost zero tensile strength, it fractures. This is not a failure of the grout itself, but a failure of the engineering beneath it. Most builders aim for the bare minimum code, which is L over 360 deflection. In my world, that is a recipe for a callback. A floor that feels solid to a walking person can still be a trampoline for a tile installation. You have to understand that tile and grout are part of a system. If one part of that system moves while the other stays rigid, the weakest link breaks. That link is always the grout line.
The physics of a flexing tub
A bathtub that is not properly shimmed or supported by a ledger board will sink under the weight of water. Fiberglass and acrylic tubs are notorious for this. They are lightweight and easy to install, but they are flexible. When you fill that tub, the bottom expands and the rim drops. If your tile is installed tight against the tub rim and grouted in, that grout will turn to powder within weeks. I have seen 1/4 inch gaps open up because the installer forgot to install a 2×4 stringer along the back wall to catch the flange of the tub. This is basic carpentry that gets skipped in the rush to finish a project. The tub must be rock solid. I often tell people to fill the tub with water before they grout or caulk the transition. This simulates the maximum load and ensures that the joint is at its widest point during the application. If you grout a dry, empty tub, the first time you take a bath, you are snapping every bond you just created.
“A floor is only as good as the subfloor beneath it; deflection is the enemy of every joint.” – Master Flooring Axiom
Why your subfloor is lying to you
Standard OSB or plywood subfloors often lack the stiffness required for a permanent grout bond. If you have 16 inch on-center joists, a single layer of 3/4 inch subfloor is technically enough by code, but it is not enough for a high-traffic shower. I always look for the bounce. If I can stand in the middle of the room and make the water in a glass ripple by shifting my weight, the tile is going to fail. You need a secondary layer of underlayment or a cement backer board that is properly thin-setted to the subfloor. A lot of guys just screw the backer board down dry. That is a mistake. Without a layer of thin-set between the plywood and the backer board, you leave microscopic air pockets. Those pockets allow the board to vibrate. That vibration is what kills the bond between the tile and the grout. It is a chain reaction of physics that starts at the joist and ends with a crack in your shower floor.
The 1/8 inch that ruins everything
Expansion joints are the most misunderstood part of any flooring or tile installation. Every change of plane, such as where the floor meets the wall or where two different walls meet in a corner, must be a movement joint. You cannot put rigid grout in these corners. It will crack every single time because the walls and the floor move independently of each other. This is called differential movement. You must use a 100 percent silicone sealant that matches the color of your grout. Silicone is flexible and can handle the expansion and contraction caused by temperature changes and house settling. I see guys cramming grout into corners and then wondering why it falls out in chunks six months later. It is because the house is breathing and the grout is choking it. You have to give the materials room to exist without fighting each other.
| Material Type | Standard Thickness | Deflection Rating | Moisture Resistance |
|---|---|---|---|
| Plywood (CDX) | 3/4 Inch | L/360 | Moderate |
| OSB (Subfloor) | 23/32 Inch | L/360 | Low |
| Cement Board | 1/2 Inch | N/A (Rigid) | High |
| Uncoupling Membrane | 1/8 Inch | High (Lateral) | High |
Chemistry of the bond
The water to powder ratio in your grout mix determines the final crystalline structure of the joint. If an installer adds too much water to make the grout easier to spread, they are essentially drowning the cement. As the excess water evaporates, it leaves behind a honeycomb of air voids. This results in a soft, chalky grout that has no structural integrity. It might look good for the first week, but once it fully cures, it is weak. I always mix my grout to the consistency of peanut butter, let it slake for ten minutes, and then remix it. This slaking process allows the polymers to fully hydrate. If you skip the slake, you are working with an unfinished chemical reaction. This is the same reason why hardwood floors fail when they are not acclimated. Wood is a living material that reacts to humidity. If you install 3/4 inch solid oak that has been sitting in a humid garage into a dry, air-conditioned house, those planks will shrink. The same principle applies to the moisture levels in your thin-set and grout. You are managing the evaporation of water to create a stone-like bond.
The ghost in the expansion gap
Ignoring the perimeter expansion gap is the fastest way to buckle a floor. Whether it is tile, laminate, or hardwood floors, every surface needs a place to go when it expands. For tile, this means the gap between the last row of tile and the wall. For laminate or hardwood floors, this gap is even more significant. I have seen laminate floors pop up in the middle of a room like a tent because the installer pushed the planks tight against the baseboards. The floor had no room to grow as the humidity rose, so it lifted. In a shower, if your tile is jammed against the studs, any movement in the house frame will put direct pressure on the tile field. This pressure translates into cracked grout lines in the center of the floor. It is a hidden stress that most people never think to check until the damage is already done. You need a minimum of 1/4 inch at the perimeter, always.
- Check the subfloor for any vertical movement or bounce before starting.
- Install blocking between joists if the span is too long for the material.
- Always use a modified thin-set with high polymer content for better adhesion.
- Ensure the tub is sitting on a bed of mortar or a dedicated support frame.
- Never grout corners or changes of plane; use 100 percent silicone instead.
- Verify that the moisture content of the subfloor is within the acceptable range.
“The installation of tile requires a substrate that is essentially rigid; movement is the precursor to failure.” – TCNA Handbook Principles
Hardwood and laminate moisture issues
While we are talking about showers, we cannot ignore how humidity affects the rest of the home. The steam from a shower can migrate through walls if there is no proper vapor barrier. This moisture then attacks the hardwood floors or laminate in the adjacent hallway. I have seen beautiful white oak floors start to cup outside a bathroom because the homeowner didn’t run the exhaust fan. The bottom of the wood stays dry while the top absorbs the steam, causing the edges to lift. Laminate is even worse because the core is often made of high-density fiberboard, which acts like a sponge. Once that core swells, the clicking mechanism is destroyed. You can’t fix it. You have to replace it. This is why I am so obsessed with moisture meters. If you don’t know the numbers, you are just guessing. And in the flooring world, a guess is a liability that usually costs a few thousand dollars to fix.
Final assessment of shower stability
Getting a shower to stay crack-free for twenty years requires a commitment to the boring stuff. It is about the screws, the thin-set, the joist spacing, and the chemistry of the grout. If you focus only on the color of the tile, you are building a beautiful house on a foundation of sand. You have to be a mechanic first and an artist second. The next time you step into your tub and hear a tiny crunch, know that it is the sound of physics winning a battle against a lazy installation. Fix the structure, and the grout will take care of itself. Stop looking for a magic grout that won’t crack and start looking for a subfloor that won’t move. That is the only real solution in this industry. If you want a floor that lasts, you have to build it from the joists up, not the tile down.