
Most guys skip the leveling compound. They think the underlayment will hide the dip. It won’t. I spent three days grinding concrete on a job last month just so the floor wouldn’t click like a castanet. That experience taught me one thing. The surface is only as honest as the structure beneath it. When you drop a heavy cast iron skillet or a pipe wrench on a ceramic floor, the resulting crater is more than just an eyesore. It is a structural breach in a vitreous shield. Most homeowners think they have to rip the whole tile out, risking the integrity of the surrounding grout and the waterproof membrane or the radiant heating wires hidden in the thin-set. They are wrong. You can patch it, but you have to understand the chemistry of the bond. If you treat it like a simple craft project, the patch will pop out the first time someone walks over it in heavy boots. We are talking about molecular adhesion, color matching at the pigment level, and the physics of compressive strength.
The microscopic anatomy of a ceramic fracture
Ceramic tile repair requires a deep understanding of the material density and the surface tension of the glaze. A ceramic tile is a composite of clay, minerals, and water fired at temperatures exceeding two thousand degrees. This process creates a brittle, glass-like surface over a porous biscuit. When a hole appears, you are looking at the exposed, thirsty interior of the tile. You cannot just slap some wood filler or basic caulk in there. Those materials shrink as they dry. They lack the shore hardness to handle the PSI of a kitchen chair leg. To fix this, you need a two-part epoxy resin system that mimics the hardness of the tile itself. We use resins because they undergo a chemical reaction rather than a simple evaporation process. This means zero shrinkage. The bond happens at the edge of the fracture where the resin bites into the microscopic pores of the fired clay. If you do not clean that hole with denatured alcohol first, the residual oils and dust will prevent the resin from ever truly anchoring. It will just sit there like a loose tooth.
“A floor is only as good as the subfloor beneath it; deflection is the enemy of every joint.” – Master Flooring Axiom
Why most DIY tile patches fail in a week
The primary reason tile patches fail is the lack of proper surface preparation and the use of air-dry fillers. Air-dry fillers depend on the evaporation of water or solvents to harden. As that volume leaves the material, the patch pulls away from the edges of the hole. This creates a microscopic gap. Moisture from your mop or a spilled drink gets in there. It travels down to the subfloor. If you have hardwood floors nearby or laminate in the next room, that moisture migration can cause swelling and buckling far from the original site of the damage. A proper patch must be an island of waterproof stability. You need a polyester or epoxy resin. These materials are exothermic. They generate their own heat to cure. This creates a plug that is chemically fused to the tile walls. I have seen guys try to use grout to fill a hole. Grout is for joints. Grout is porous. If you put grout in a hole in the middle of a tile, it will crack and turn to dust within a month. It has no structural binder to hold it against a smooth surface.
The chemistry of the two part epoxy resin
Epoxy resins provide the necessary compressive strength and chemical resistance to survive the high traffic areas of a home. We are looking at a polymer formed from two distinct components: a resin and a hardener. When mixed, they create a cross-link of molecules that is incredibly difficult to break. For a tile repair, the viscosity of the resin matters. If it is too thin, it runs out of the hole. If it is too thick, you get air bubbles trapped at the bottom of the crater. These bubbles are weak points. When you step on the patch, the air pocket collapses. The surface of your repair then fails. You want the consistency of thick honey. This allows the material to self-level slightly while still clinging to the vertical walls of the chip. You also have to account for the Mohs scale of hardness. Ceramic tile usually sits around a seven. Most cheap fillers are a three. You need a high-quality resin that can withstand the friction of grit and sand dragged across the floor by your shoes.
| Material Type | Adhesion Strength | Shrinkage Rate | Curing Time |
|---|---|---|---|
| Standard Grout | Low | High | 24 Hours |
| Acrylic Filler | Medium | Moderate | 4 Hours |
| Two-Part Epoxy | Very High | None | 20 Minutes |
| Polyester Resin | High | Low | 30 Minutes |
Color theory for the grease monkey
Matching the color of a tile patch requires an understanding of primary pigments and the reflective properties of the glaze. You are not just matching a color; you are matching a depth. Tile glazes are often translucent. If you use a solid, opaque paint, the patch will look like a piece of gum stuck to the floor. I start with a neutral base that matches the lightest tone in the tile. Then I add earth-tone pigments: burnt umber, yellow ochre, or carbon black. You have to mix these in tiny amounts. A drop of black can ruin a whole batch of cream-colored resin. I always test the color by dabbing a bit on a scrap piece of wood and letting it dry. Resins often darken as they cure. If you are dealing with a marbled tile, you have to do a secondary coat. This involves a clear resin over your colored base to simulate the depth of the glaze. It is tedious. It is frustrating. But it is the only way to make the repair disappear into the floor.
“Failure in ceramic installation usually traces back to an installer who ignored the moisture content of the slab.” – TCNA Technical Bulletin
The surgical steps for a permanent repair
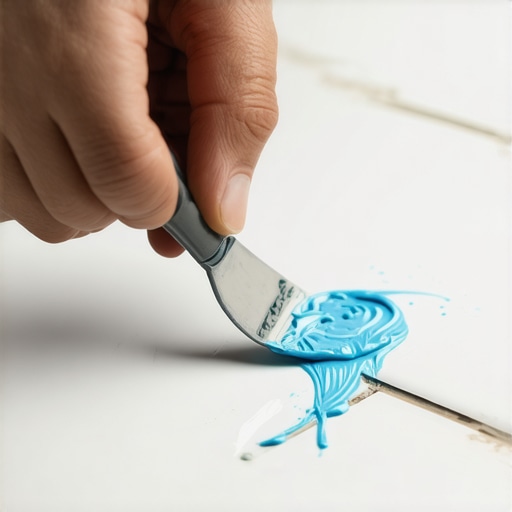
The process begins with a mechanical cleaning of the hole using a diamond burr or a high-speed rotary tool. You need to remove any loose debris and create a clean, jagged surface for the resin to grip. I use a vacuum to suck out every speck of dust. Then I wipe it down with a lint-free cloth soaked in 99 percent isopropyl alcohol. Do not use the stuff from the drug store that is 30 percent water. You need the pure stuff. Once the hole is dry, I mask off the surrounding tile with high-quality painter’s tape. This prevents the resin from getting on the good glaze. I mix my epoxy on a non-porous surface, like a scrap piece of glass. I apply it with a small metal spatula, overfilling the hole slightly. The resin will settle. After twenty minutes, when the resin is in its “gel” state, I use a fresh razor blade to shave the excess flush with the tile surface. You have to do this at a low angle. If you wait until it is fully hard, you will have to sand it, and sanding will scratch the surrounding glaze.
- Clear the crater of all loose ceramic shards and dust.
- Degrease the area using pure isopropyl or denatured alcohol.
- Select a resin base that matches the sheen of the tile (matte or gloss).
- Mix pigments slowly to reach a 95 percent color match.
- Overfill the void to account for slight settling.
- Level the repair with a sharp razor blade during the gel phase.
- Buff the area with a micro-fiber cloth once fully cured.
The 1/8 inch that ruins everything
A patch is only successful if the tile itself is not tenting or delaminating from the thin-set. Before you even think about patching, you need to perform a sound test. Tap the tile with a plastic mallet. If it sounds hollow, the patch is a waste of time. A hollow sound means the bond between the tile and the subfloor has failed. This usually happens because of a lack of mortar coverage or because the installer didn’t use a large enough notch trowel. If the tile is moving even a fraction of a millimeter when you step on it, any patch you apply will crack immediately. The movement creates shear stress. No resin can withstand constant vibration and movement if the foundation is gone. In these cases, you are better off injecting a low-viscosity adhesive through a small hole in the grout line to stabilize the tile before you repair the surface chip. This is the difference between a handyman fix and an architectural repair. We don’t just cover the problem; we solve the physics behind it.