
I’ve spent over twenty-five years on my knees with a moisture meter and a level, smelling of oak dust and floor wax, and I’ve seen every mistake in the book. Most guys skip the leveling compound. They think the underlayment will hide the dip. It won’t. I spent three days grinding concrete on a job last month just so the floor wouldn’t click like a castanet, and the same lack of attention to detail ruins penny tile installations. When you look at a penny tile floor, you aren’t just looking at a design choice, you are looking at a structural grid where the grout makes up nearly twenty-five percent of the surface area. This is a massive engineering challenge for anyone trying to maintain a clean environment. If you treat this like a standard large-format tile floor, you will fail. The sheer volume of grout lines creates a friction-heavy environment that traps every bit of debris, skin cell, and soap scum that hits the surface. I’ve walked into bathrooms where a five thousand dollar tile job looked like a moldy swamp because the homeowner used the wrong pH-balanced cleaner or, worse, ignored the sealing process entirely.
The math of the tiny tile
Penny tiles require a specific cleaning approach because their high grout-to-tile ratio creates more surface area for absorption. To clean these grids effectively, you must understand that the grout acts as a structural bond and a microscopic sponge. Unlike larger tiles, penny tiles have a circular geometry that leaves deep valleys at every intersection. These valleys are the primary collection points for contaminants. In a standard bathroom shower, the moisture levels stay high, and the grout never truly dries out if the ventilation is poor. This leads to the growth of biofilm. When we talk about cleaning these lines, we are talking about managing the capillary action of Portland cement. If you use a heavy-handed approach with too much water, you are simply pushing the dirt deeper into the pores of the cement. You need a method that suspends the dirt and then extracts it, rather than just moving it around with a mop. I always tell my clients that a floor is a performance surface. If the performance of the grout fails, the integrity of the subfloor is at risk. Moisture migration through cracked or porous grout can eventually rot the plywood subfloor or cause efflorescence on a concrete slab. This is why the chemistry of your cleaner is just as important as the brush you choose.
“A floor is only as good as the subfloor beneath it; deflection is the enemy of every joint.” – Master Flooring Axiom
Chemical warfare in your shower
The chemical composition of your grout cleaner must be alkaline or neutral to avoid dissolving the cementitious bonds. Most people reach for vinegar because they think it is a natural miracle, but vinegar is an acid. Acid eats the lime in the grout. Over time, this makes the grout lines brittle and sandy. Once the grout starts to shed, you have lost the battle. You need an alkaline cleaner that can break down the fats found in soap scum and body oils. These oils are the glue that holds the dirt in place. In my years of fixing failed showers, I have seen grout that turned to mush because the homeowner used a harsh acidic cleaner every week for a year. It looked clean for the first month, then it started to pit, and then the tiles began to pop off. If you have penny tiles installed over a waterproof membrane like Schluter-Kerdi, you are safer from subfloor rot, but the grout still needs to stay intact to prevent water from pooling under the tiles. If you have hardwood floors or laminate in the hallway outside that shower, a failure in the grout can lead to moisture wicking through the floor joists and cupping your expensive oak planks three rooms away. I once saw a walnut floor ruined because a shower pan leaked for six months without the owner knowing. The grout looked fine to the naked eye, but it was porous enough to let a gallon of water a day seep through.
The anatomy of a clean grout line
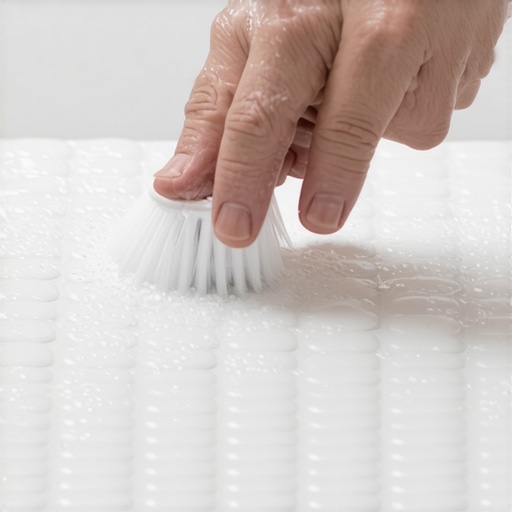
Cleaning grout between penny tiles requires a low-moisture agitation technique followed by immediate extraction with a dry microfiber cloth. You cannot flood a penny tile floor with water. The circular edges of the tiles create a convex surface that directs water straight into the grout channels. If you saturate the floor, you are saturating the subfloor. Instead, apply your cleaner with a spray bottle to control the volume. Let it sit for ten minutes. This is called dwell time. It allows the chemistry to work so your muscles don’t have to. During this time, the cleaner is emulsifying the oils. After the dwell time, use a stiff nylon brush. Never use brass or steel brushes on penny tiles, especially if they are glass or glazed ceramic. You will scratch the finish and create even more microscopic hiding spots for dirt. Scrub in a circular motion to match the tile’s shape. This ensures you are hitting every angle of the grout line. Once you have agitated the dirt, don’t just let it dry. You must wipe it up with a clean, dry cloth. If you let the dirty water dry on the floor, the dirt simply settles back into the pores of the grout. It’s a cycle of futility that most people repeat until their floor looks gray and dingy.
Tools that work and tools that destroy
The best tools for penny tile maintenance are nylon grout brushes, steam cleaners with microfiber pads, and wet-dry vacuums for extraction. Many people buy those cheap plastic scrubbers from the grocery store, but they aren’t stiff enough to reach the bottom of the grout valley. You need a brush with tapered bristles that can get deep into the recessed areas. Steam is a great option, but you have to be careful. While most people want the thickest underlayment, too much cushion actually causes the locking mechanisms on LVP to snap under pressure, and similarly, too much heat and pressure from a steam cleaner can actually blow the pigment out of your grout or melt the sealer right off the surface. If you use steam, keep it moving. Don’t linger on one spot. The goal of steam is to use heat to break the bond of the grease, not to cook the grout. After steaming, a wet-dry vacuum is the secret weapon. It pulls the dirty liquid out of the grout pores better than any towel ever could. This is the professional way to ensure the floor is actually clean and not just wet. If you are dealing with a large area of penny tiles, like a full wet room, investing in a small orbital scrubber can save your back and your knees. Just make sure the pads are soft enough for the tile material.
| Grout Type | Porosity Level | Cleaning Difficulty | Recommended Cleaner |
|---|---|---|---|
| Sanded Grout | High | Hard | Alkaline Degreaser |
| Unsanded Grout | Medium | Moderate | pH Neutral Soap |
| Epoxy Grout | Near Zero | Easy | Steam and Neutral Cleaner |
| Urethane Grout | Low | Easy | Enzymatic Cleaner |
The lie of the universal cleaner
There is no such thing as a universal cleaner that works for both penny tile grout and surrounding hardwood or laminate surfaces. I see this all the time. People use their floor steamer on their bathroom tile and then take it right onto their laminate floors. That is a death sentence for laminate. Laminate is essentially a photograph glued to a wood-chip core. Steam will blow those seams wide open. Even on hardwood floors, excess moisture from tile cleaning can cause the wood to expand and cup. When you are cleaning your penny tiles, you must isolate the area. Use painters tape or towels to create a barrier at the threshold. If you are using a heavy-duty alkaline cleaner on your grout, and it splashes onto your site-finished oak floors, it will eat through the polyurethane finish and leave a permanent spot. You have to be surgical. Most homeowners treat floor cleaning like they are washing a car, throwing buckets of water everywhere. You need to treat it like you are cleaning a watch. It is about precision, chemistry, and controlled moisture. If you don’t respect the boundaries between different flooring materials, you will end up calling a guy like me to replace the whole transition area.
“Grout is a porous cementitious product that requires specific pH maintenance to retain its structural integrity.” – TCNA Maintenance Manual
Protecting the structural integrity of the base
Sealing the grout is the final and most vital step in maintaining the cleanliness of penny tiles over a long period. If you don’t seal your grout, you are leaving the door wide open for every drop of dirty water to move into the subfloor. A high-quality penetrating sealer sits below the surface and fills the microscopic voids in the cement. This creates tension that makes water bead up on top of the grout rather than soaking in. However, you cannot seal dirty grout. If you seal over dirt, you are locking that stain in forever. You must deep clean, let the floor dry for at least twenty-four hours to ensure no moisture is trapped in the thin-set, and then apply the sealer. For penny tiles, a spray-on sealer is often easier because of the thousands of tiny lines, but you must wipe the excess off the tile faces quickly. If the sealer dries on the glazed surface of the tile, it will leave a hazy film that is a nightmare to remove. I always tell people to test a small area first. Every tile reacts differently. A marble penny tile will absorb the sealer, while a glass penny tile will let it pool on the surface. Understanding the physics of your specific material is what separates a master installer from a weekend warrior.
- Check the grout for cracks or missing chunks before cleaning.
- Vacuum the floor thoroughly to remove loose grit that can act like sandpaper.
- Apply the alkaline cleaner and allow a ten-minute dwell time.
- Scrub the grout lines with a stiff-bristled nylon brush in circular motions.
- Extract the dirty solution using a wet-dry vac or microfiber towels.
- Rinse with a small amount of distilled water to remove chemical residue.
- Dry the floor completely with a fan to prevent moisture from sitting in the valleys.
- Re-apply a penetrating sealer every six to twelve months depending on use.
Final thoughts on the matter involve looking at the long-term health of your home. A clean floor is a dry floor. If you manage the moisture and the chemistry of your penny tiles, you won’t have to worry about the structural failures that plague so many modern homes. Don’t fall for the marketing of splashy cleaners. Stick to the basics of pH-neutral maintenance and mechanical agitation. Your subfloor and your knees will thank you. If you ever see the grout starting to powder or turn soft, stop cleaning and call a professional. At that point, you aren’t dealing with dirt, you are dealing with a chemical breakdown of the installation. Keep your transitions dry, keep your brushes stiff, and never, ever use vinegar on your cement. It is a simple set of rules that most people ignore at their own expense. I’ve spent my life fixing those mistakes. Do it right the first time and you won’t need to see my sawdust-covered face in your house anytime soon.